
In my very first blog post about pleating fabric, I have described how to pleat an accordion type of pleats. In this post, I will show you how to permanently hand pleat knife pleats – another common type of pleats. These, unlike the accordion pleats lie flat (see the images below).
In this blog post you will learn:
- What tools will you need to hand pleat knife pleats?
- How to create moulds for hand pleating knife pleats?
- How to hand pleat knife pleats at home?

What tools will you need to hand pleat knife pleats?
Most of the tools you will need to create knife pleats are the same as for accordion pleats (to learn more about the individual tools, click the links below):
- 2 pieces of A4 Kraft paper at least 200 gsm (grams per square meter) (opens in new tab)
- Long rulers (opens in new tab)
- Mechanical or classic pencil (opens in new tab)
- Quilting/omnigrid ruler (optional) (opens in new tab)
- Art knife (opens in new tab)
- Cutting mat (opens in new tab)
- Iron (opens in new tab)
- 100% polyester fabric (opens in new tab)
- Stabiliser
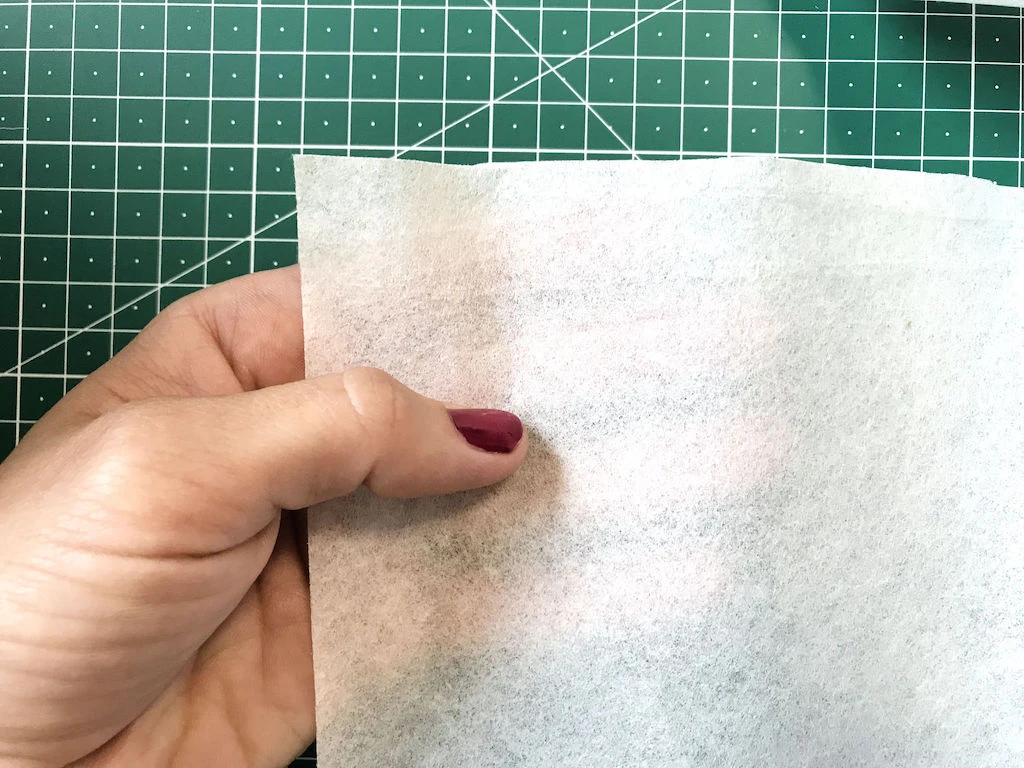
Stabiliser
To hold an accordion pleating mould together while applying heat, a cotton twill tape is used. To hold the shape of a knife pleating mould, you will need a fusible interfacing (55% rayon, 45% polyester).
How to create moulds for pleating knife pleats?
I strongly recommend creating a small pleated sample like the one shown here every time you are about to use a new fabric. Some fabrics are really tricky to fix in between the moulds, so it is extremely helpful to give your project a small scale try.
1. Draw lines on A4 sheets
Repeat the following process twice that is with two A4 kraft paper sheets as you need both for pleating one piece of fabric.
Draw lines 1,5 cm (0 5/8 inch) and 2 cm (0 3/4 inch) apart from each other on the long side of the paper as you can see in the scheme below. A quilting (omnigrid) ruler is an ideal tool for doing this. Place the ruler perpendicularly to the short side of the paper. On either side of the ruler create marks 1,5 cm (0 5/8 inch) and 2 cm (0 3/4 inch) apart from each other (see the scheme below).
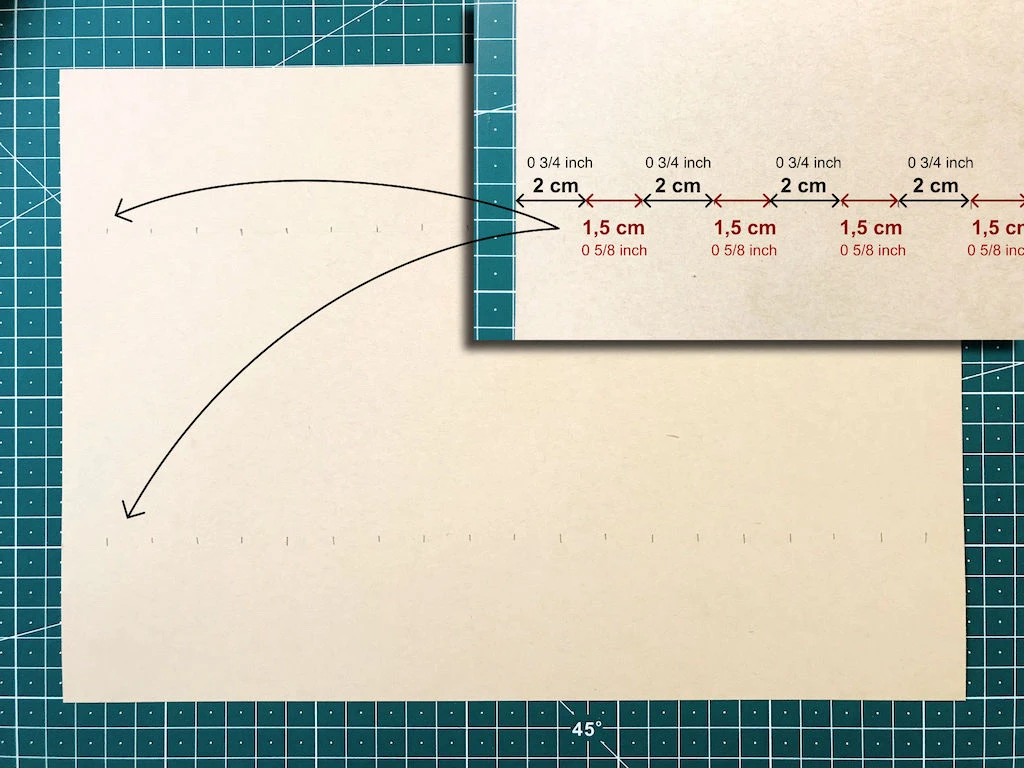
Work as accurately as possible. Make sure that the individual marks are exactly opposite to each other and connect them.
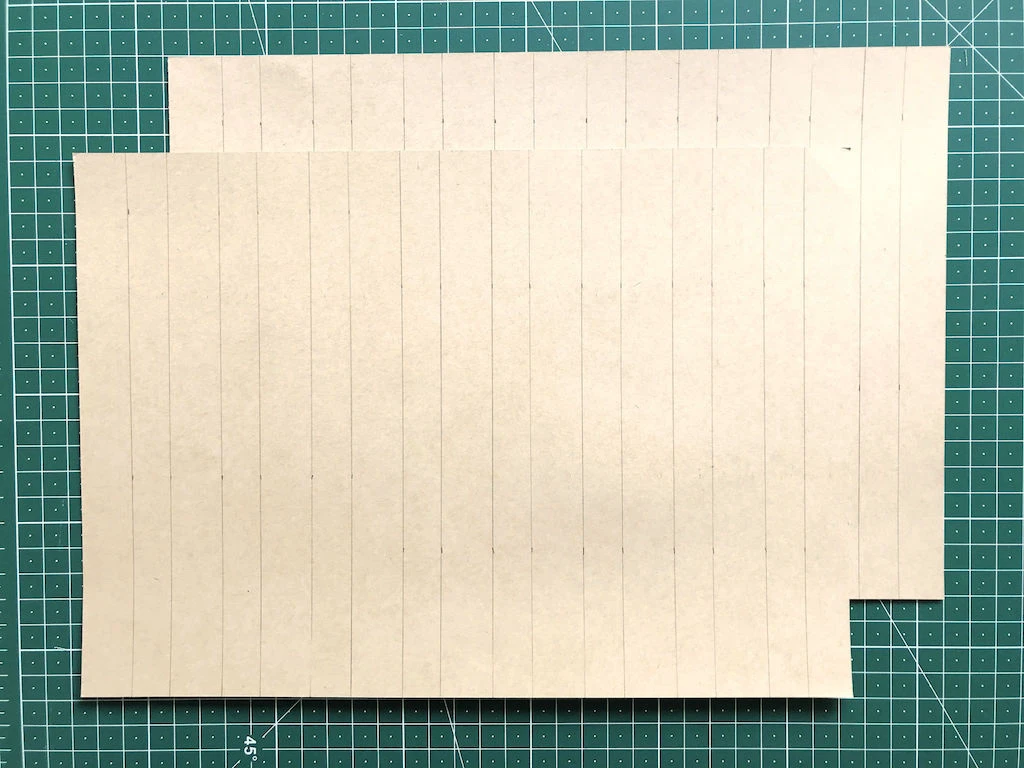
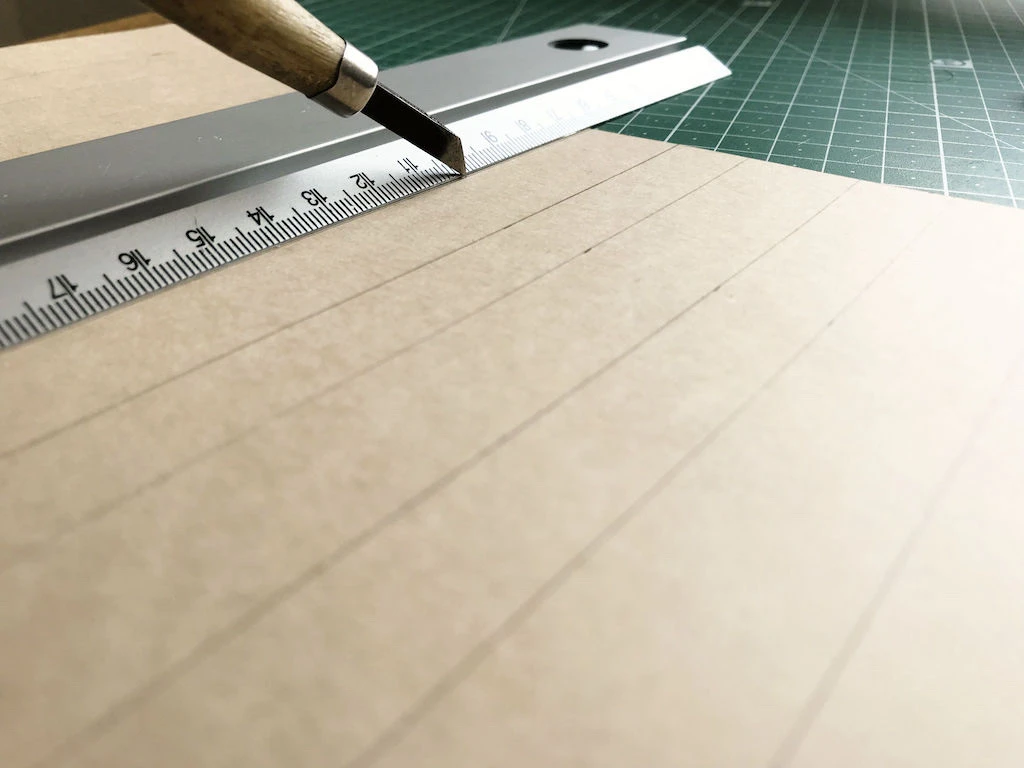
2. Press the drawn lines
The best method is to press the lines of the folds with the spine of an art knife (do not use its sharp edge). Do your best to work as precisely as possible, press the art knife exactly where you have drawn the lines.
Visible inaccuracies are not advised. If the pressed lines are not evenly spread, your moulds come out corrupt and will not fit together properly. As a result, pleating is hard and the result poor.
Press all the drawn lines on both sheets.
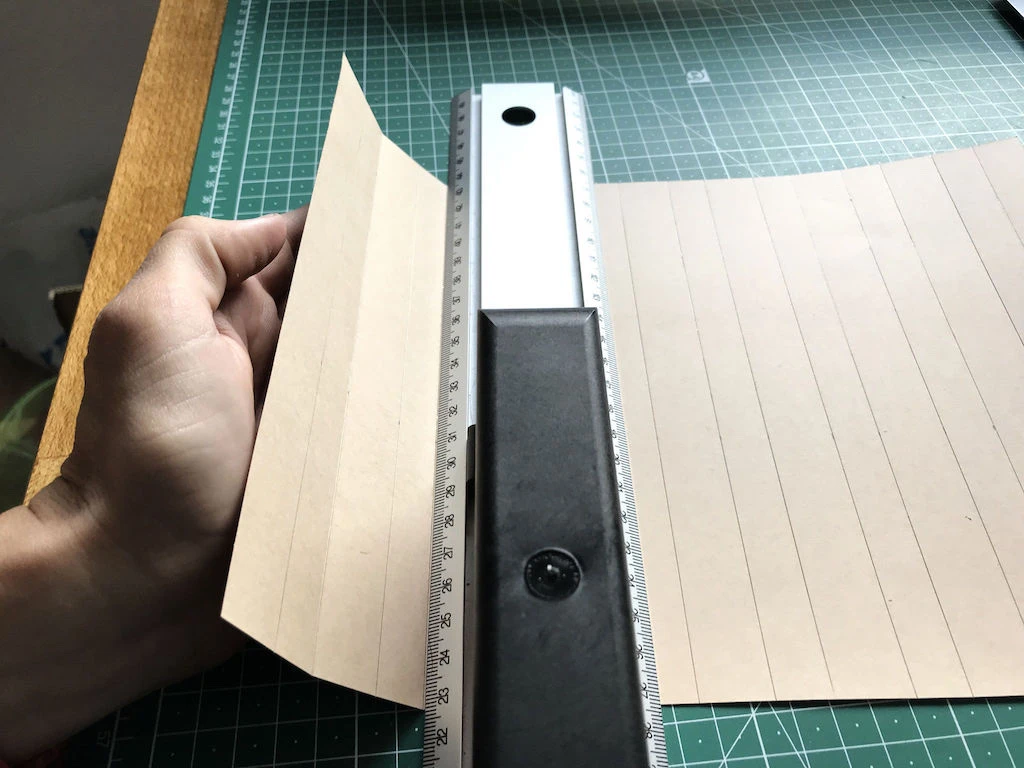
3. Fold the pre-pressed lines
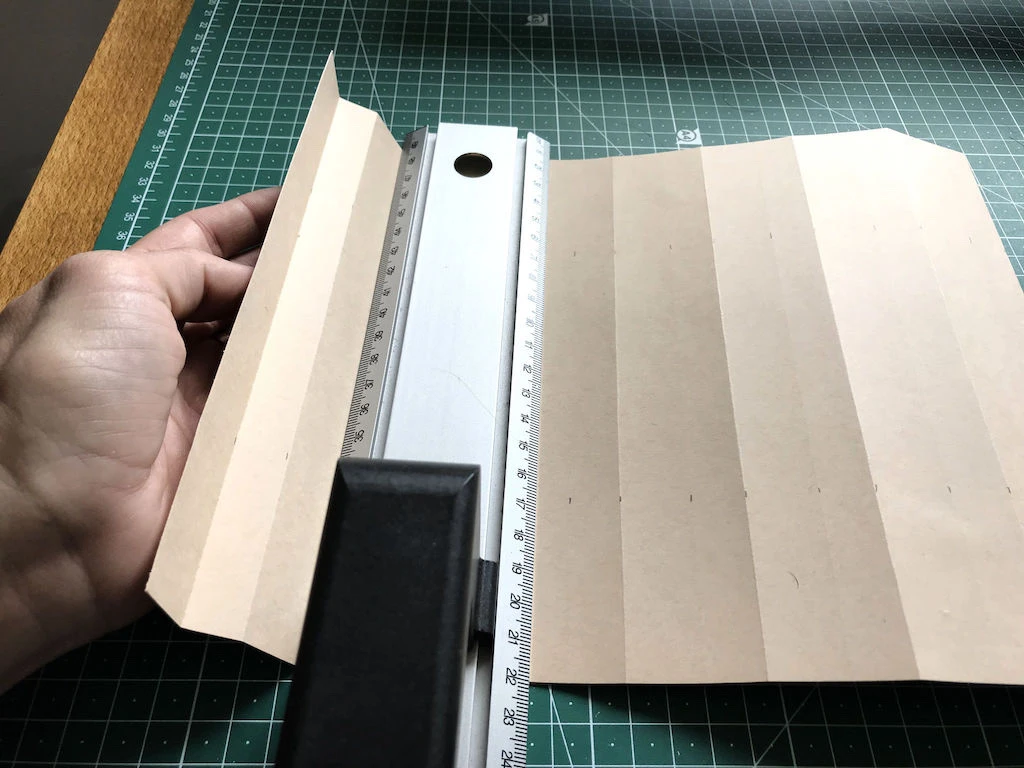
You begin by folding one half of the lines and then the second one. Put a ruler right next to the first line, slightly lift the kraft paper and push it against the ruler. Skip the second line and go to the third line. Repeat it – lift the paper on the left side slightly and push against the ruler. Do the same with the 5th, 7th lines and so on.
You will end up with a folded piece of paper like this:
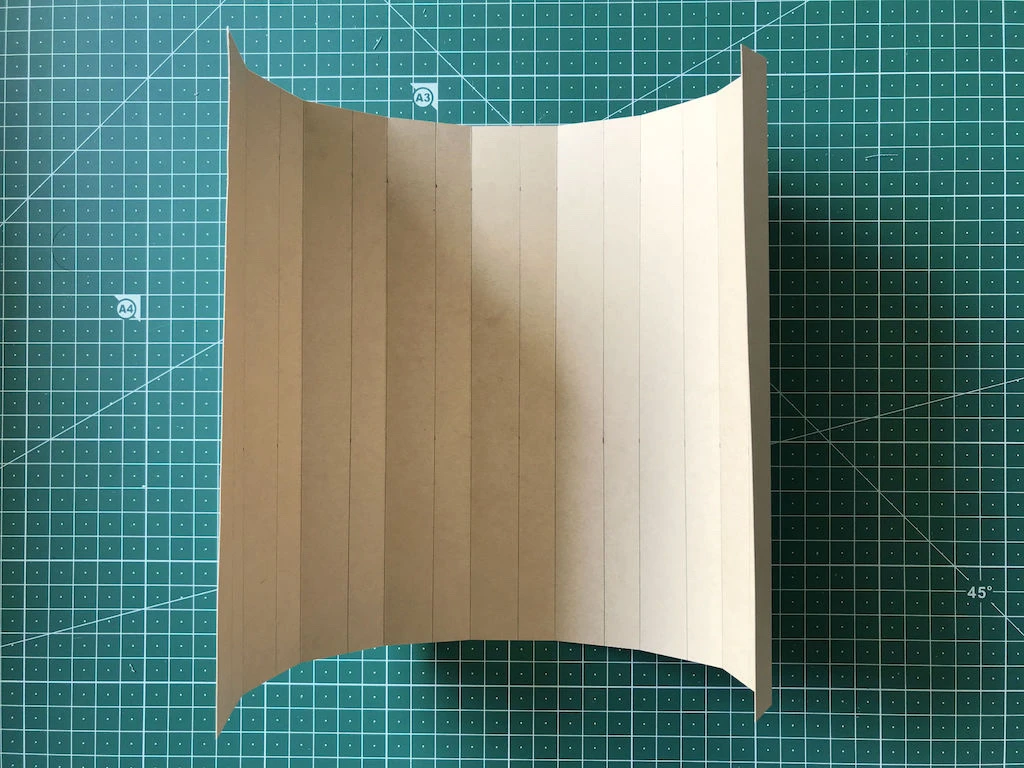
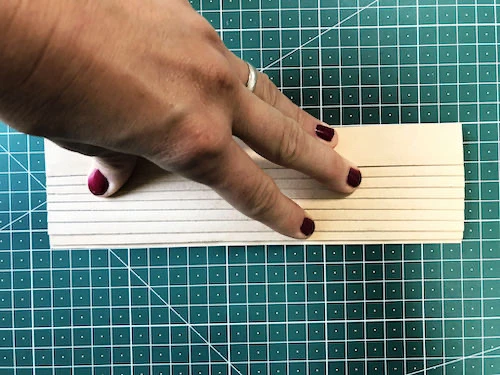
Turn the paper to the other side. The pre-pressed lines are visible. Fold every second line and your mould is almost ready (see the images below).

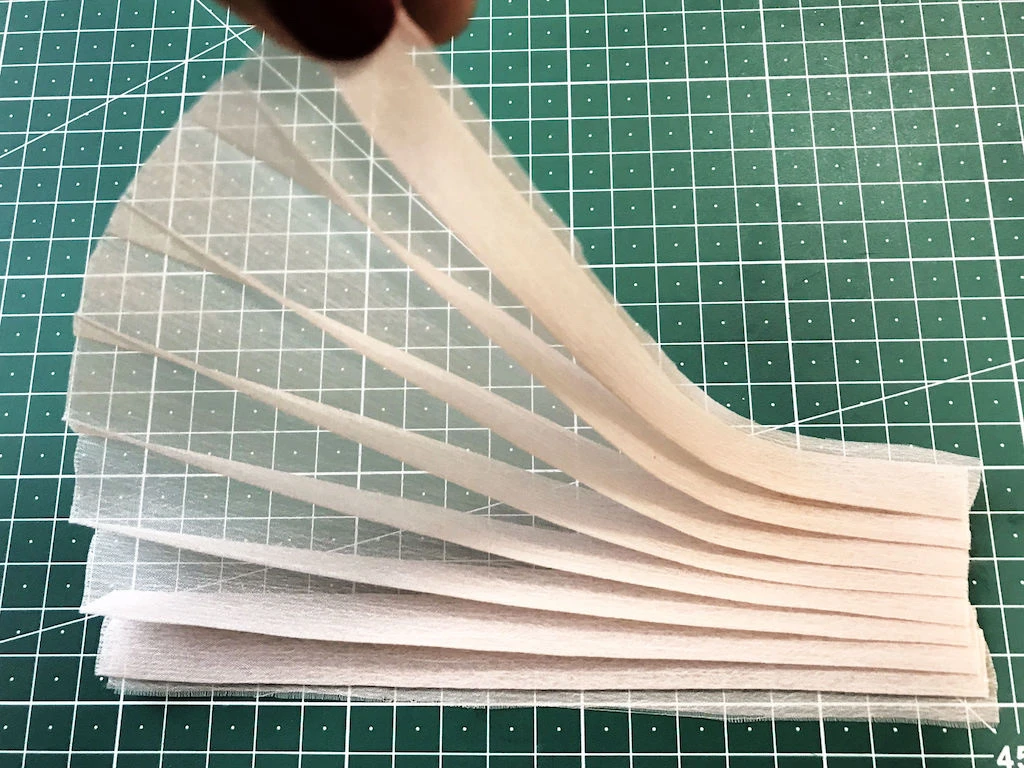
4. Create the final shape of the mould
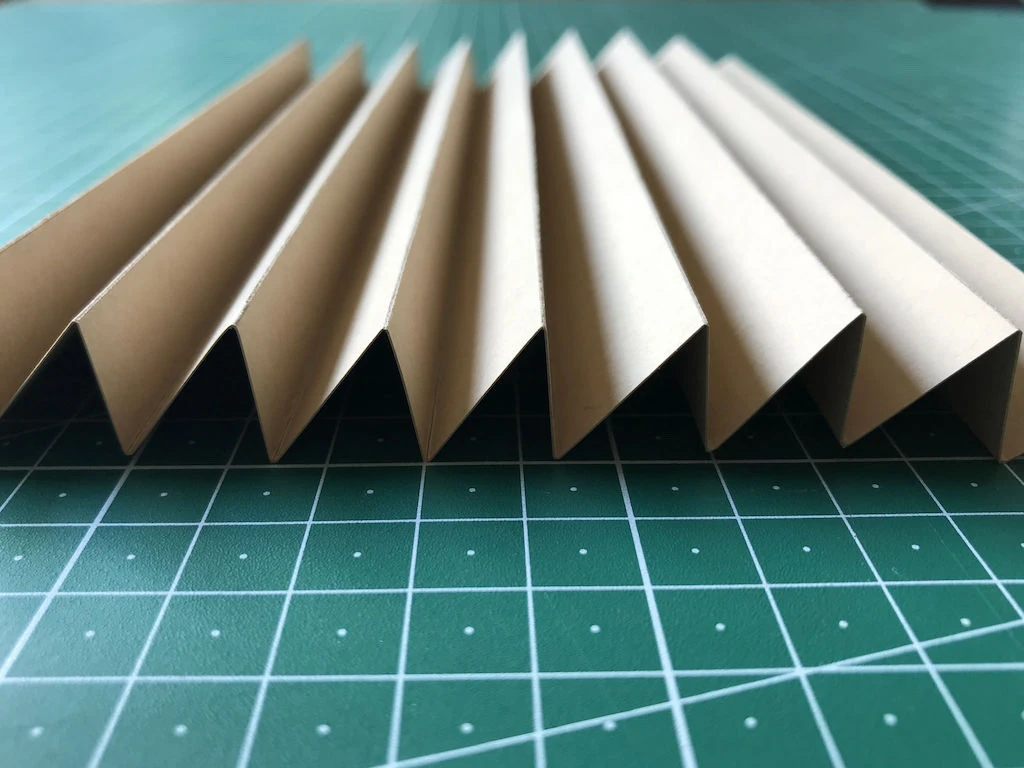
Gently push one end of the folded paper towards the other end and create an accordion. In this phase, the folded lines gain the intended shape (see the images below).
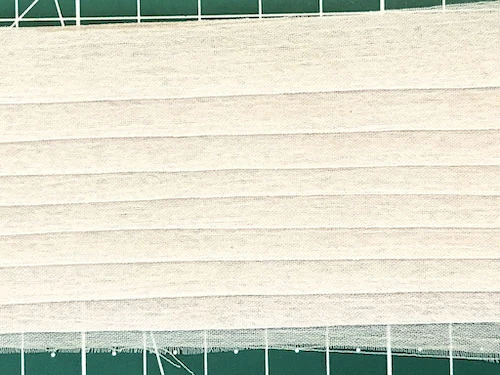
The result looks similar to an accordion pleating mould, however, when you push the paper from the top, the pleats will lay down and become flat (see the images below).
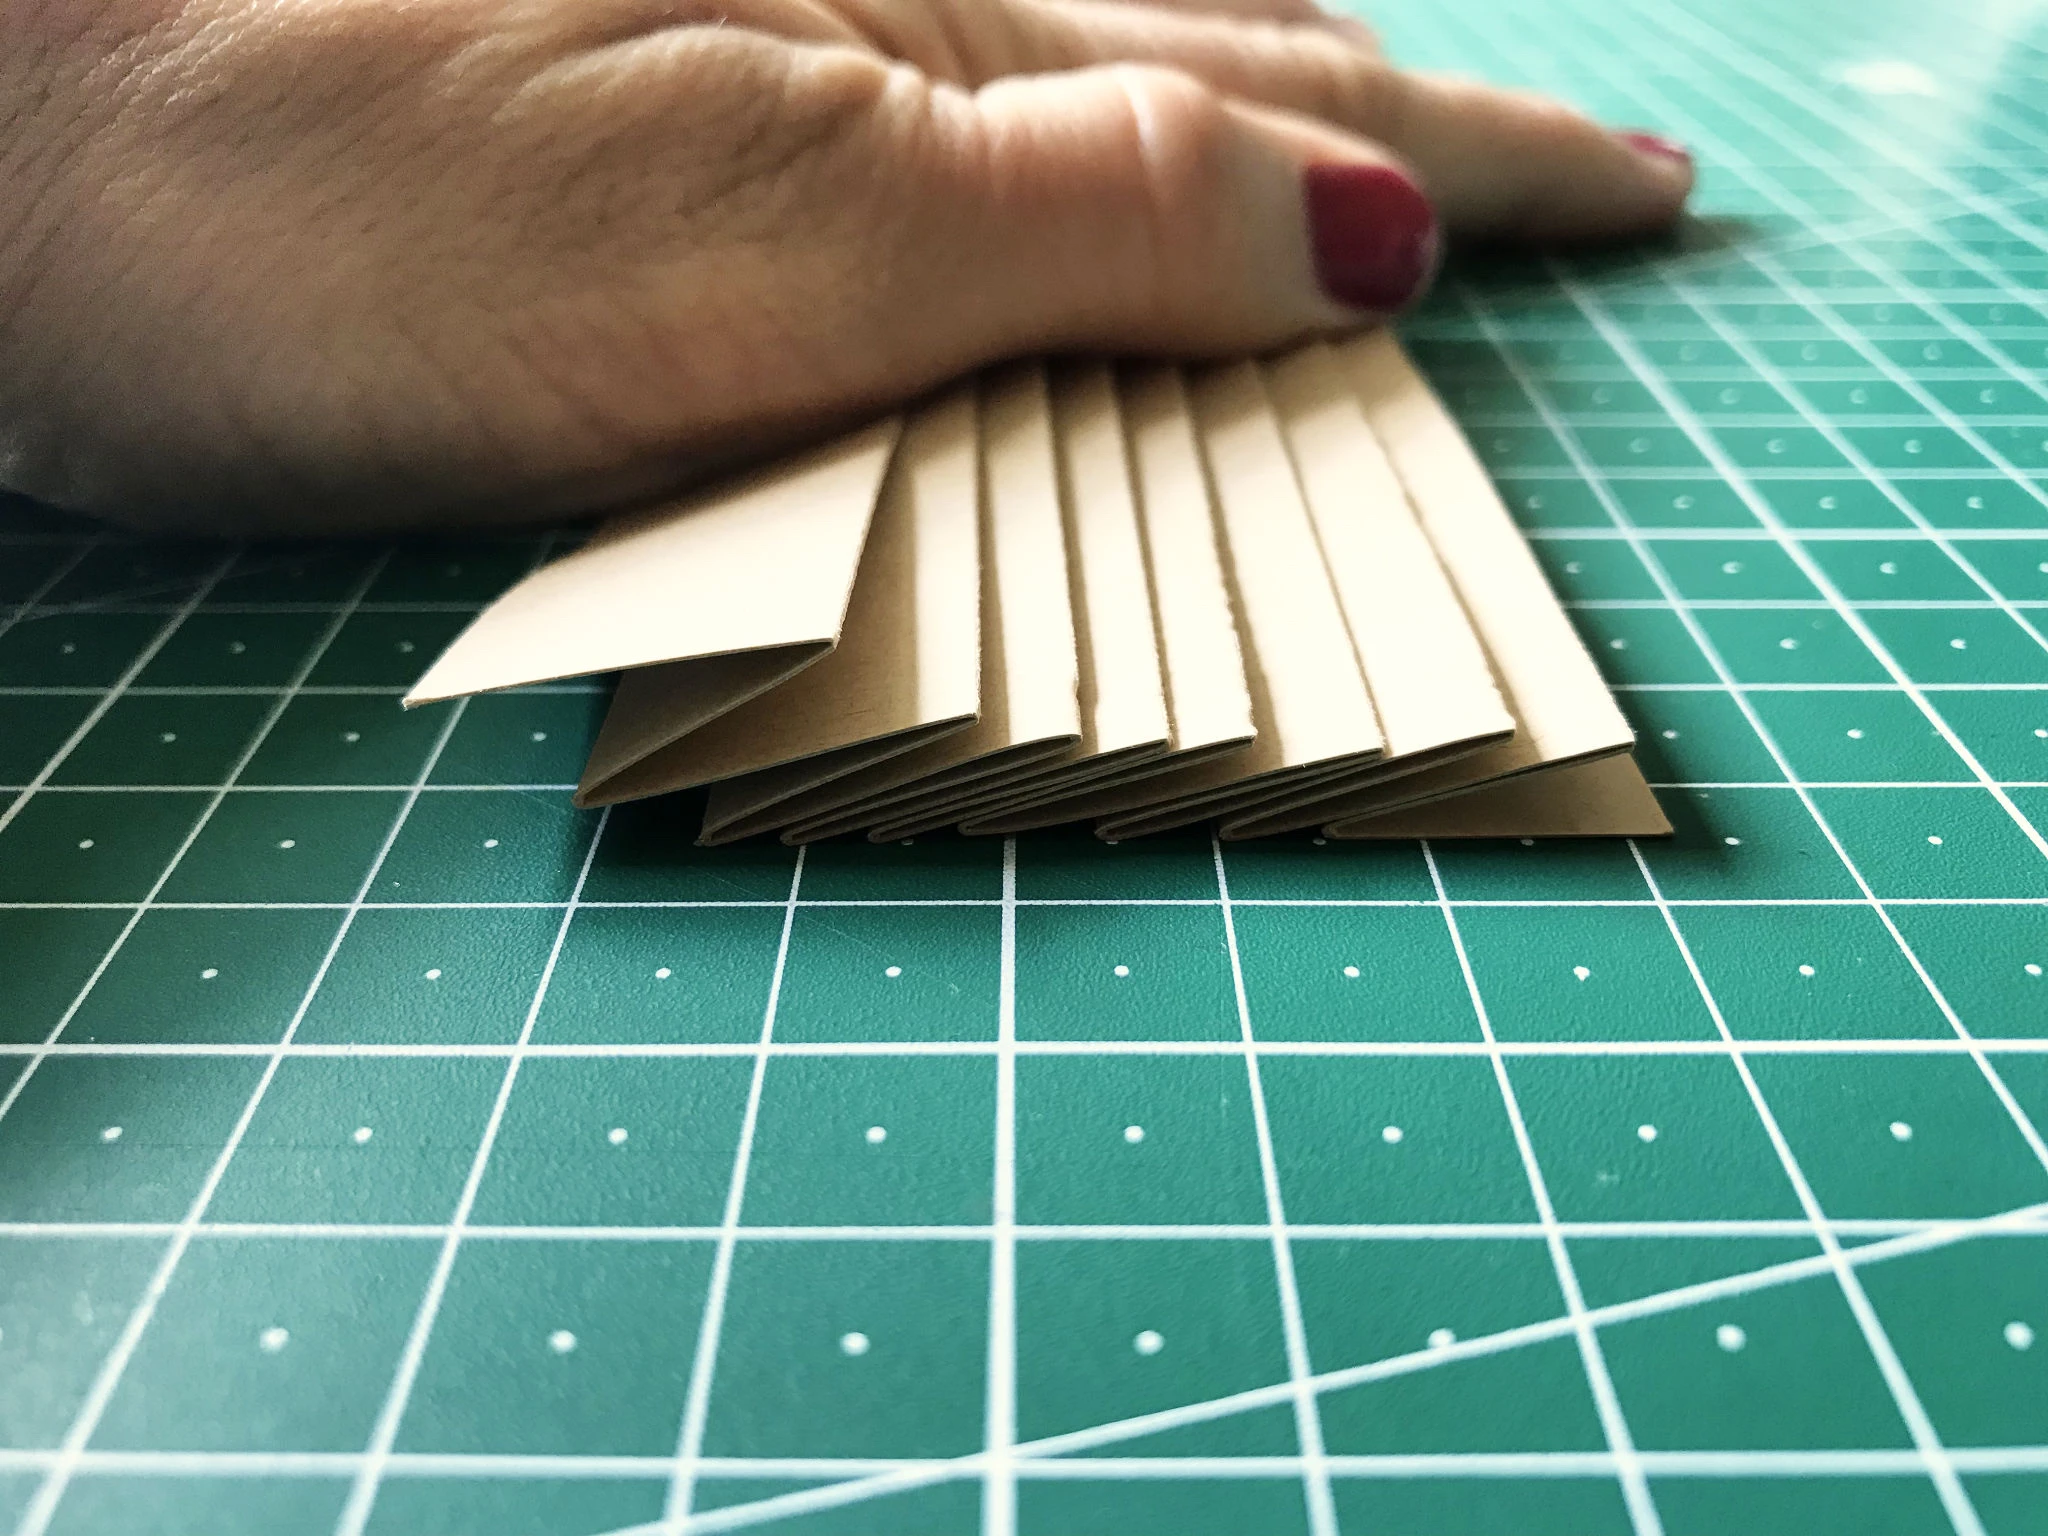
I am sure you remember that you need two moulds.
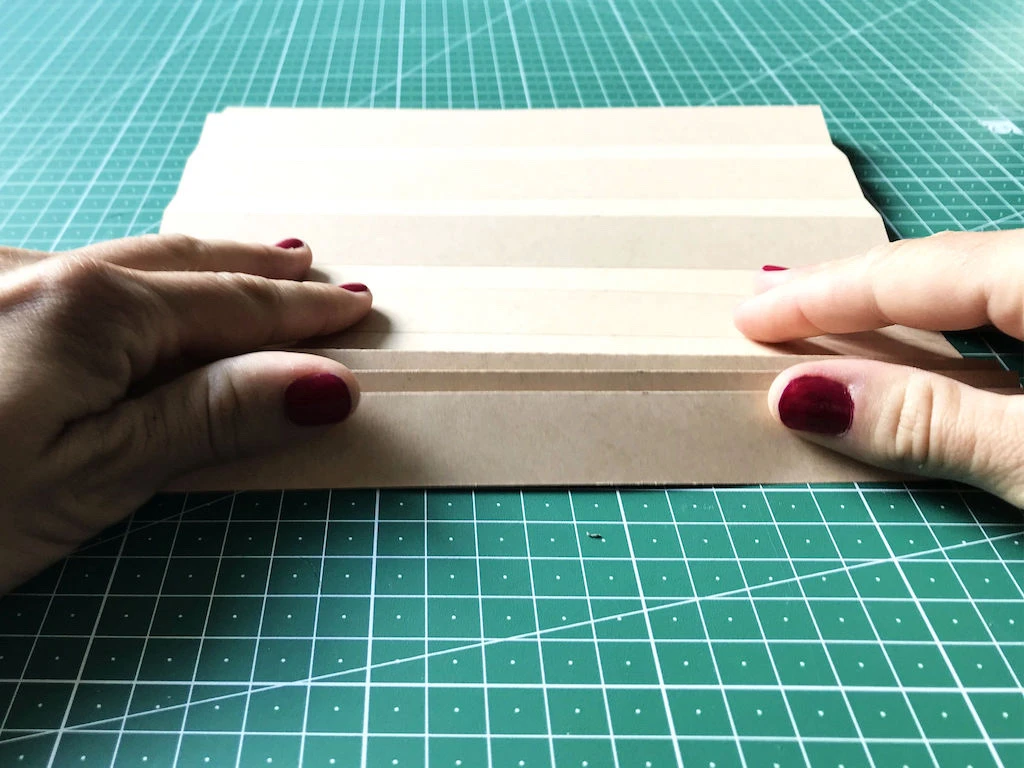
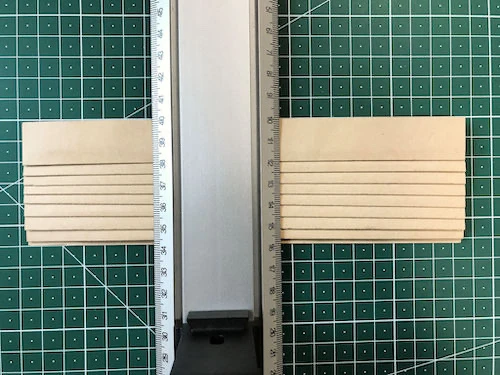
In this phase you can also measure the size of the mould when folded in order to cut out a proper size of the fusible interfacing. Use the grid on your cutting mat or a ruler to do so (see the images below).
How to hand pleat knife pleats at home?
1. Prepare the polyester fabric
Properly pretreat the fabric in the same way you will treat the final garment. Wash or dry clean, let dry and iron. (In this tutorial, I’m using 100% polyester chiffon). To read more about preparing fabric for your sewing projects, read this blog post.
Cut out a piece of fabric you want to pleat. It should be slightly smaller than the unfolded pleating mould itself.
Also hem the fabric before pleating. Hemming a fabric that has already been pleated may result a visually unappealing design.
Hem the fabric before pleating. How to do so, please read this blog post .
2. Place the fabric in between the pleating moulds
Spread both moulds and carefully place the prepared piece of fabric on one of them. Align the edge of the fabric with the edge of the pleating mould.

Place the other mould on the fabric. Start at one end and push the ‘sandwich’ (two knife moulds with fabric in between) towards the other end.
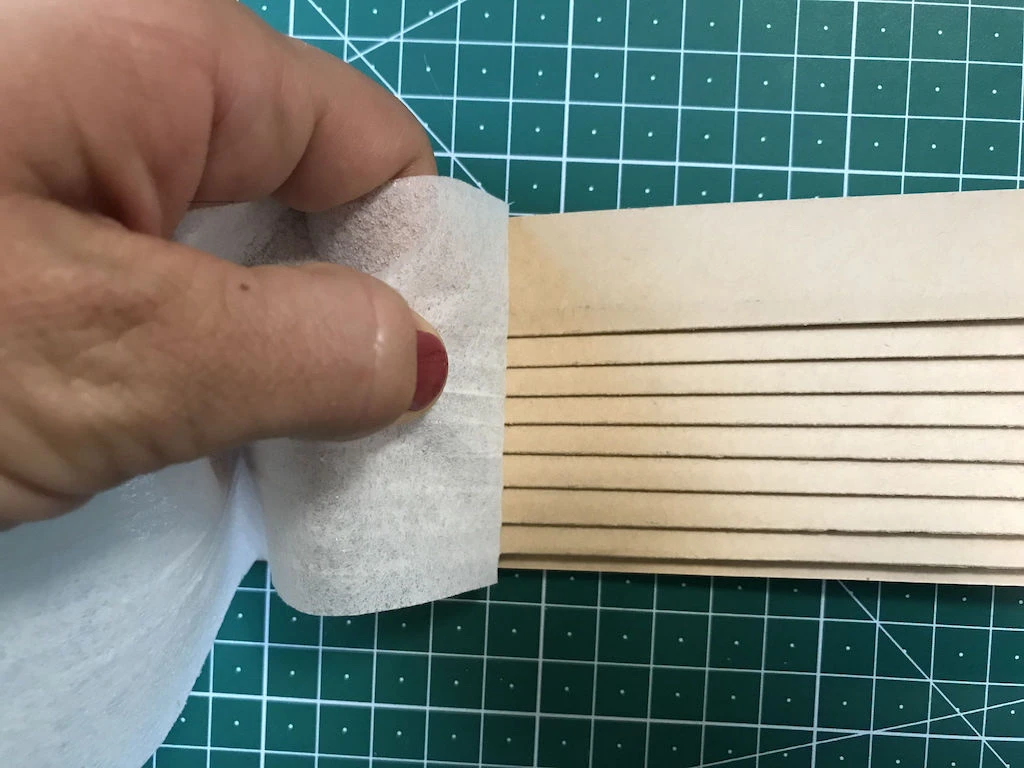
3. Fix the interfacing to the upper mould and pleat the fabric
Place the “sandwich” on your ironing board and prepare your iron and interfacing you have cut before. Turn the iron on and set it to medium heat; with steam off, iron the interfacing onto the upper mould while holding the sandwich together. Make sure the pleats do not move to the sides.

Do not move the iron away from the mould and continue pressing the sandwich with the fused interfacing. Press the moulds for about 10 minutes and make sure you did not skip any part of it.
4. Let everything cool down
After you have finished ironing your pleats, let the moulds with the fabric inside cool down. The longer you wait, the better. After a while the moulds might seem cold enough, yet, inside there is still a lot of folded fabric which needs to cool down properly as well.
If you take out the fabric when it is still warm, the polyester fibres may get distorted. This time in an undesired way, so patience is a vital ingredience here.
5. Tear off the fusible interfacing
If you wish to re-use the pleating moulds, tear off the fusible interfacing from the upper mould.
6. Take out the pleated fabric
When you are sure that the fabric inside is sufficiently cold, you can finally take it out. Lift the upper mould and take out the fabric. Now it is pleated and can be further used.
Conclusion: How To Pleat Fabric? Part 2 – Permanent Knife Pleats
I hope you enjoyed this tutorial. If pleating impressed you, I strongly recommend buying Paul Jackon’s book about pleating. You will find out how to add more interest to one type of pleat (see the images below). How to make other fascinating types of pleats and how to combine them together in order to create really attractive designs. In the first place, however, you will be able to create your own pleating patterns.
If you like this tutorial, rate and share it. Thank you.