
🧵 Want a custom-fit circle skirt pattern? Grab yours instantly with my circle skirt calculator.
🧵 Get a collection of 6 custom-cit circle skirt patterns in 1 convenient PDF. Launching soon.
A circle skirt is a universal, timeless garment almost every woman loves to wear or sew. No matter whether you sew for a little girl, or make an adult circle skirt for a stunning look, you cannot go wrong. This tutorial will walk you through sewing a circle skirt of any type and offer some useful tips along the way.
What you need to sew a circle skirt
- Circle skirt pattern
- Tape measure
- Fabric scissors
- Matching thread
- Pins
- Iron
- Interfacing
- Woven fabric
- Zipper 8” (20 cm) long
- 2 x hook & eye closure
Sewing the circle skirt step-by-step
Pretreat your fabric before sewing and prepare your circle skirt pattern.
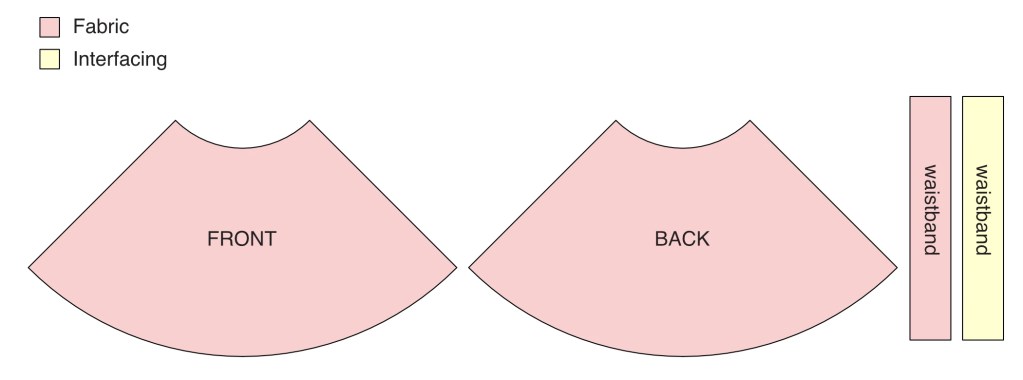
Transfer the pattern pieces to your fabric: First, make sure you properly align the indicated grainline of the pattern with the fabric grainline. Cut two circle skirt panels (FRONT and BACK) and the straight waistband. Don’t forget to transfer key markings (notches, centres) so that you can easily pin and sew together all the pieces.
Also, transfer the waistband pattern to the interfacing and cut out 1 piece.
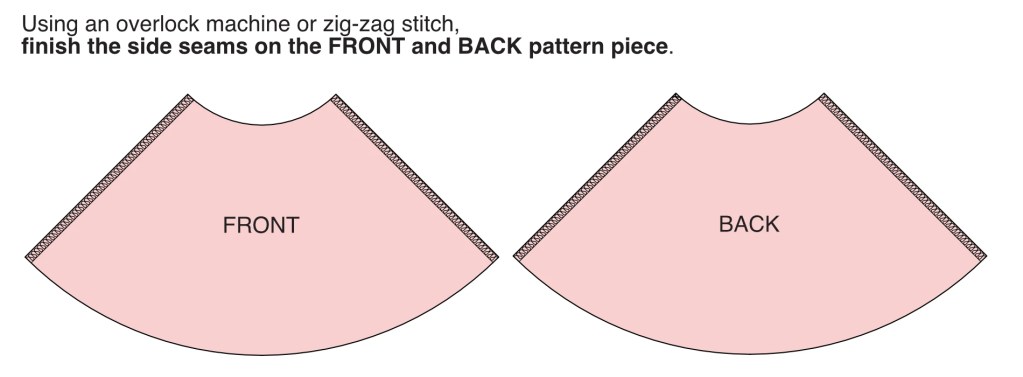
Finish seam allowances on the side seams. I use an overlock machine, you can also use a standard zig-zag stitch. Do NOT finish any seam allowances on the waistband.
Sew and press the side seams. RIGHT sides together, completely sew one side seam. On the other side leave space for the zipper (8” – 20 cm or other length of your zipper). Machine-baste the part where the zipper will go.


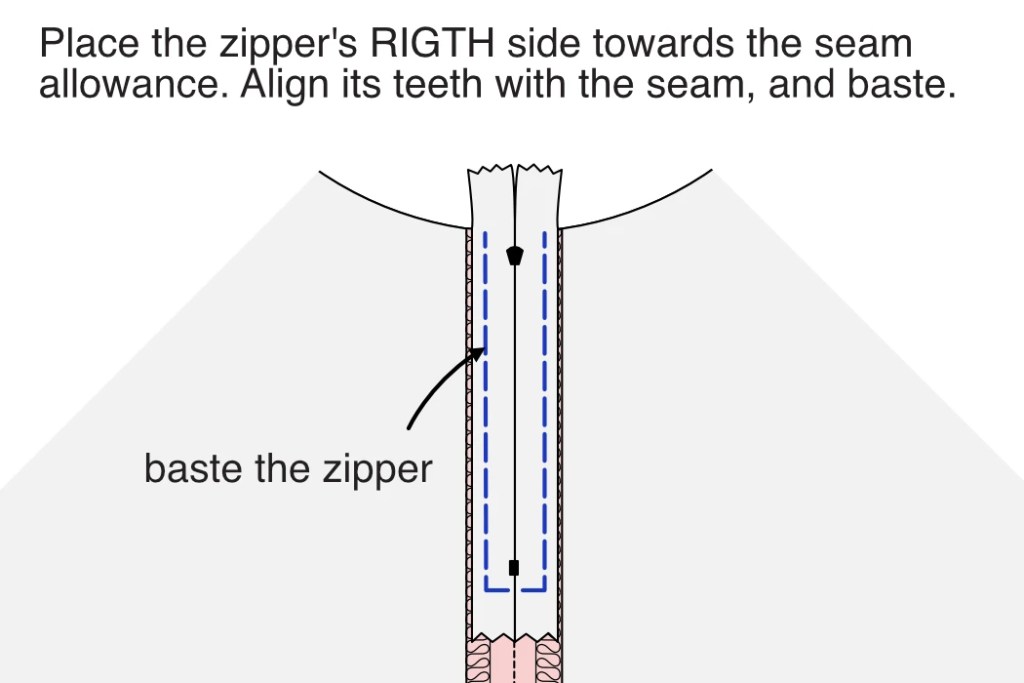
Baste the zipper to the skirt: Place the zipper RIGHT side to the seam allowance. Make sure the teeth are precisely aligned with the basted seam. Also, make sure that the top stop of the zipper does NOT end at the cut waist, but BELOW it. The distance between the fabric edge and the top zipper stop is the seam allowance width. With the zipper in its proper place, pin and baste it to the skirt.
Sew the zipper: From the RIGHT side of the fabric, sew the zipper to the skirt. Use a zipper presser foot in order to do so. Having done that, put the skirt aside and make the waistband.

Tailor the waistband of the circle skirt
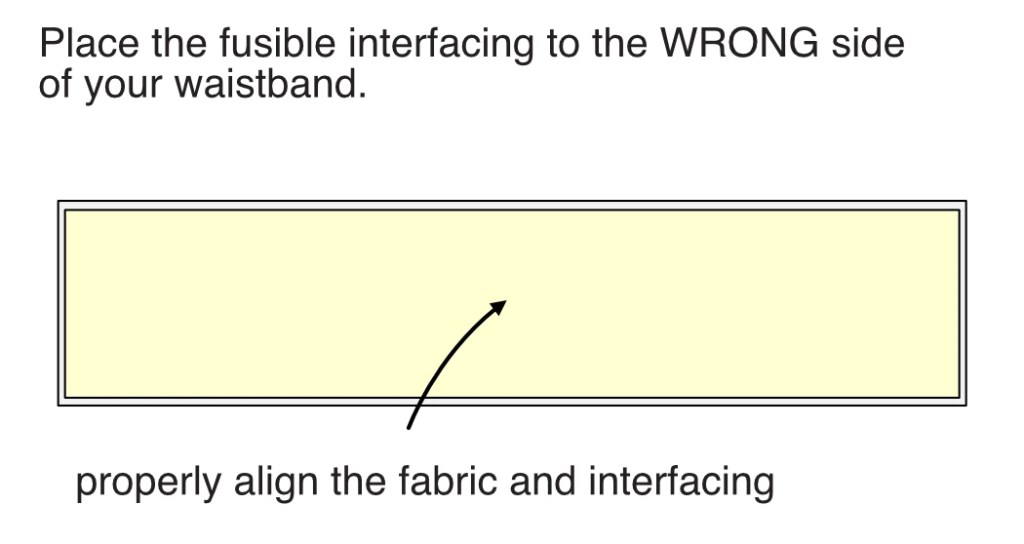
Fuse the interfacing to the waistband: Slightly dampen your presser cloth and iron the interfacing to the WRONG side of the waistband. Make sure there are no wrinkles or bubbles while the interfacing is completely fused to the fabric.

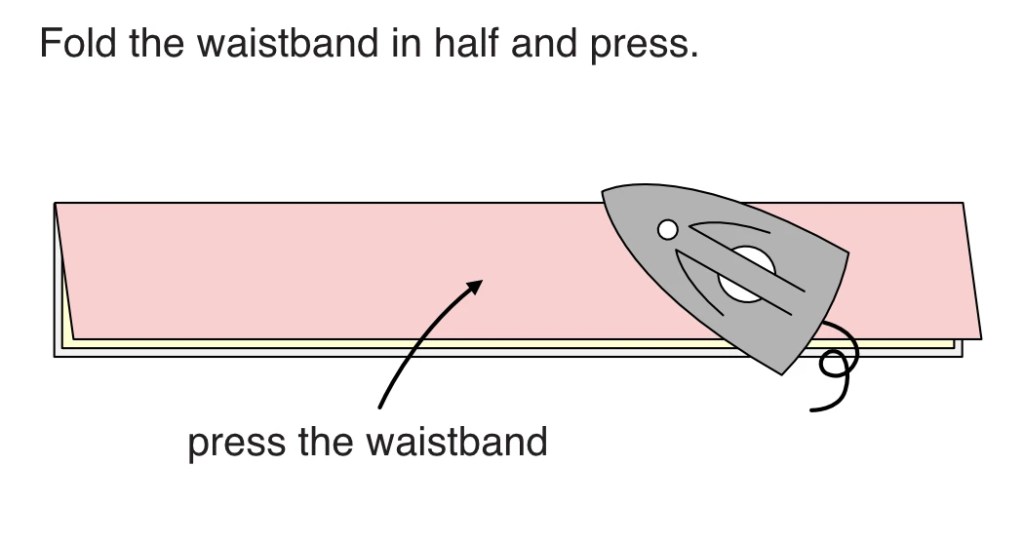
Press the waistband: Fold the waistband in half WRONG sides together and press along the whole waistband to create a nice crisp edge at the top.
Prepare the seam allowances of the waistband: Unfold the pressed waistband and fold the edges towards the inside (see the images below).
Fold one edge by 3/8” (1 cm) towards the inside of the waistband and press the folded edge.

Fold the other edge by 1/2” (1.25 cm) towards the inside of the waistband and press again.
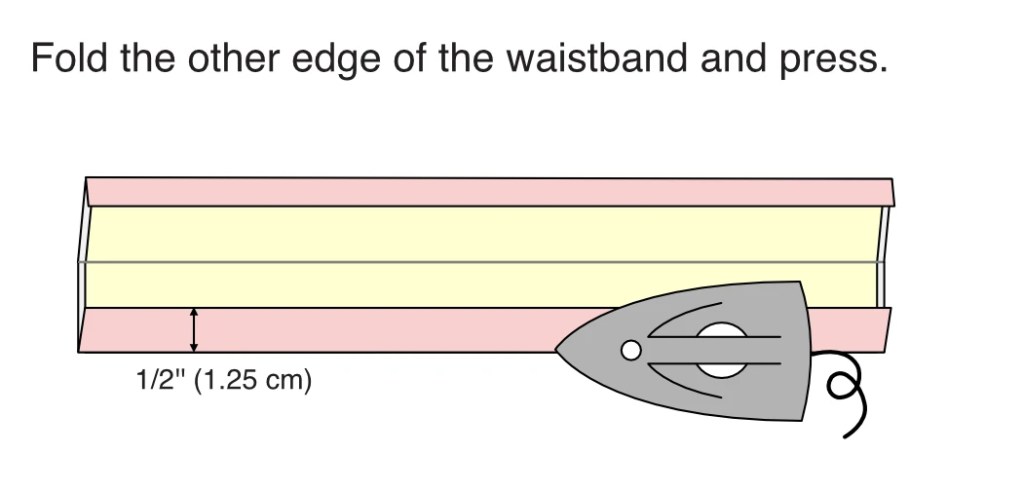
Now, when you fold the waistband along the centre fold, the edges should be NOT perfectly aligned, only parallel. One side of the waistband should be a bit narrower and the other one a slightly wider. Don’t worry, this is the way it should be.
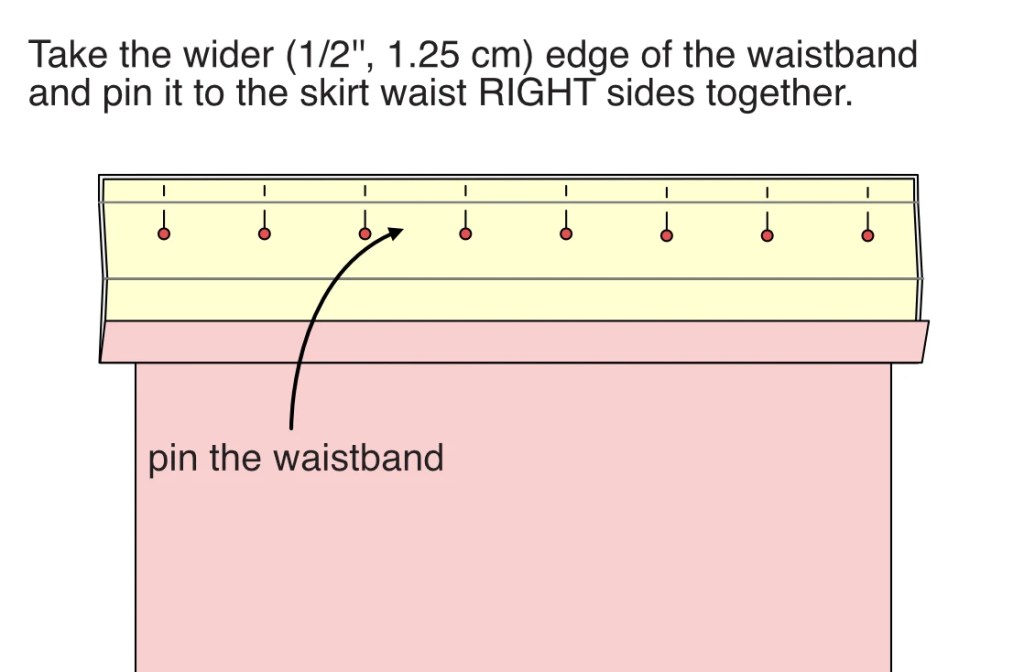
Pin the waistband to the waist:
RIGHT sides together, pin the waistband with the 1/2” (1.25 cm) folded edge to the waist. If you are sewing a waistband with an extension, align one end with the opening and allow the extension on the other end to extend beyond the skirt edge.
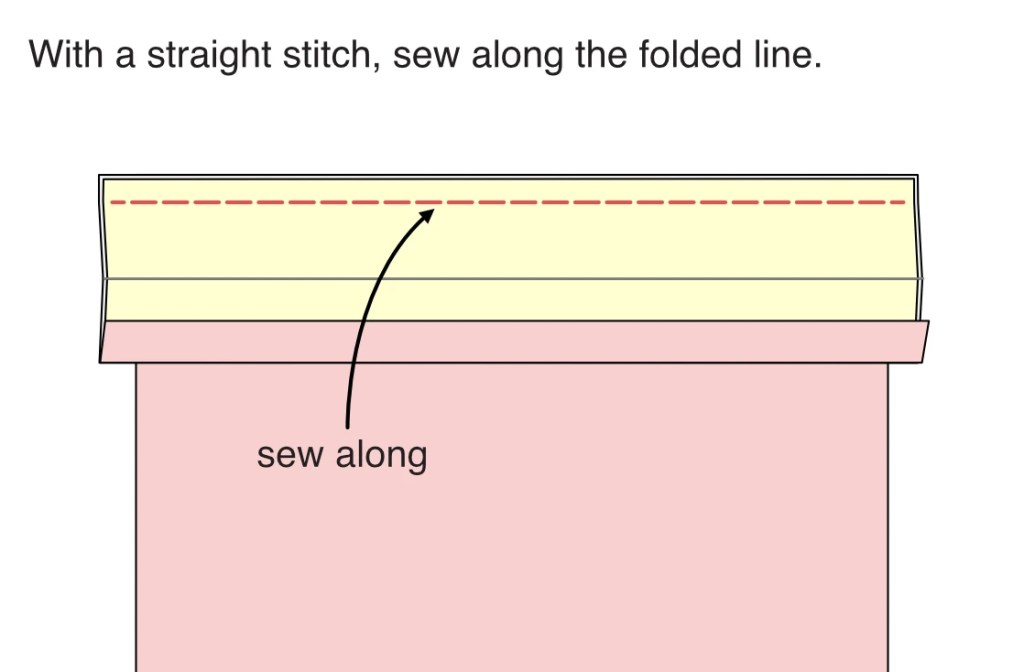
Using a straight stitch, sew the waistband and skirt together along the folded line near the edge of the waistband.
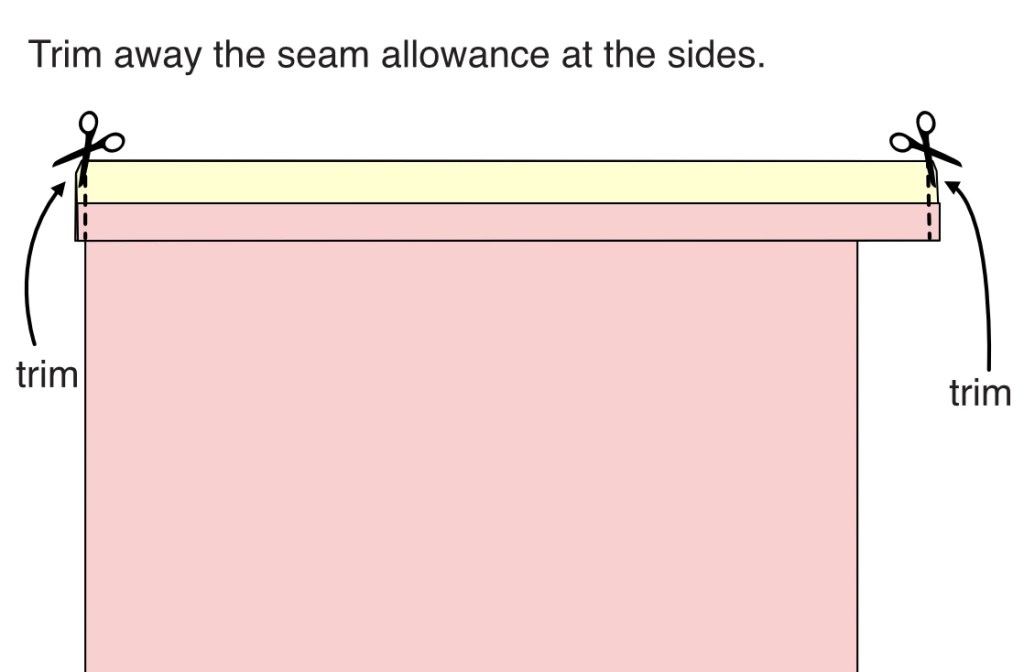
Finish the edges of the waistband: Along the centre fold line, fold the waistband RIGHT sides together, and pin. Make sure the seam allowances are folded upwards. Sew along the short edges of the waistband. After you are done, trim away the seam allowances and corners at both ends. In the images below you can see two versions of finishing the waistband. The first one is an edge-to-edge waistband and the other is a waistband with an extension.
Edge-to-edge waistband


Waistband with an extension

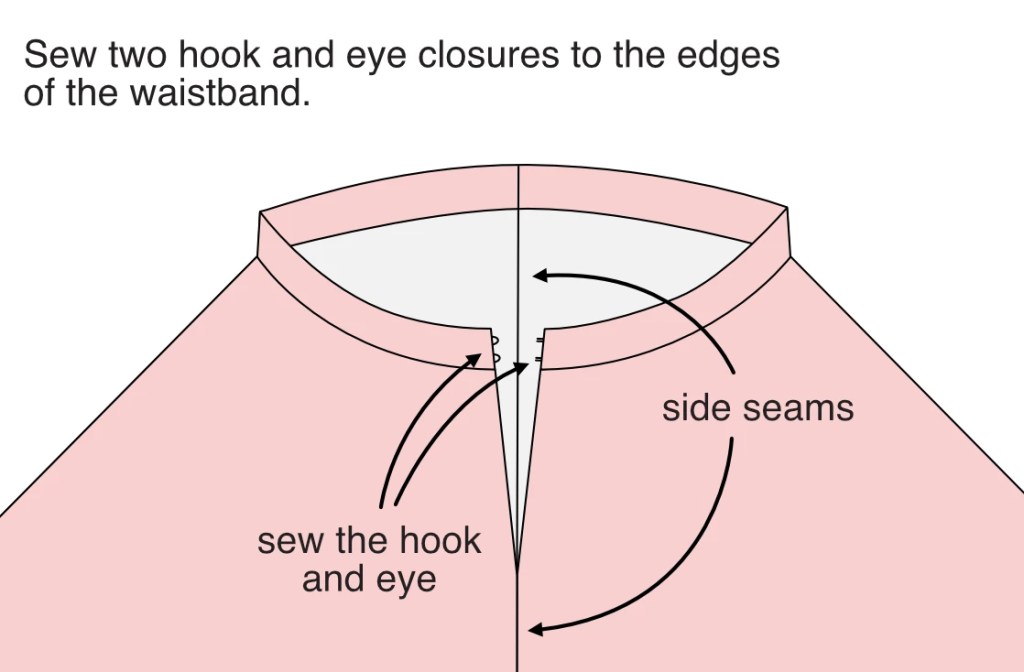
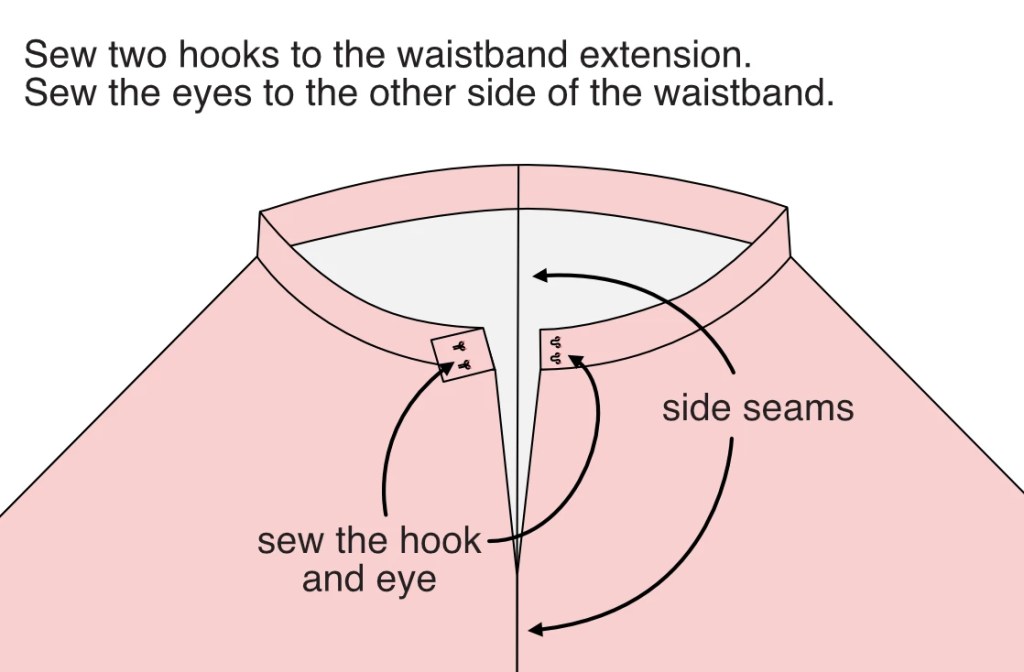
Finish the waistband: Turn the waistband to see its RIGHT side. Pin the waistband so thatit does not move. Using a matching thread, stitch from the right side of the skirt just below the lower edge of the waistband (this is method is called stitch in the ditch. Learn more sewing and pattern making terms). You may need to slightly pull the waistband while sewing so that the thread does not catch it. Sew the hook and eye closures.
Finishing an edge-to-edge waistband

Finishing a waistband with an extension
In order to finish the extension of the waistband, use a slip stitch (invisible stitch). You will do this by hand, WITHOUT a sewing machine.


Your skirt is ALMOST finished. Now LET IT HANG FOR 24 HOURS. This needs to be done before finishing the hem. The parts of the fabric cut on the bias stretch under gravity and the hem becomes uneven.
Finish the hem of the skirt: Measure the desired skirt length from the floor, and mark the final hemline. Add hem allowance and cut away any redundant fabric.


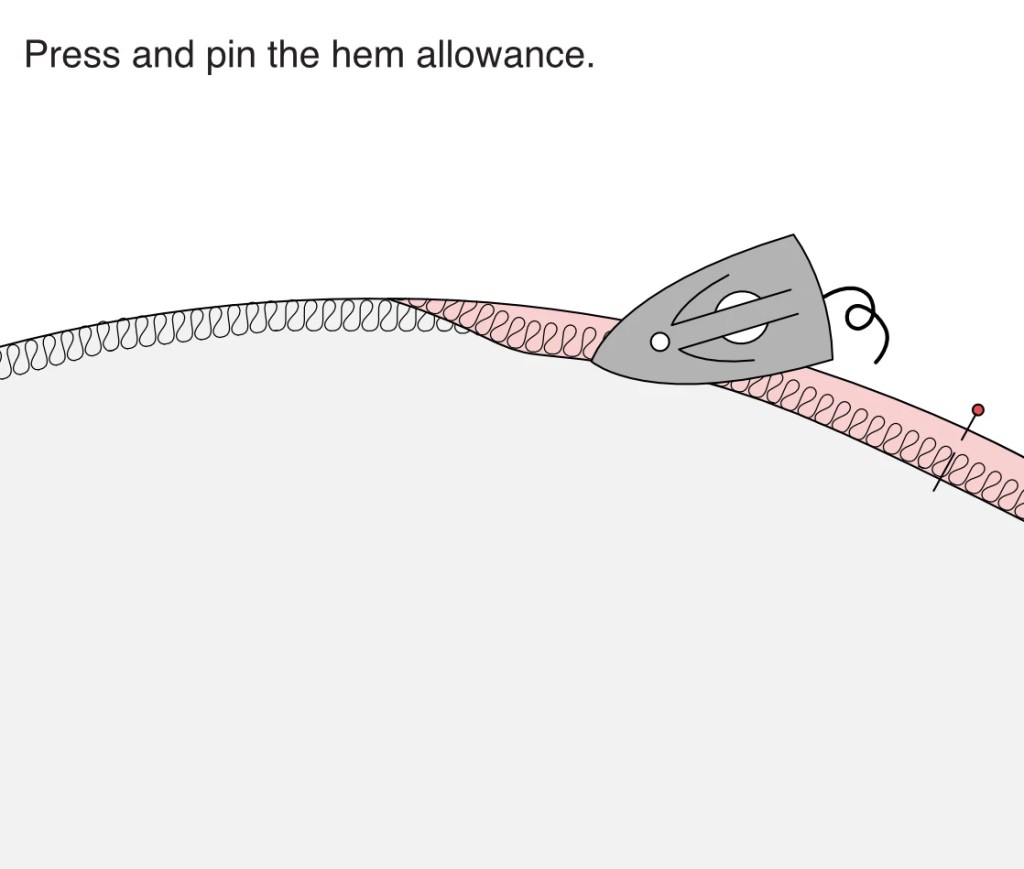
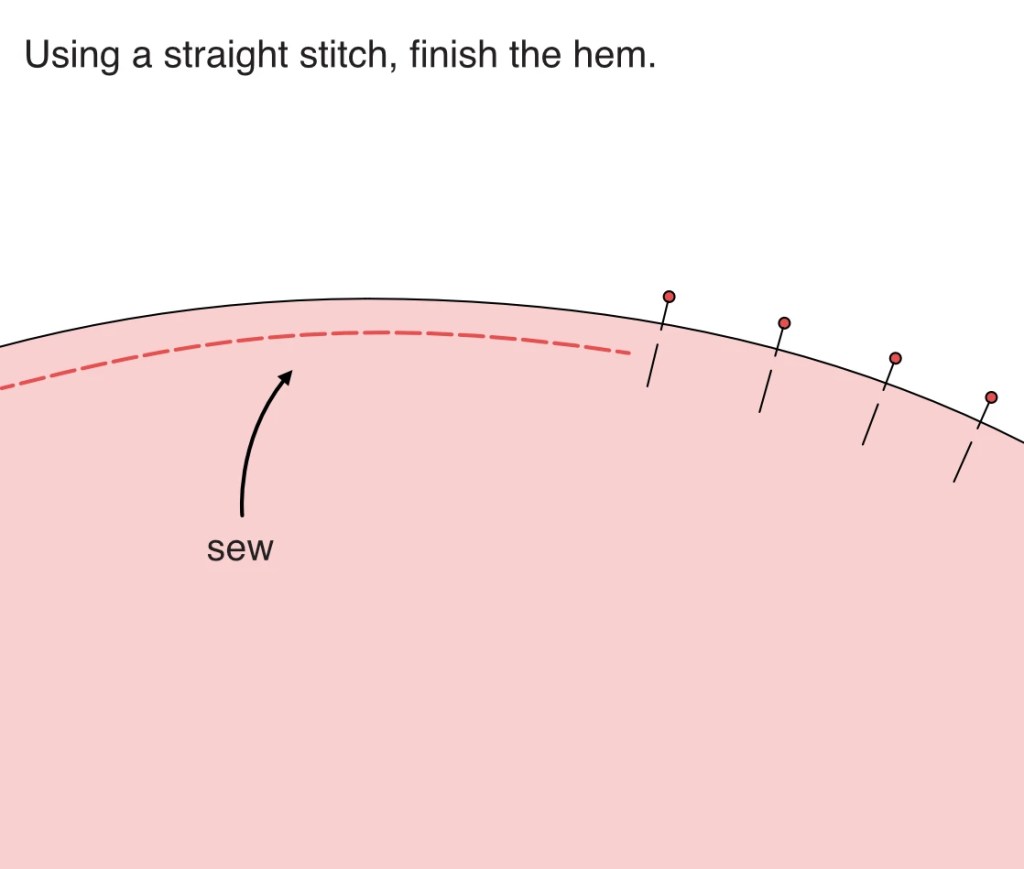
Finish the hem with a double-fold hem (do not serge/zig-zag the seam allowance) or serge/zig-zag the hem allowance and use a single-fold hem (the second method is shown in the images below). No matter which option you go for, make sure to press the folded hem before sewing it.
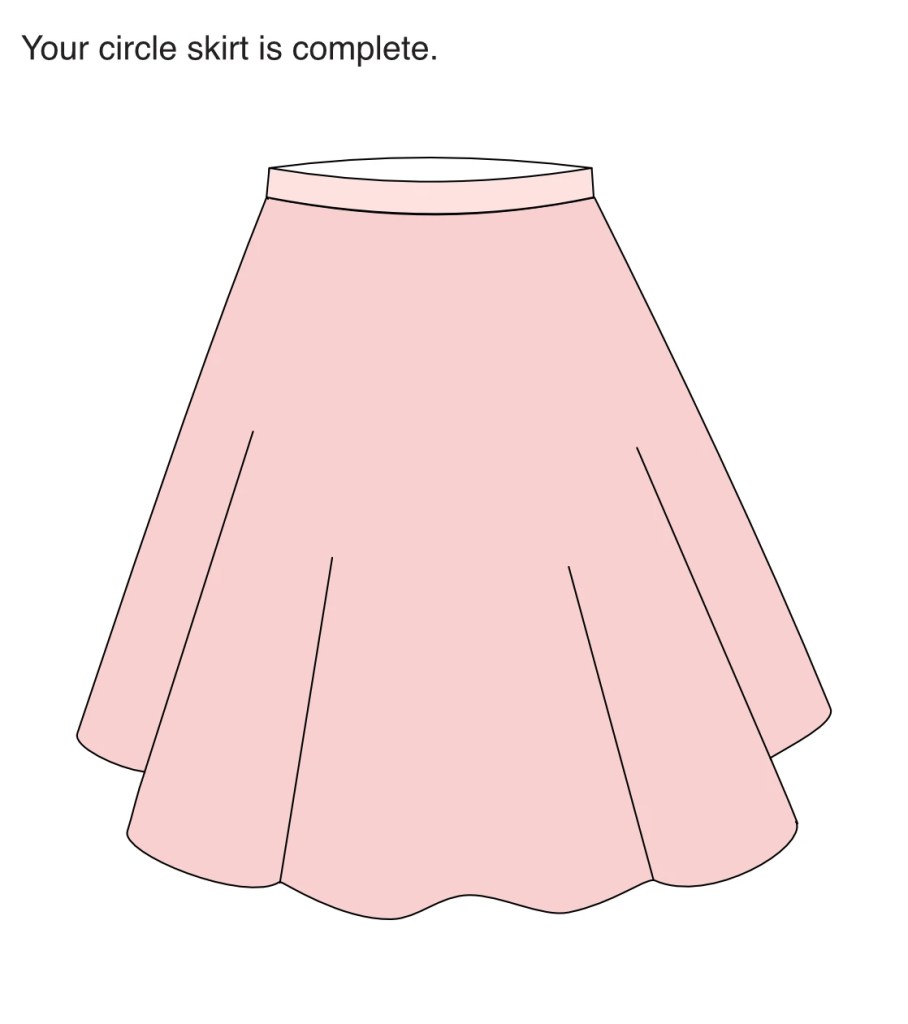
Conclusion: How to sew a circle skirt
That’s it. Your circle skirt is finished. Once you try it on, you’ll see how easy and versatile this garment is. With a little practice, you can make the same skirt in different fabrics and lengths for any occasion.


How to sew a circle skirty FAQs