Exploring Waistband Types, Styles, and Step-by-Step Techniques


Drafting waistbands is one of the fundamental skills in garment construction for skirts and pants. It plays a key role in securing the garment comfortably around the waist while also adding structure, shape, and style to the finished piece. Whether you’re working with a simple straight waistband or a more tailored shaped version, understanding how to draft and attach waistbands correctly can elevate your sewing projects. Waistbands can also vary widely — from classic non-stretch bands to flexible elastic options — each suited to different fabrics, fits, and styles.
If you’ve already explored drafting the basic skirt or pants patterns, you’ll find that adding the right waistband is an essential next step to complete your garment. This page will guide you through drafting several basic waistband styles, helping you achieve a clean and professional finish every time. Whether you’re aiming for a sleek, fitted look or a more relaxed, comfortable fit, mastering waistbands is a valuable skill in your sewing toolkit.
On this page you will find:
How to develop an elastic waistband casing
The elastic waistband casing is a great choice for every sewing beginner and a super time saver for everyone as you do not have to sew a zipper into the skirt as with the fixed waistband. Use a standard jersey or rib jersey fabric to create one. The easiest way to apply an elastic waistband is with a circle skirt made of knit fabric.

You can also insert an elastic band into the casing so that the skirt will hold better at the waist. The knit fabric of the casing may lose its elasticity with wear and tear. So, the elastic band inside will prevent the skirt waist from slipping down. I like to make the elastic a little more tight so I subtract about 2 – 5 cm (1 – 2”) from the waist circumference.
Instead of a casing, you can go for a nice, decorative elastic band directly sewn to the circle skirt.

Elastic waistband casing with knit fabric.
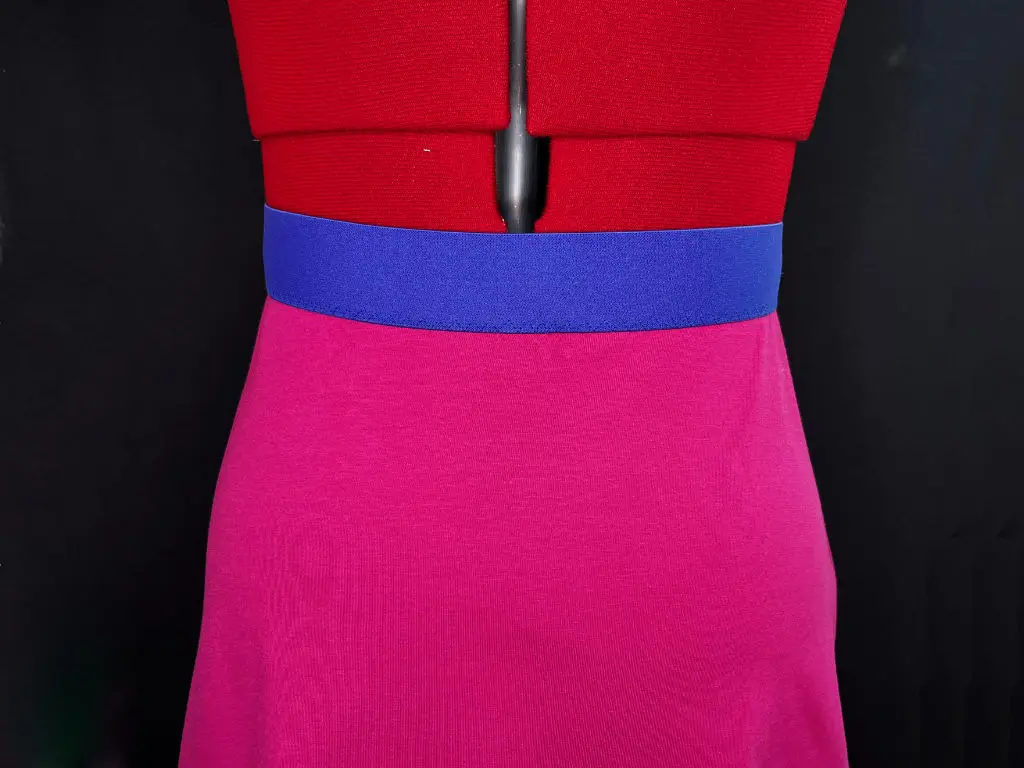
Elastic waistband with knit fabric.
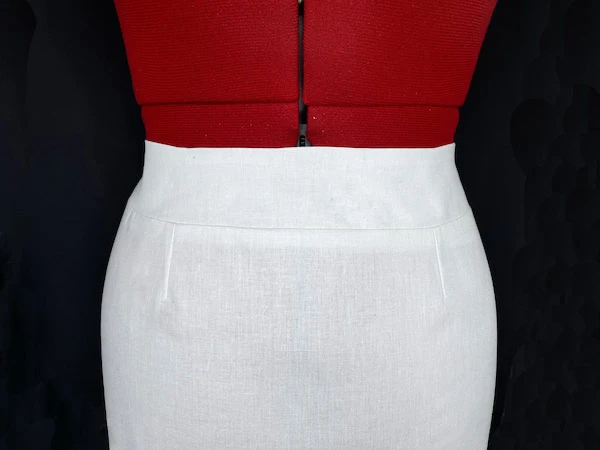
How to develop a fixed waistband
When working with fixed waistbands—whether curved, straight, or those finished with a facing—you’ll usually need to include a zipper to get the garment on and off easily. Because fixed waistbands don’t stretch, the zipper is essential for opening up the waistband just enough to step in comfortably. You can choose between an invisible zipper for a clean, seamless look or an exposed zipper for a more decorative finish, depending on your design preference.
Invisible zippers are a popular choice for waistbands as they create a smooth, polished appearance without interrupting the waistband’s shape or style. On the other hand, exposed zippers can add a bit of edge or detail, especially when matched with coordinating thread or fabric. Either way, correctly inserting the zipper into the waistband ensures your skirt or pants fit well while maintaining a professional finish.
When it comes to waistbands, there are multiple alternatives, you can choose from:
a) Facing without a waistband


b) Straight waistband
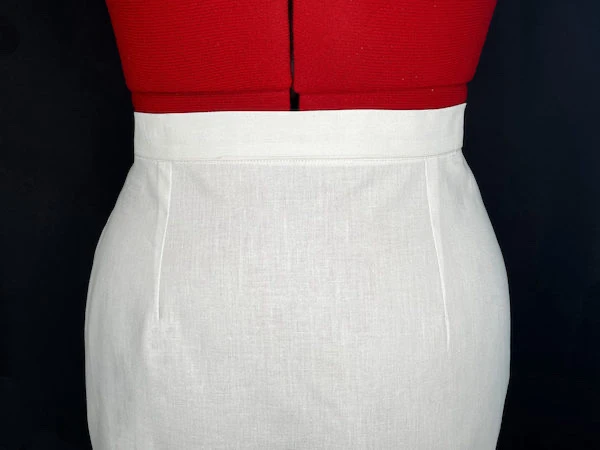
c) Shaped waistband
Read on, to learn more about drafting waistbands for the basic skirt pattern.
a) Facing without a waistband
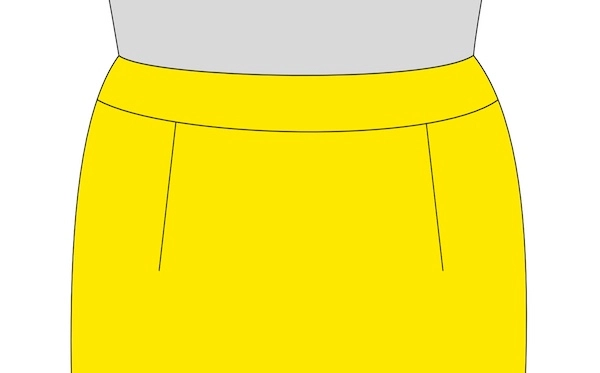
You can design your basic skirt without a waistband. In this case, the darts of the skirt will end directly at your waist. All you have to do is to develop a facing for the waistline. To do so, follow the steps below:
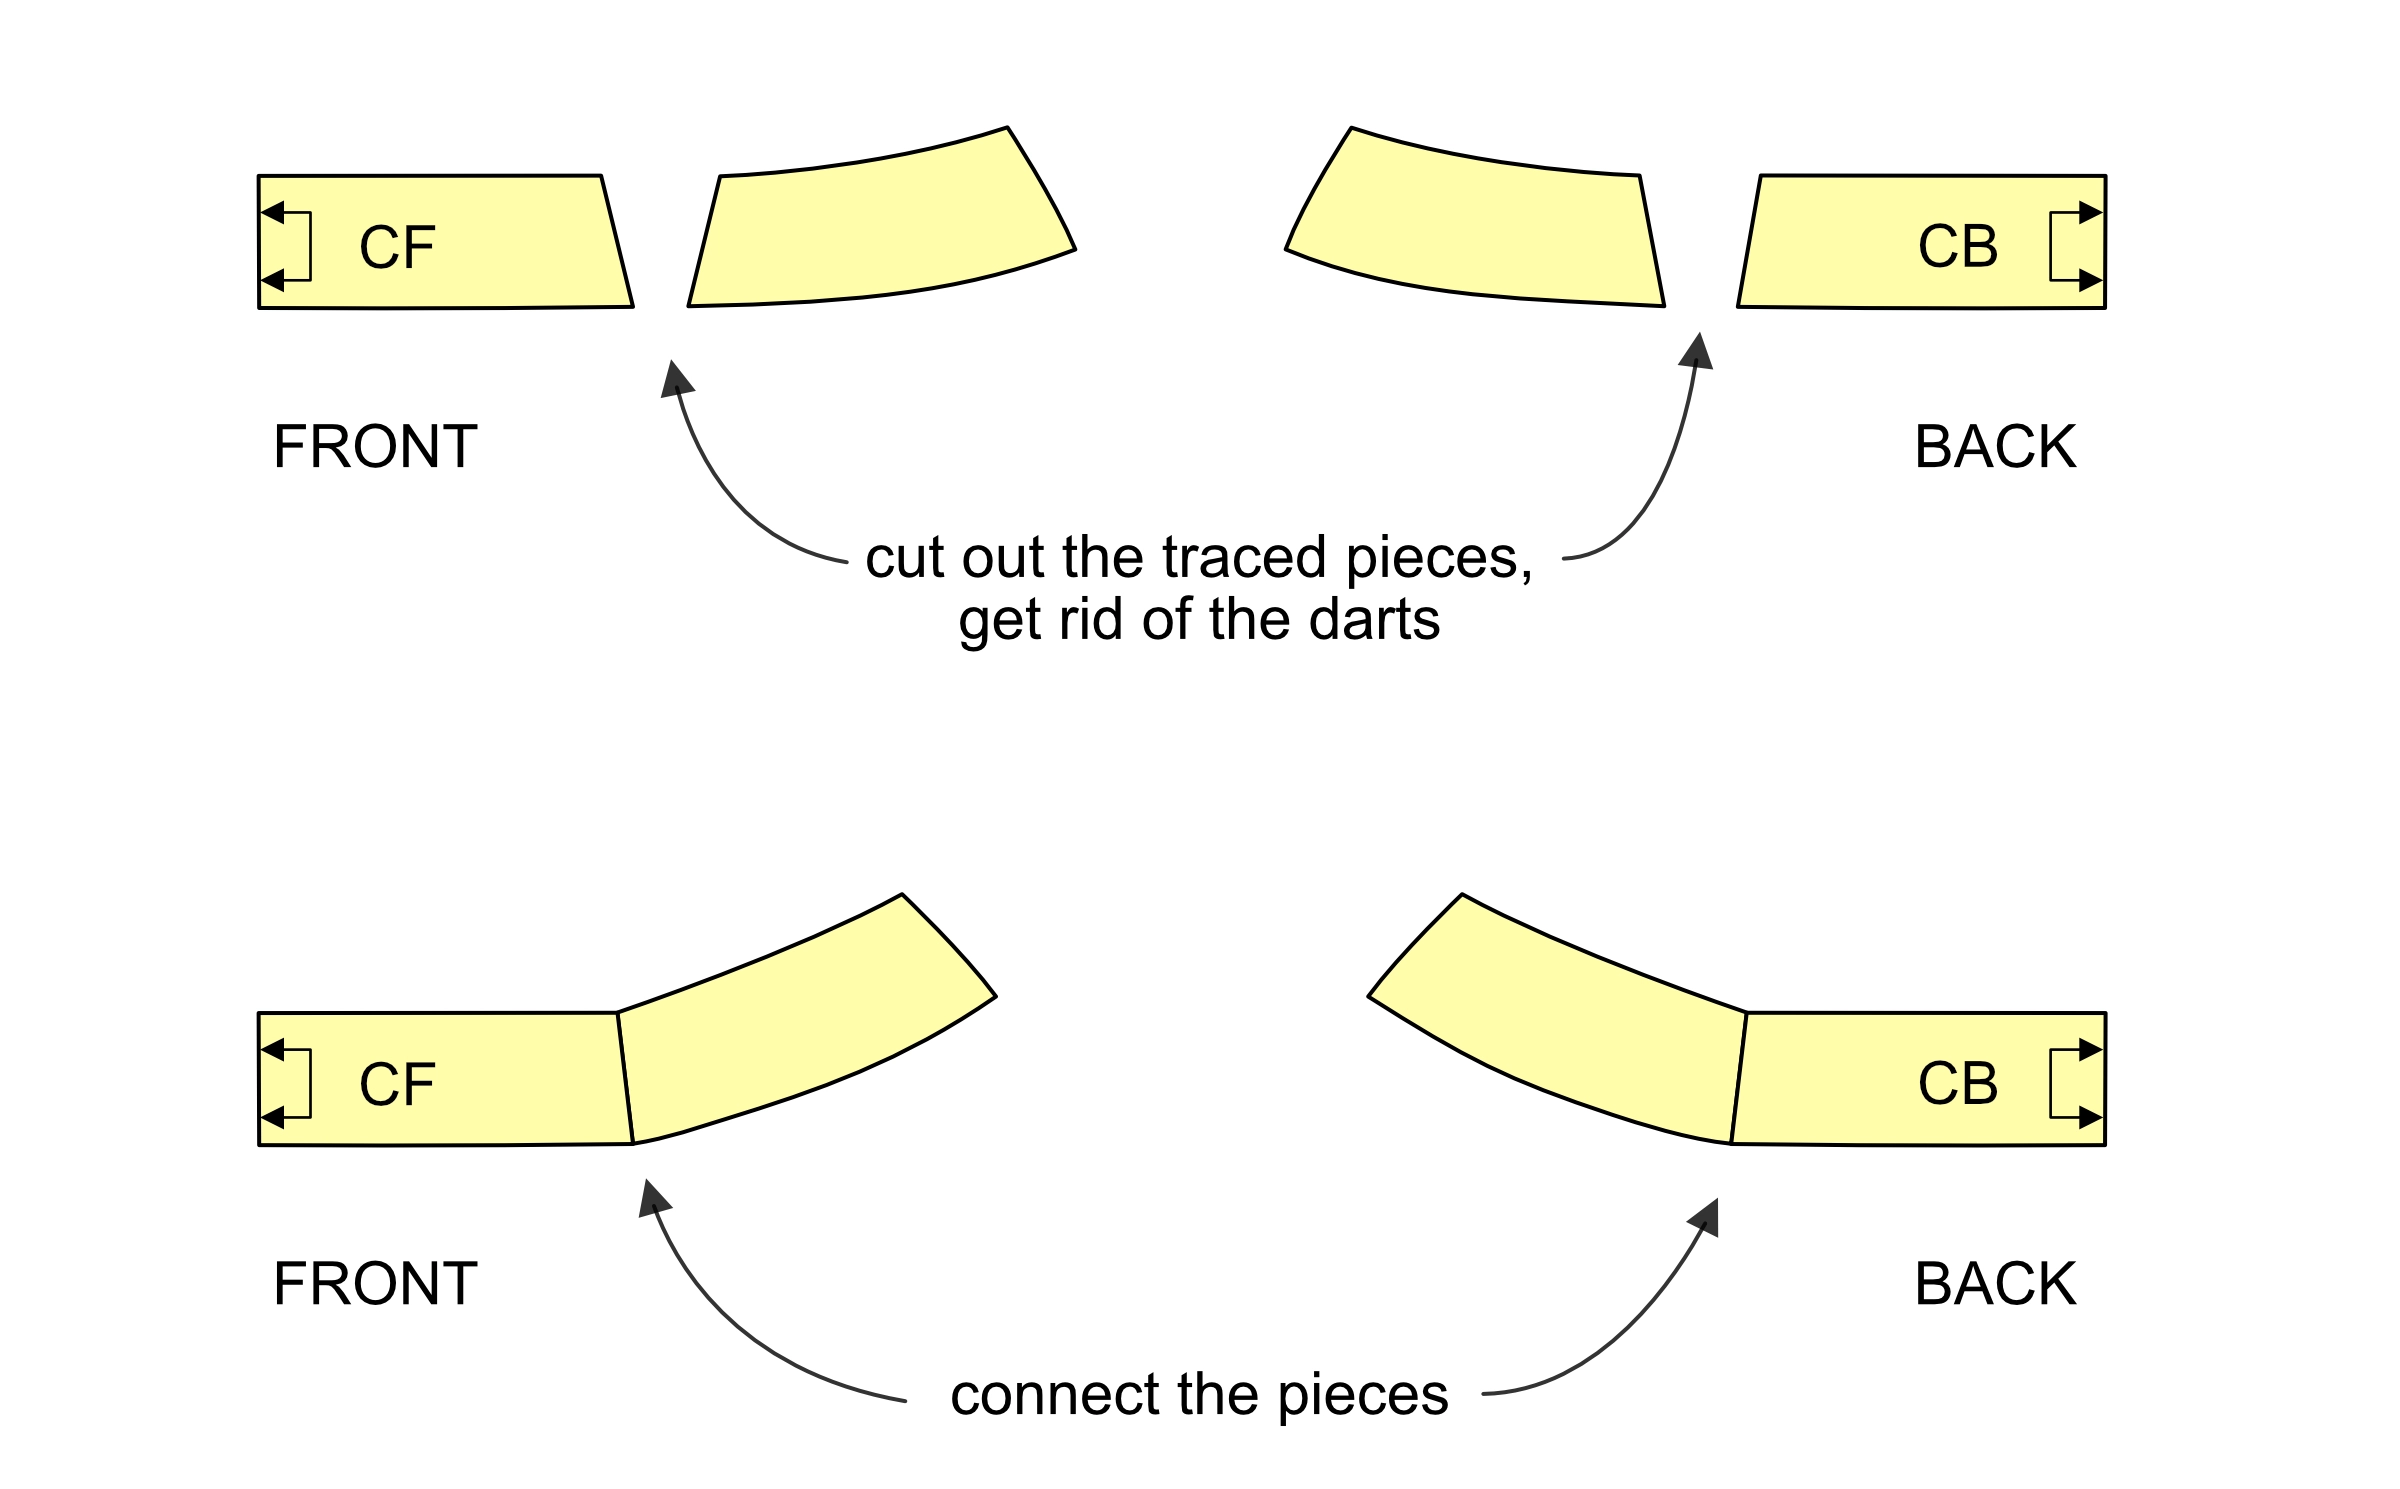
1. Decide on the facing width — usually about 3″ (7 cm). Draw a line this distance down from the waistline; in the image below, this line is shown as a dashed line. Trace the waistline, the dashed line, parts of the side seams, the centre front and back, and parts of the darts. (see the image below).

2. Cut out the traced pattern pieces. Eliminate the darts, then join the two front pieces and the two back pieces. Label the pattern accordingly. You should now have one half of the front facing and one half of the back facing. (see the images below).
3. Using a French curve or a flexible ruler, smooth the lines where you joined the pieces to create clean, even curves. The facing for your garment is now complete. Do not forget to place it on the fabric fold before tracing.
(see the image below).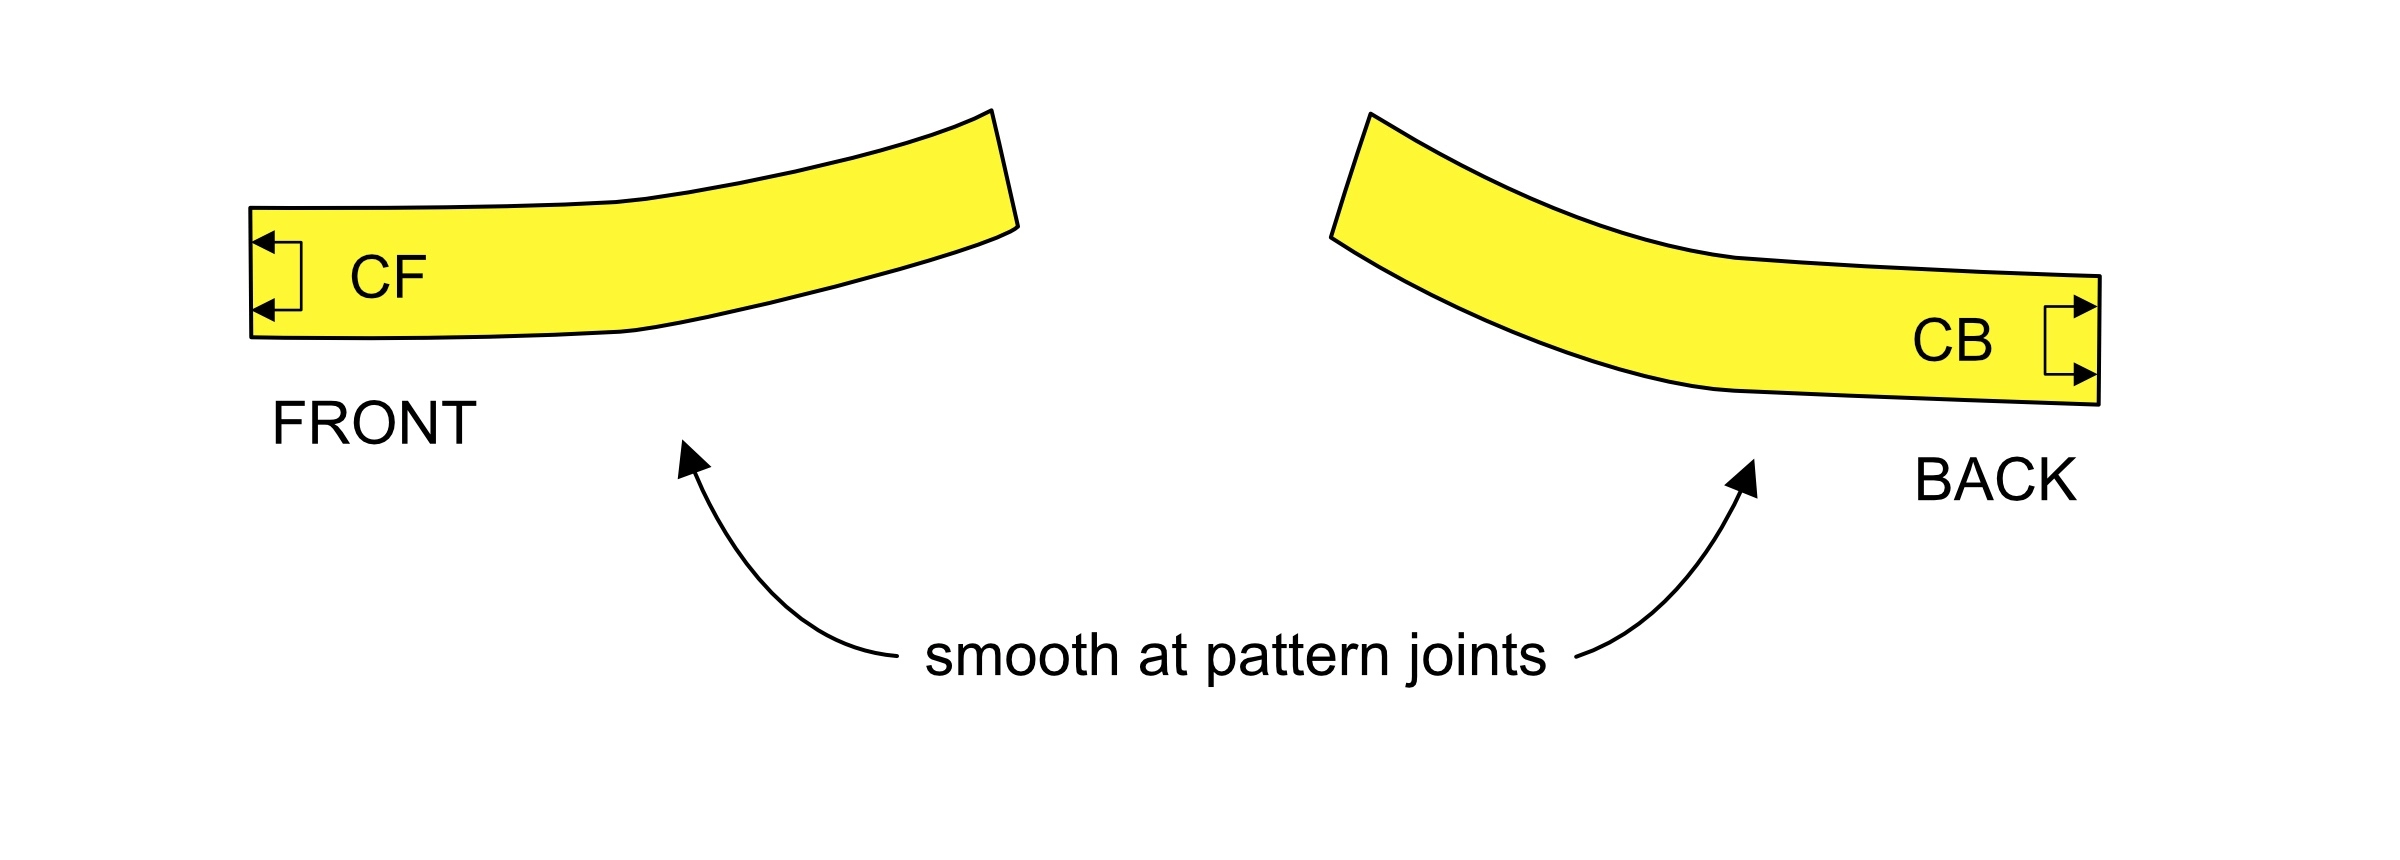
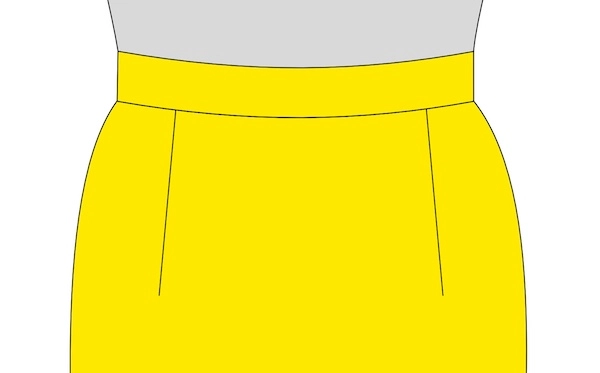
b) Straight waistband with an extension
Use the straight waistband, if you want the skirt to sit directly on your natural waist and if the waistline of the basic skirt is not too curvy. To draft it, follow these instructions:
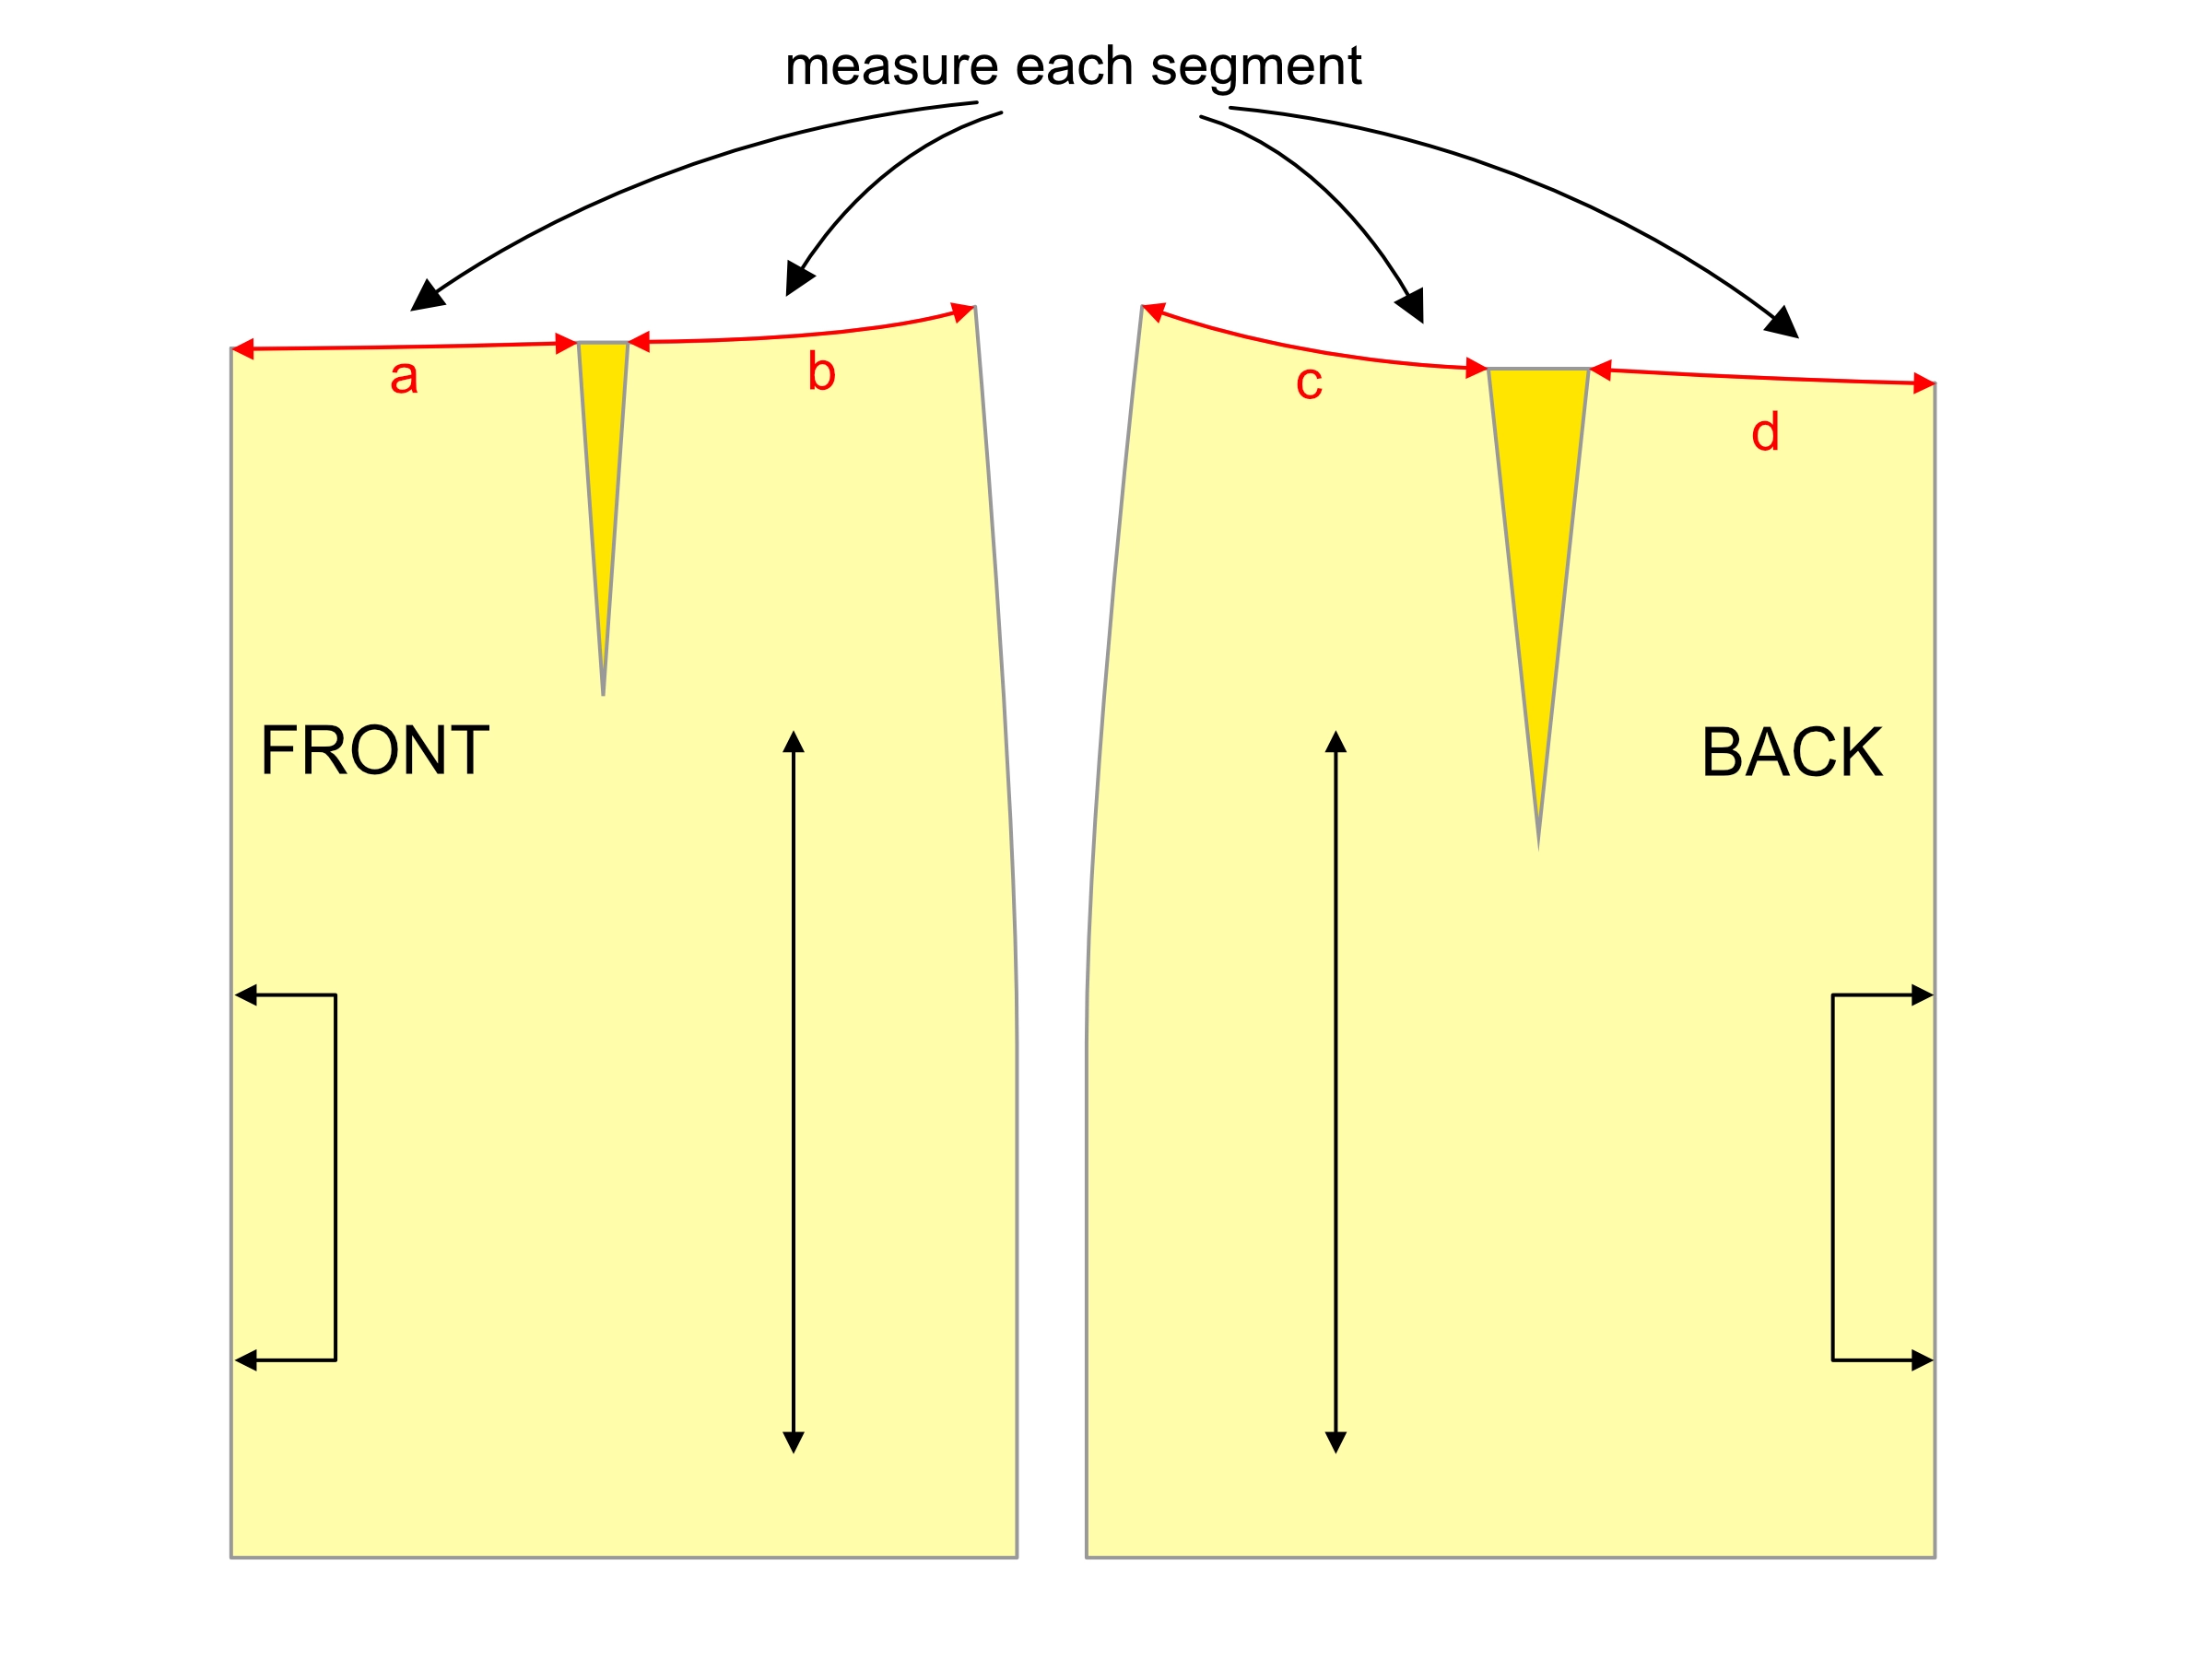
1. Pick your basic skirt or pants/trouser pattern. Measure the waist on the FRONT and BACK pattern pieces. If darts are present, do not include them in the measurement. Add the FRONT and BACK measurements together and multiply the result by 2 to get the full waist circumference of the garment (see the image below).

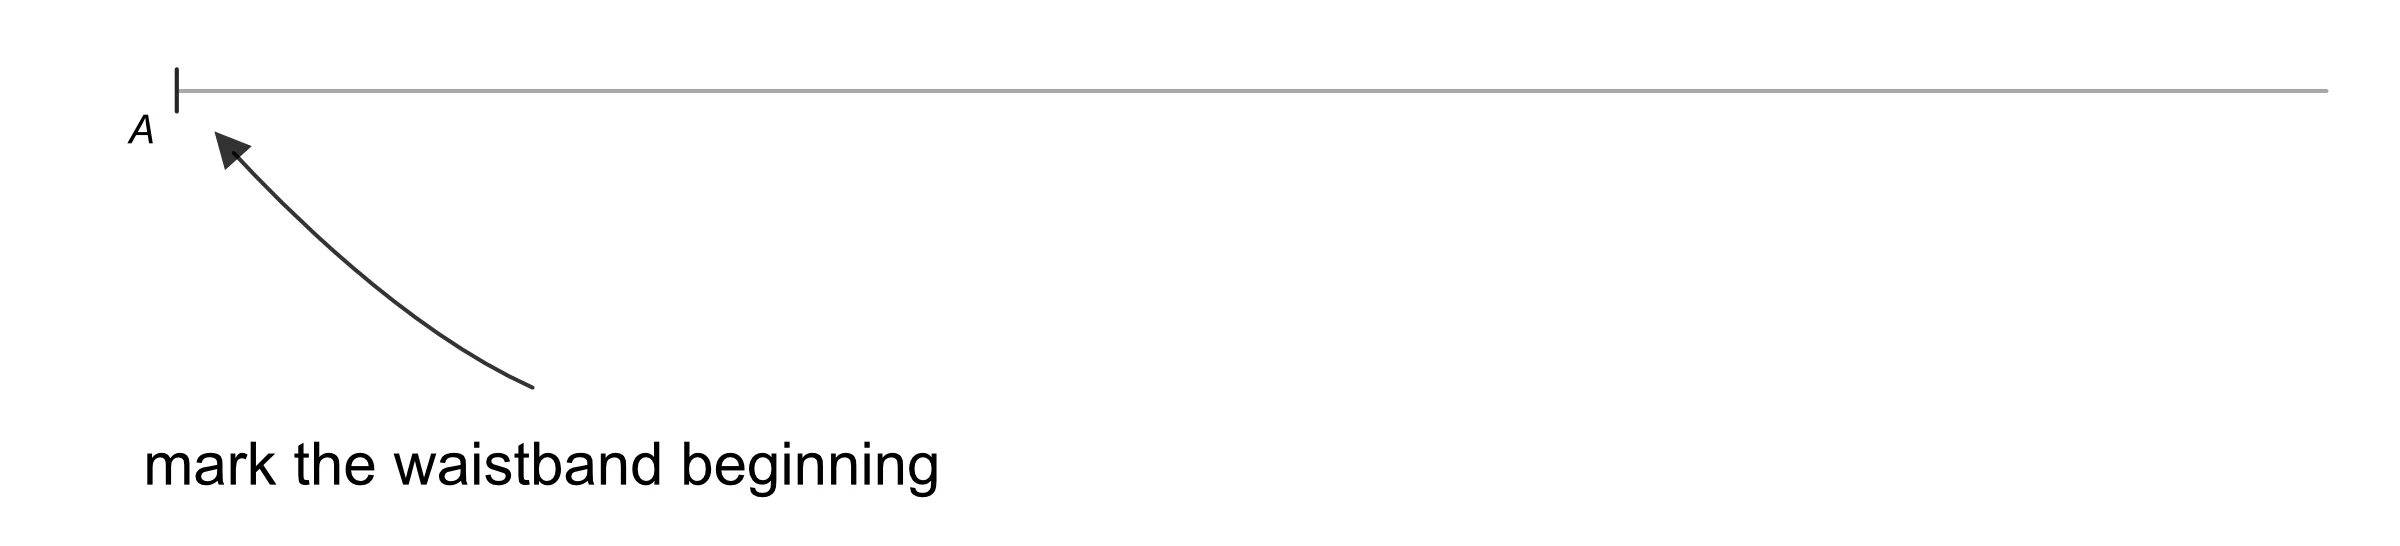
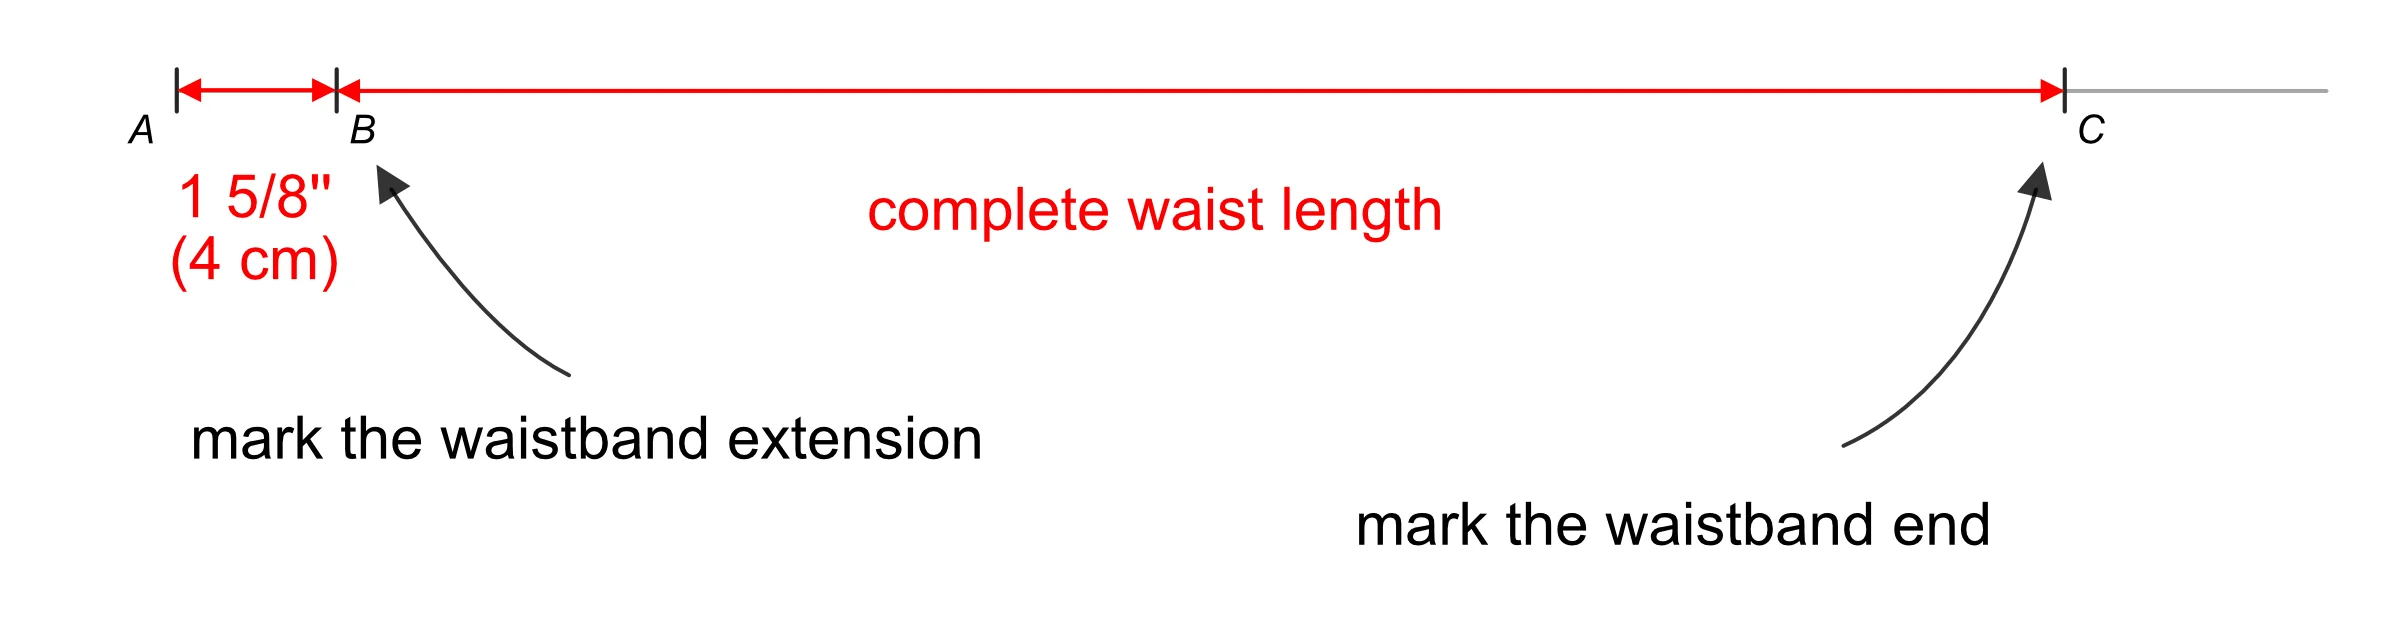
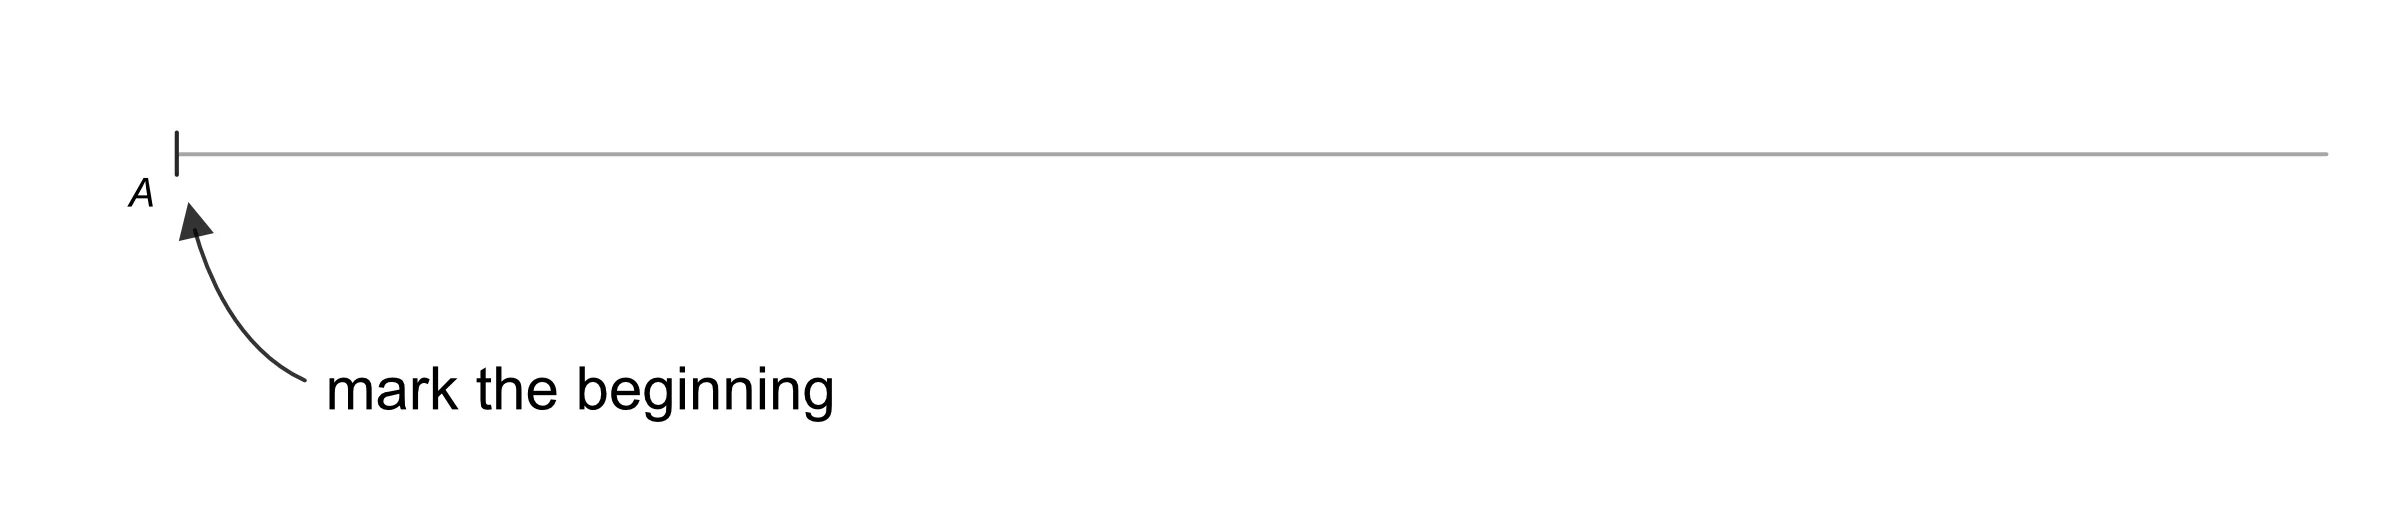
2. Using a long ruler, draw a horizontal line on a piece of tracing paper. Mark point A — the beginning of the waistband (see the image below).
3. On the horizontal line you have just drawn, mark points B and C.
The AB measurement is the extension of the waistband usually 1 1/4 – 2” (3 – 5 cm).
BC is the full waist measurement of the skirt or pants. (see the image
below).
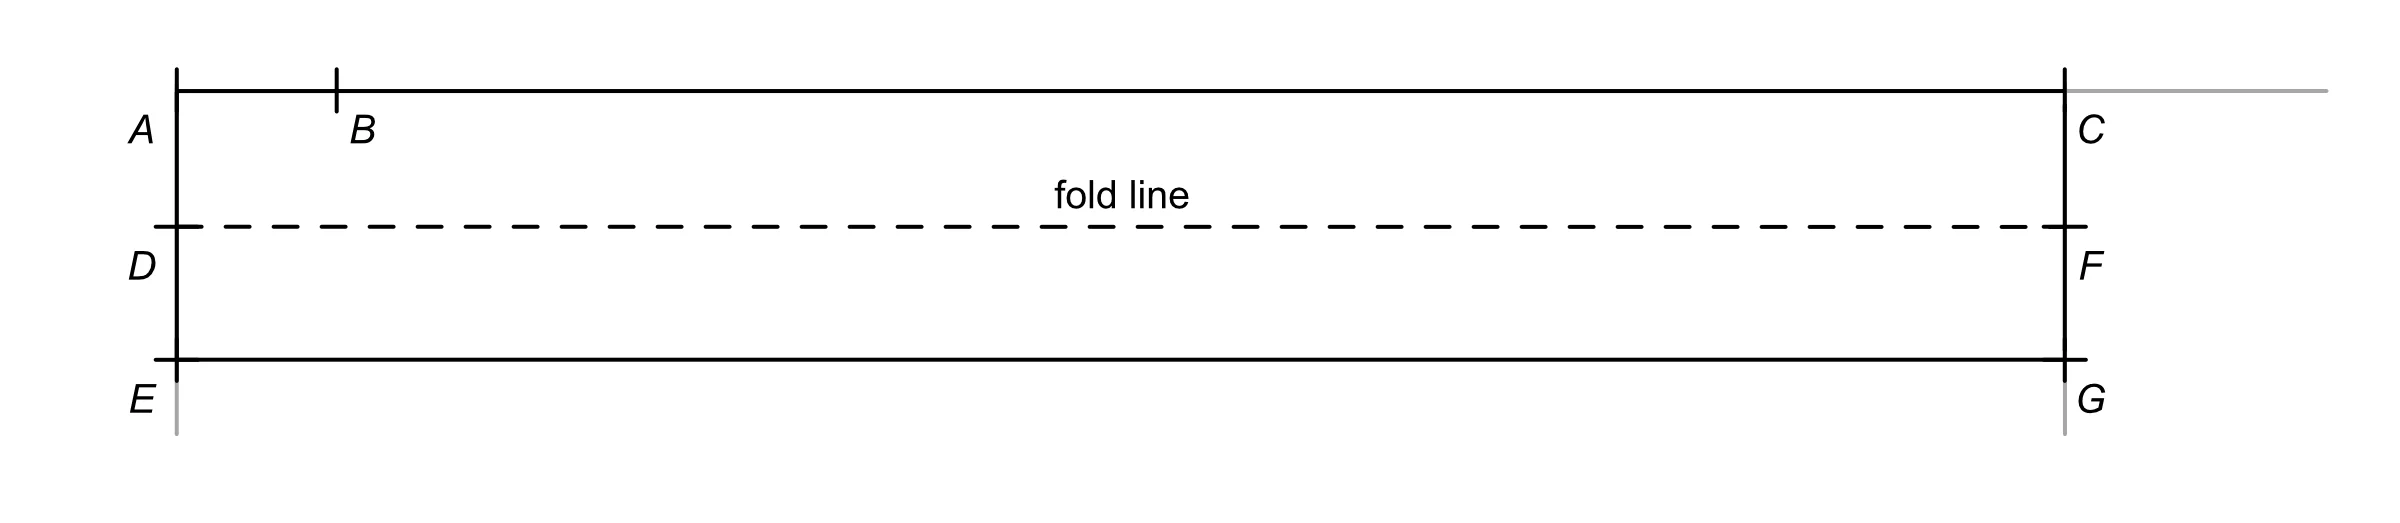
4. From points A and C, draw two perpendicular lines using a pencil (see the image below).

5. Decide on the waistband width — it is usually 2 – 5 cm (1 – 2 ”). On the vertical lines, mark points D, E, F, and G.

6.Using a dashed line, connect points D and F to draw the waistband fold line. Using a solid line, connect the following: A to G, C to I, and G to I.
7. Mark the button and buttonhole. The buttonhole is typically placed on the waistband extension (point AB), about 3/8”’ (1 cm) from the outer edge and centred vertically on the waistband. The button goes on the opposite end. Add notches for the centre front and side seams. The straight waistband with an extension is complete. You can trace it and use with your garment.

c) Curved waistband
Go for the curved waistband (also called the shaped waistband), if the waist of the skirt is quite curvy, or you prefer more shaping around the waist.
1. Measure and calculate the original full waist length. This means measuring the entire waistline — front and back — without including any darts.
2.Decide on the waistband width — usually 2 – 4”’ (5 – 10 cm). Lower the waistline of the skirt or trousers by this amount.
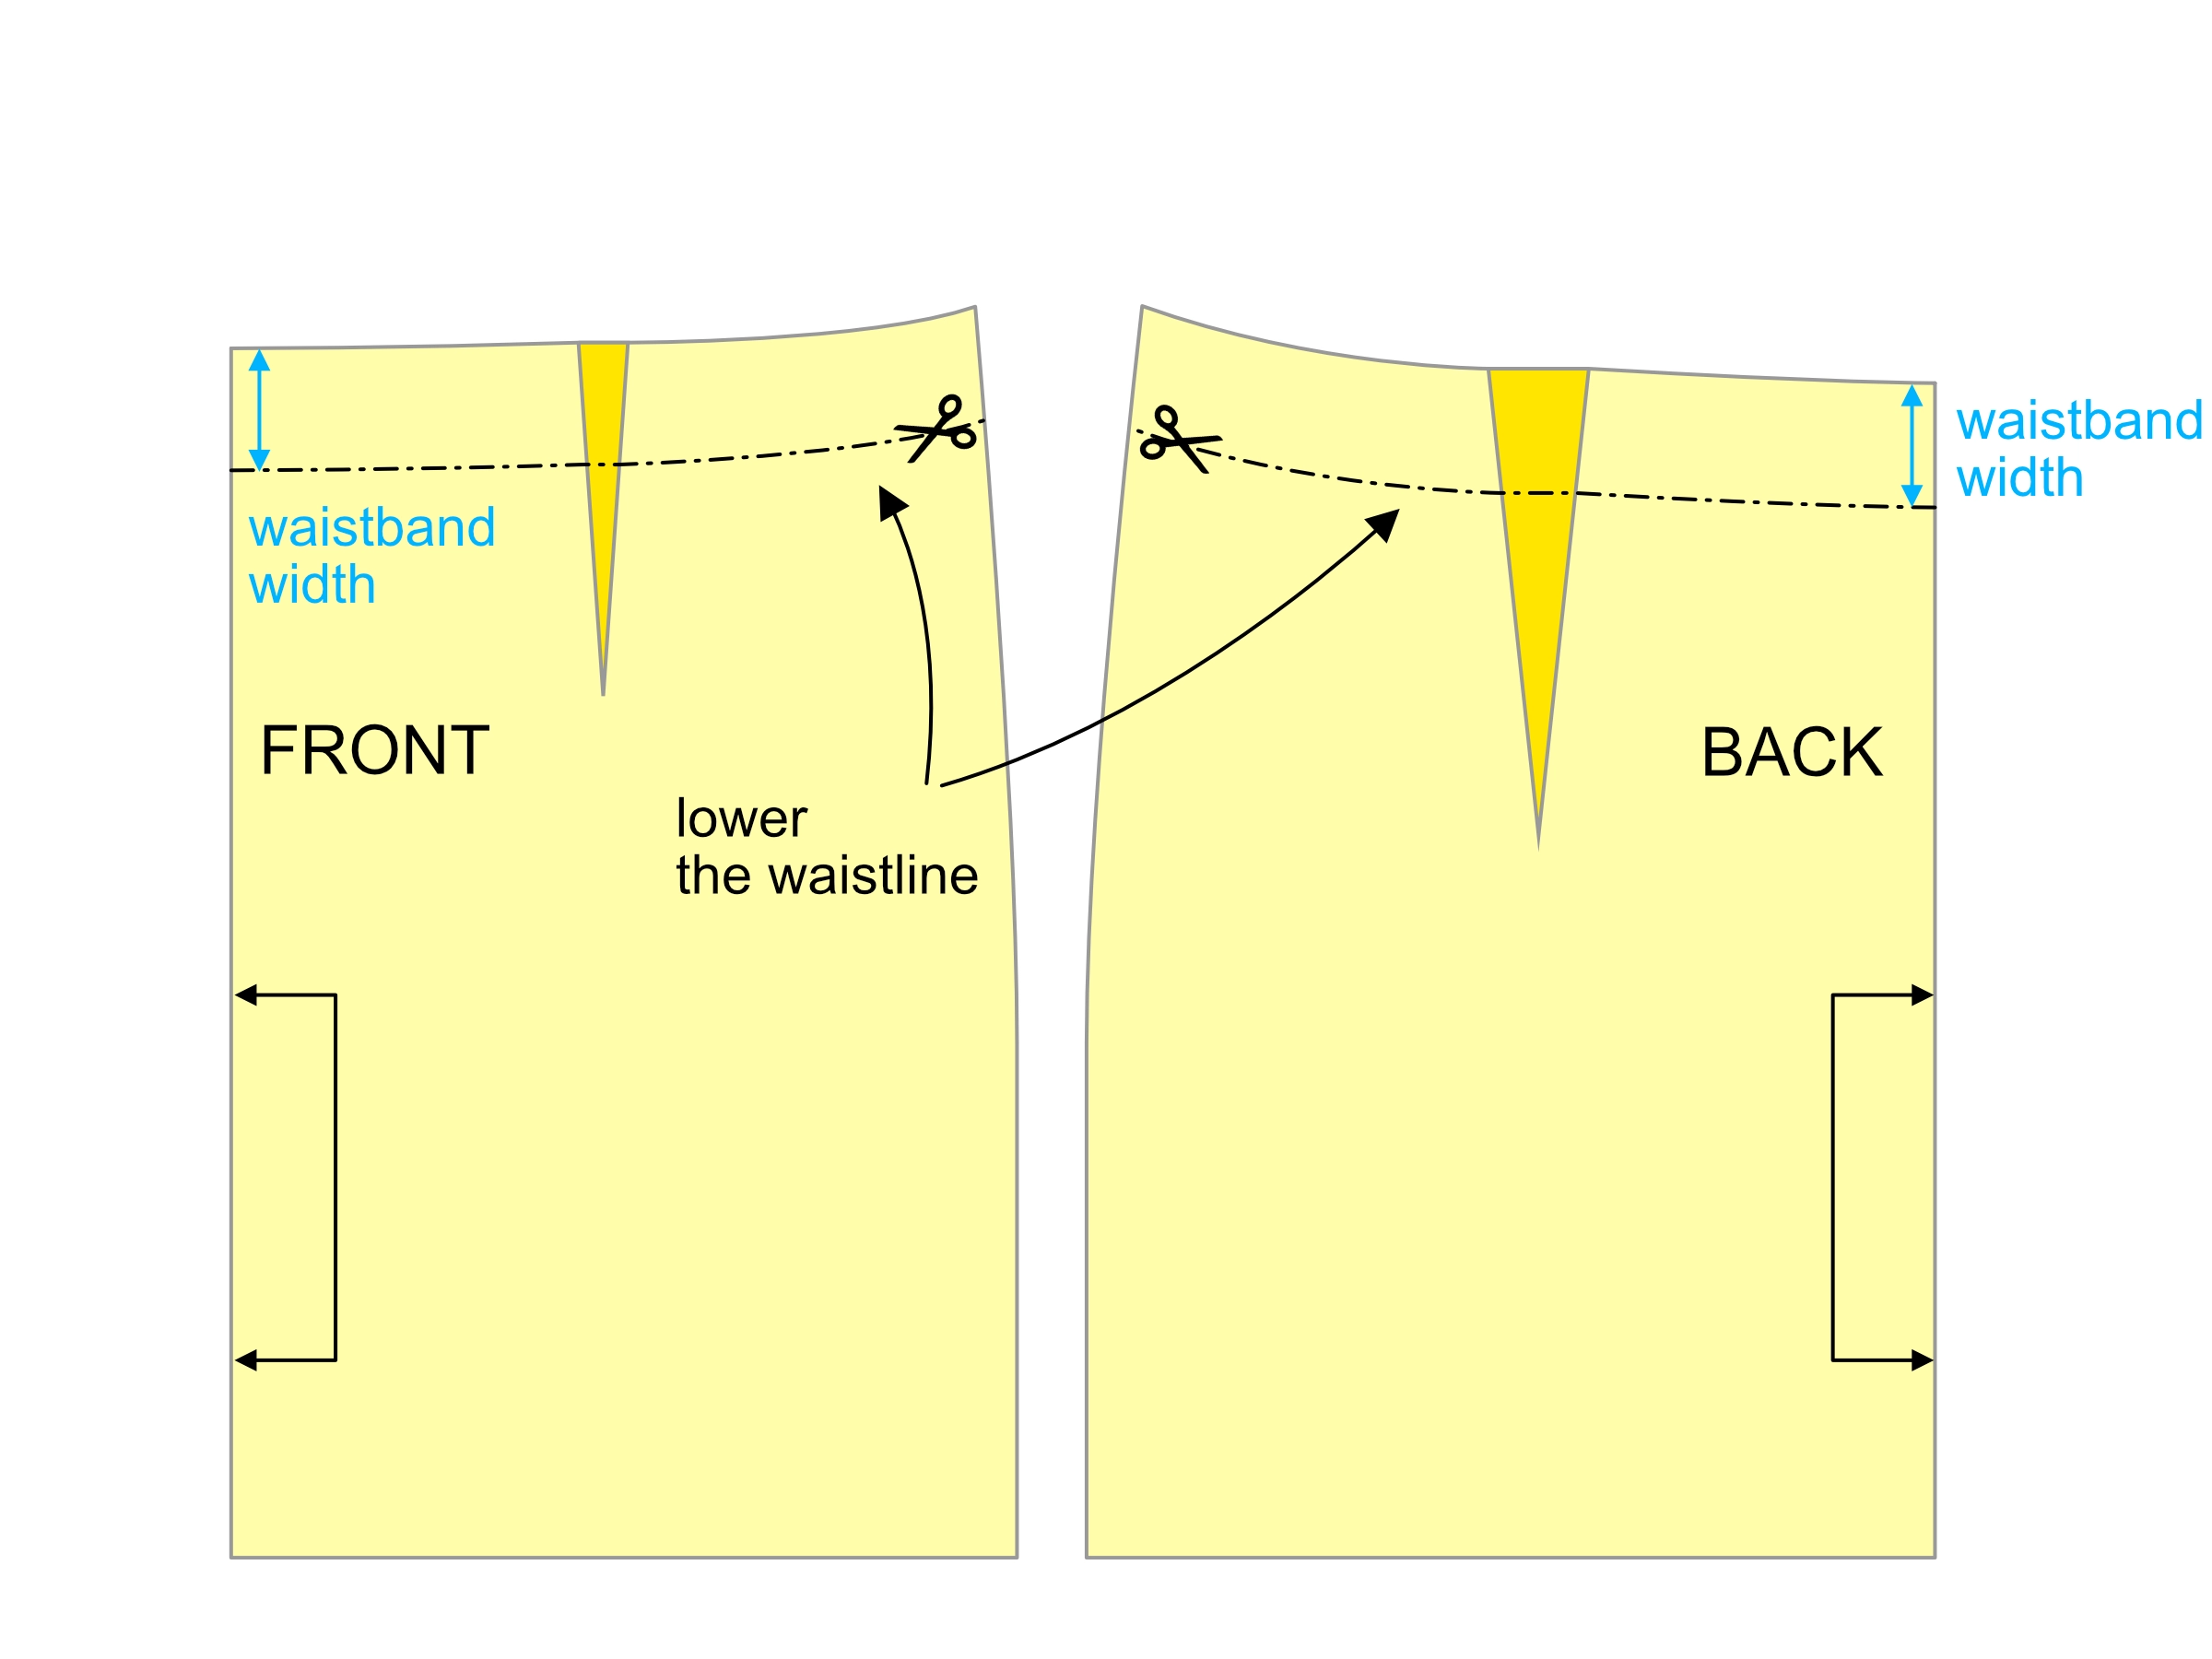
3.Measure the new waistline (after lowering it). Again, do not include the darts.

4.Draw a long horizontal line and mark point A — the beginning of the waistband.
5. Mark point B. AB = original waist length.

6. Using the chosen waistband width, draw a rectangle ABCD.

7.Cut out the rectangle and draw three vertical lines dividing it into four equal sections.

8. Cut along the vertical lines, leaving a small hinge at the top or bottom edge.
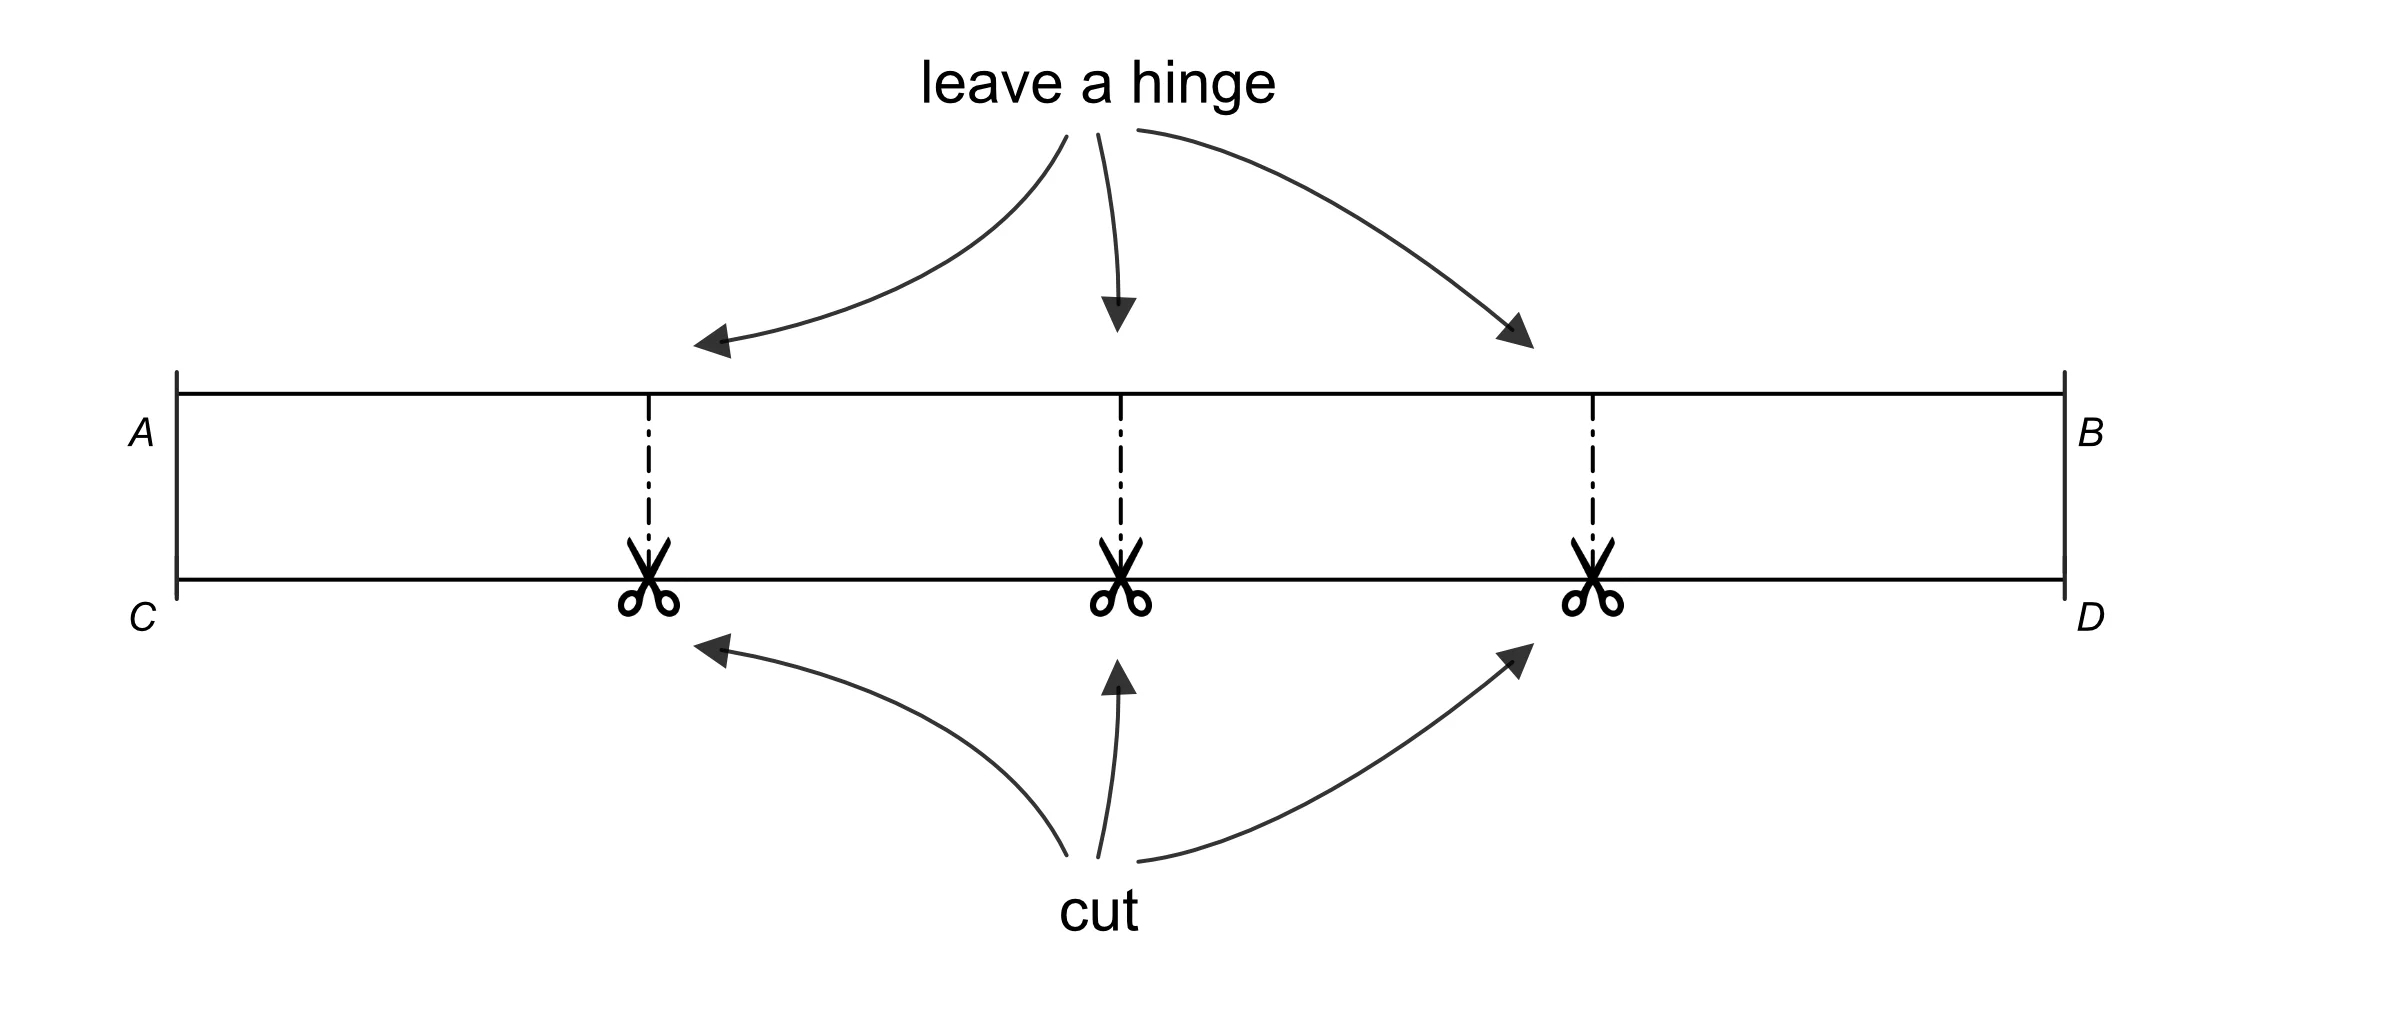
9. Evenly spread the waistband pieces until the bottom edge (CD) measures the lowered waist length.

10. Smooth out the curves and add notches for the centre front and side seams. The shaped waistband is now complete. Before sewing, cut two pieces — one for the outer waistband, and one for the inner waistband.
