


After exploring different possibilities of pleating, I finally started to create my own pleating designs. One of them is a folded star. I am probably going to create a few and use them as part of my Christmas postcards.
In this blog post, I’m going to describe how to fold a paper star. Let’s start with the necessary tools.
1. Prepare tools for pleating a paper star
- 1 piece of A4 kraft paper at least 170 gsm (grams per square meter)
- Ruler
- Quilting/omnigrid ruler (optional)
- Mechanical or classic pencil (for drawing the template)
- Art knife
- Cutting matt
2. Prepare the paper star template
There are two ways of transferring the star template you can see in the image below to your A4 kraft paper.

Method a) Print the template out on your home printer directly on the kraft paper
CHECK THE POSSIBILITIES OF YOUR HOME PRINTER FIRST. NEVER USE PAPER WITH HIGHER GSM THAN YOUR HOME PRINTER ALLOWS YOU TO. IT MAY DAMAGE YOUR PRINTER!
Once you have found out the maximum paper GSM of your printer, decide whether you will print the template directly on the paper that will become the pleated star.
Method b) Draw the template for a star manually
If you decided to draw the star manually, pick your kraft paper, ruler and mechanical pencil and follow the scheme and instructions below in order to draw the template.

1. In the center of the paper draw three horizontal lines 1 cm (3/8 inch) apart (see the image below). I use my quilting ruler to draw these lines.
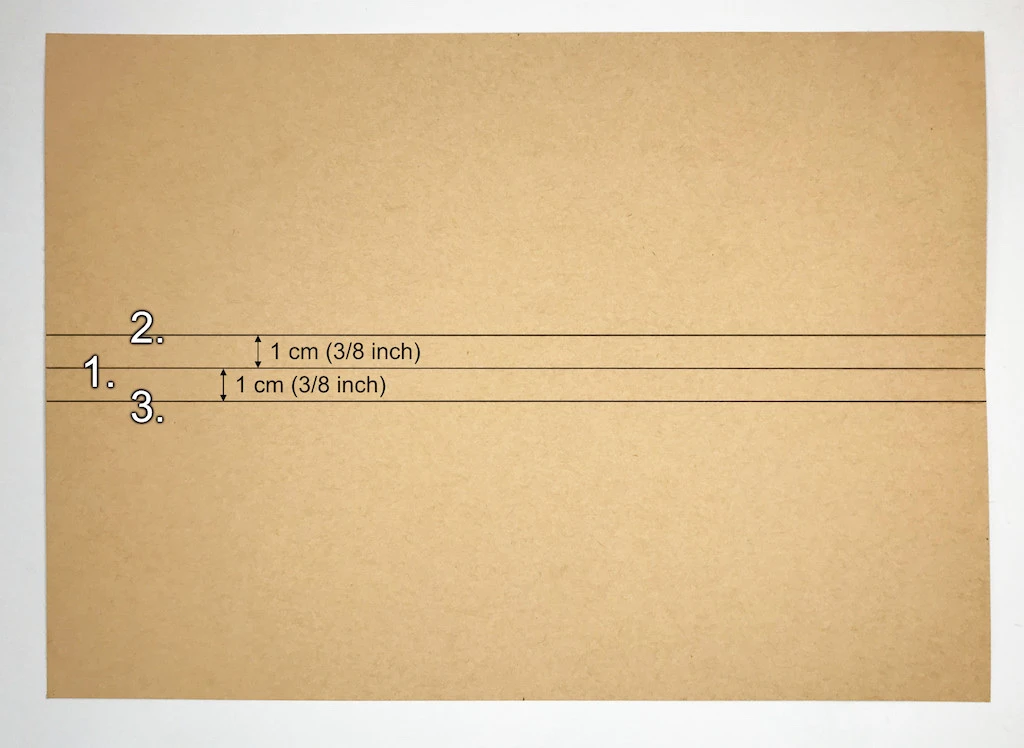
2. In the center of the paper draw three vertical lines 1 cm (3/8 inch) apart (see the image below).

3. Draw a diagonal line across the opposite edges of the square created by the vertical and horizontal lines (see the image below).
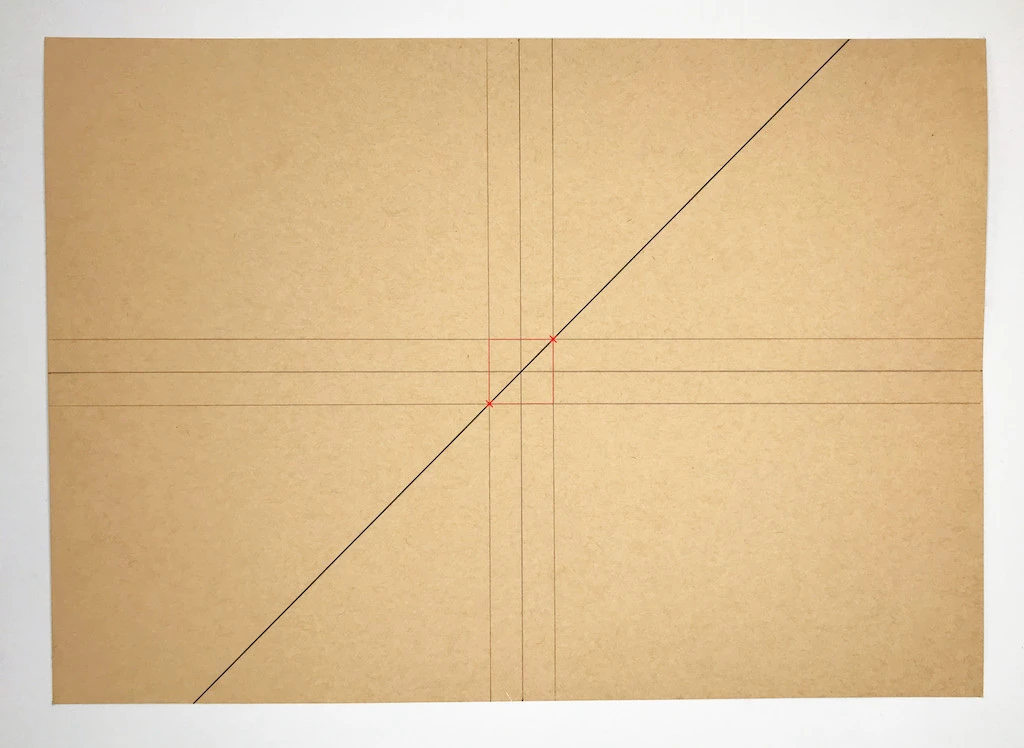
4. On both sides add a parallel diagonal line 1 cm (3/8 inch) apart from the first diagonal line. I use my quilting ruler for this. (see the image below).

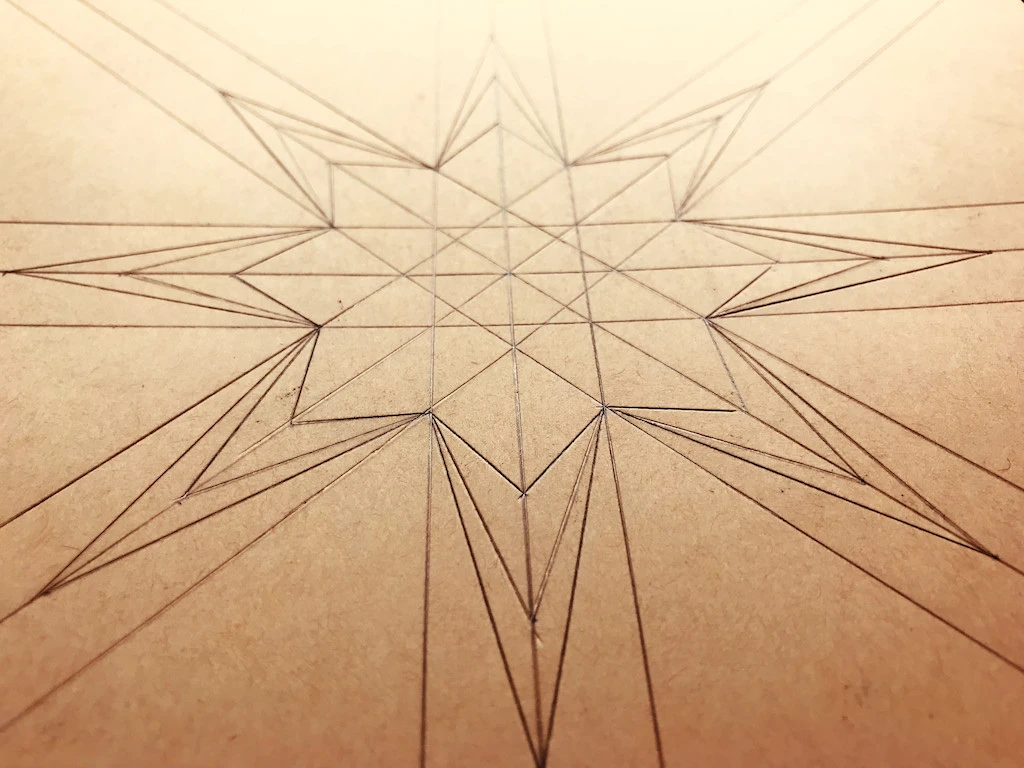
5. Draw another set of symmetrical diagonal lines the same way (see the images below).

6. Draw the points of the star according to the scheme (see the image below) and you will end up with what looks like a triple star.


3. Pre-press all the lines
Using an art knife and ruler, pre-press all the vertical and diagonal lines on the kraft paper (see the image below). You do not need a super sharp art knife since the pleats should be pre-pressed with its spine (not the blade).
Be as accurate as possible in order to achieve high-quality results. Otherwise, the outcome may look messy. DO NOT FORGET to use a cutting matt so that your table is not scratched with the art knife.

You can see that all the lines are pre-pressed in the star image below.
4. Fold the paper to get the pleated star
1. First fold all the long lines drawn across the paper (see the image below).

2. Then start folding the paper around the star closest to the centre. Push upwards all the short star lines. You will get a small folded star (see the image below).
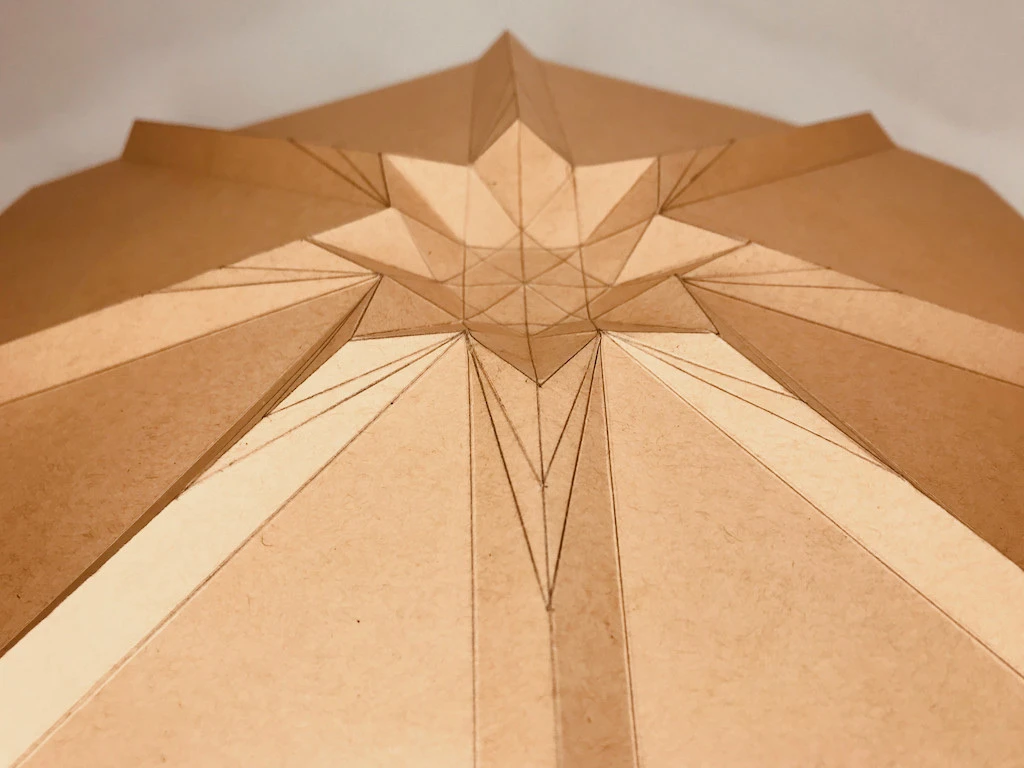
3. In the next step, while you are folding the middle star lines downwards, fold right away upwards the long lines forming the arms of the outer star (see the images below).

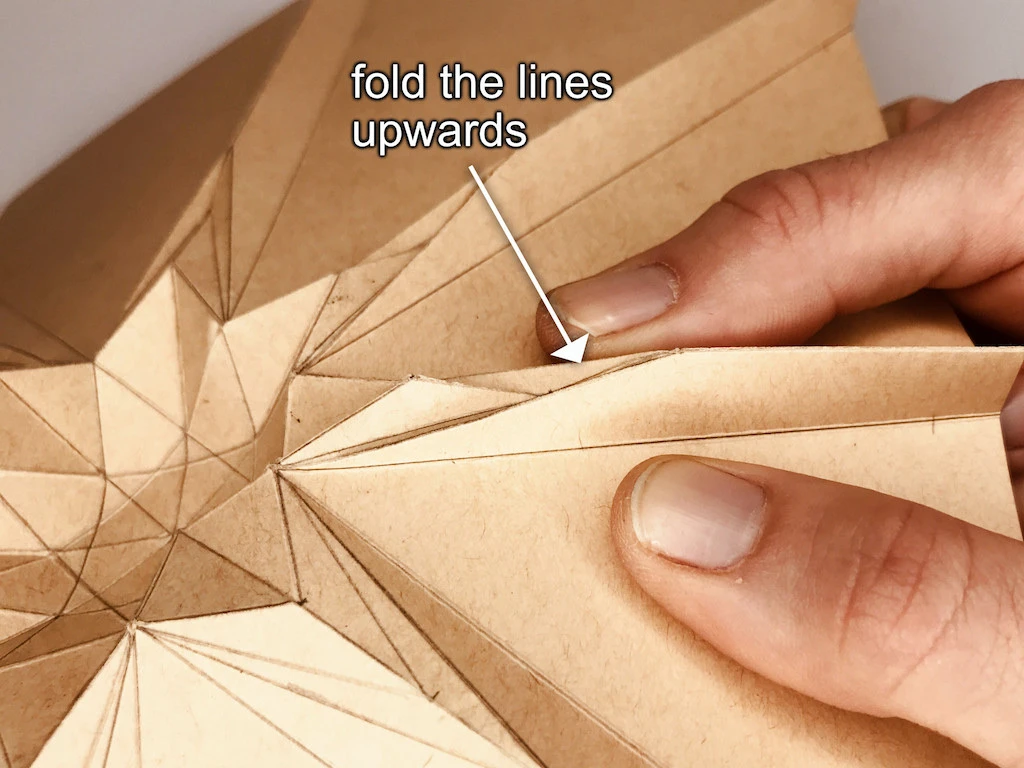
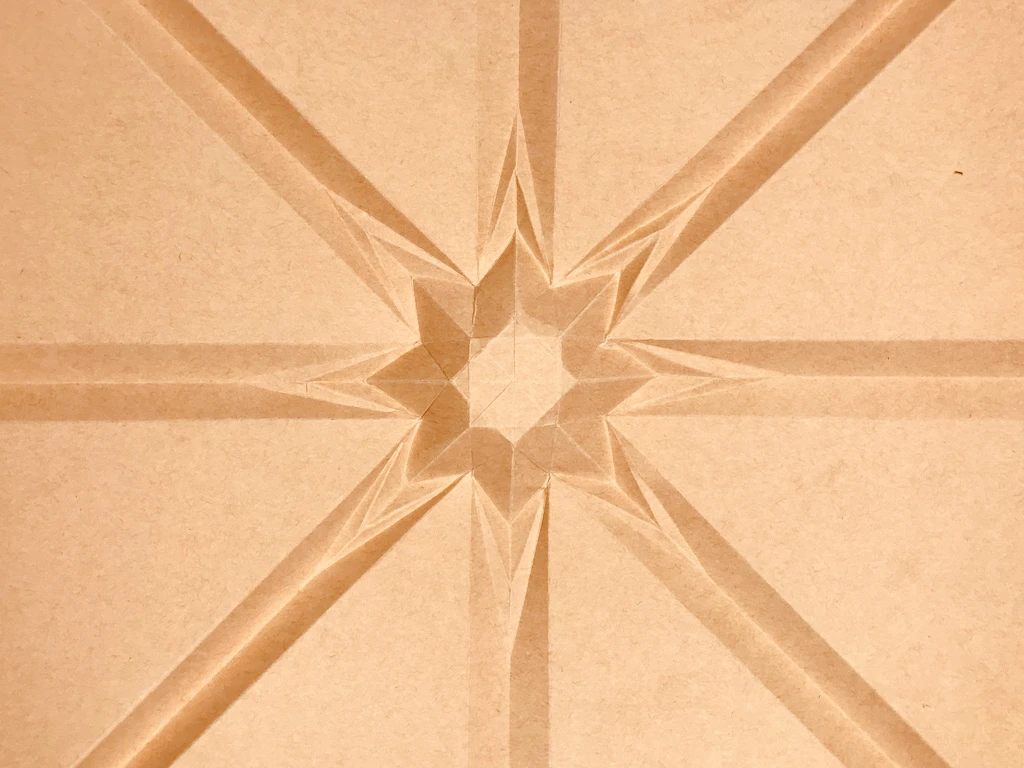
4. Continue folding the paper downwards and upwards until you complete both middle and outer shapes of each arm and hence the whole star. Now it is ready and invites you to make your own.

Also look at the other side of the paper. The star looks great even from the back.
Conclusion: How to Fold A Star
I hope you enjoy the folded star and found this tutorial interesting. I also hope it inspired you to create your own pleating designs. If you are interested not only in pleating paper but also pleating fabric, read my previous blog posts about hand pleating fabric: How To Pleat Fabric. Part 1, How To Pleat Fabric. Part 2, How To Pleat Fabric. Part 3 and How To Pleat Fabric. Part 4.