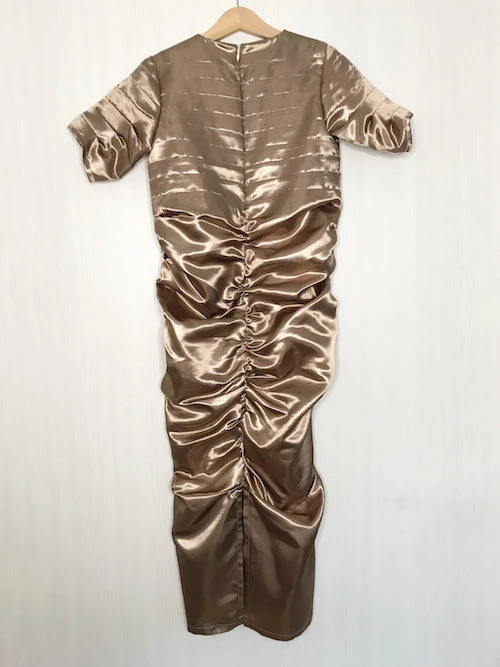
For Halloween 2022 my family and I decided to dress as characters from the Harry Potter movies. In this blog post, I’ll describe how to make a Narcissa Malfoy (Draco Malfoy‘s mom) beige dress with a concealed zipper. As the dress was made for a child, there is no shaping at the bust. Therefore, I used a dartless bodice pattern. Due to the lack of time, I didn’t sew a lining.
To sew the dress it is useful to have some experience with sewing garments and adjusting patterns.
This beige dress is inspired by a dress called “La Sirene” (also called the Lobster dress) designed by the American fashion designer Charles James. I happen to have a book about his work and found it very helpful for designing the dress.
In this tutorial you will find the following:
- What will you need to sew the dress?
- How to modify a basic sleeve pattern to draft the dress sleeve?
- How to modify a basic dart-less bodice pattern to draft the dress bodice?
- How to draft the skirt of the beige dress?
- How to sew the beige Narcissa Malfoy dress?
What will you need to sew the dress?
To sew a Narcissa Malfoy beige dress you will need:
- basic dartless bodice pattern
- basic sleeve pattern
- beige satin fabric
- a long concealed zipper (length: from the neckline to the hipline)
The skirt of the dress will be a “prolonged” bodice. Make sure that the bottom of the bodice is wide enough to accommodate your hips.
How to modify a basic sleeve pattern to draft the dress sleeve?
The sleeve I have prepared for altering is a standard set-in sleeve with one seam.
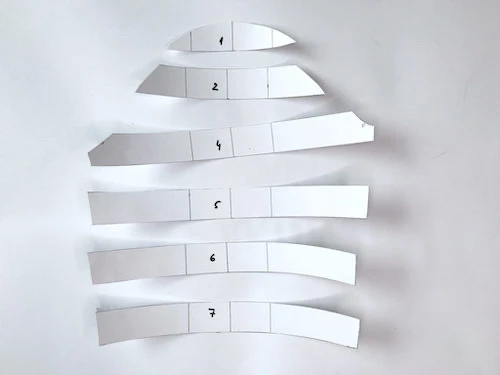
1. On the sleeve pattern, draw a vertical line indicating the centre of the sleeve.
2. Draw 6 horizontal lines that are 3 cm (1 3/16”) apart dividing the pattern into 7 segments. These lines should be perpendicular to the vertical line (see the image below).

3. Draw two vertical lines 4 cm (about 1 1/2”) apart from the sleeve centre and number the segments (see the image below). The numbering will help you arrange the individual parts of the pattern correctly later in the process :).

4. Slash the pattern along the drawn lines (see the images below).

5. Draw an inverted T-shape on a blank sheet of paper (see the image below).

6. Glue the sleeve pattern rows evenly positioning them 2 cm (about 13/16”) apart (see the image below).
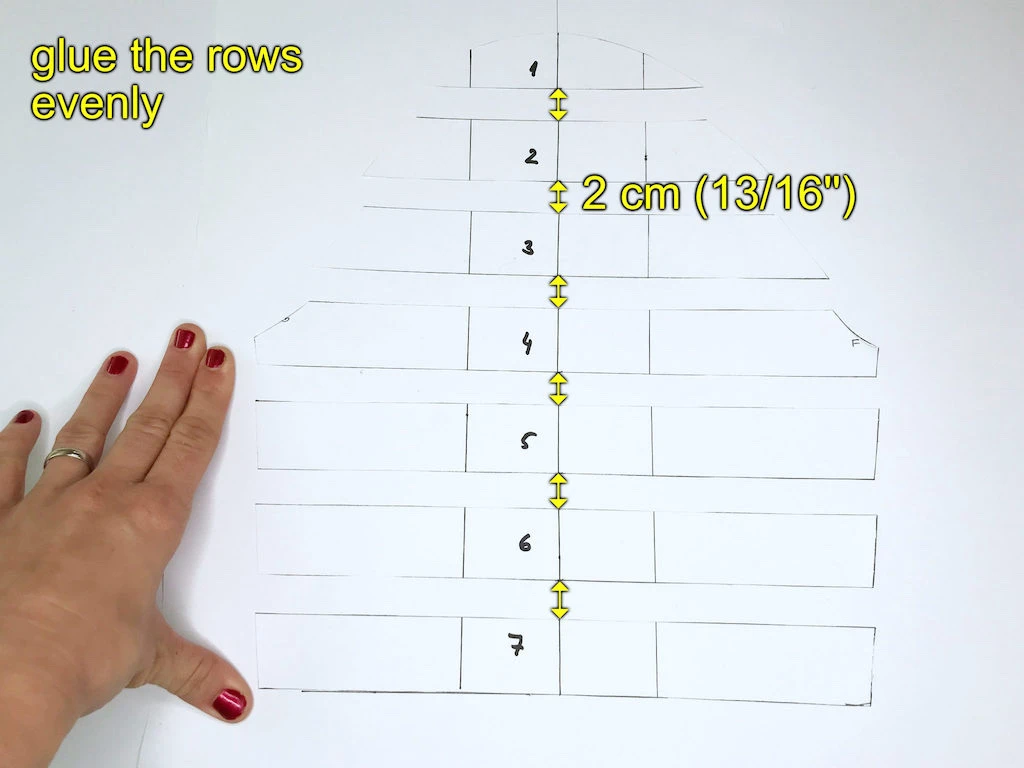
7. Outline the sleeve pattern, cut it out from the paper and your sleeve pattern is ready (see the image below).

How to modify a basic bodice pattern to draft the Narcissa Malfoy dress bodice?
The process for creating the bodice is similar to creating the sleeve pattern. That means: slashing and spreading the pattern in order to sew tucks towards the wrong side of the pattern piece. Let’s start with the FRONT pattern piece.
1. Before making any major modifications to the basic bodice pattern pieces, develop a simple facing for the neckline (see the image below).

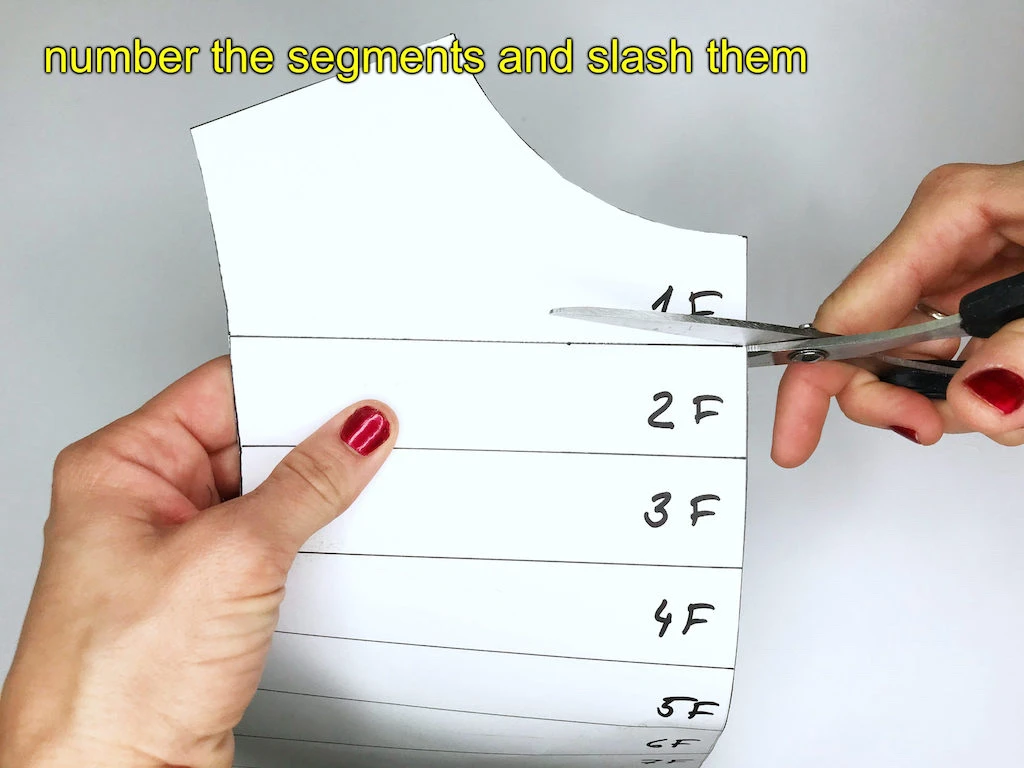
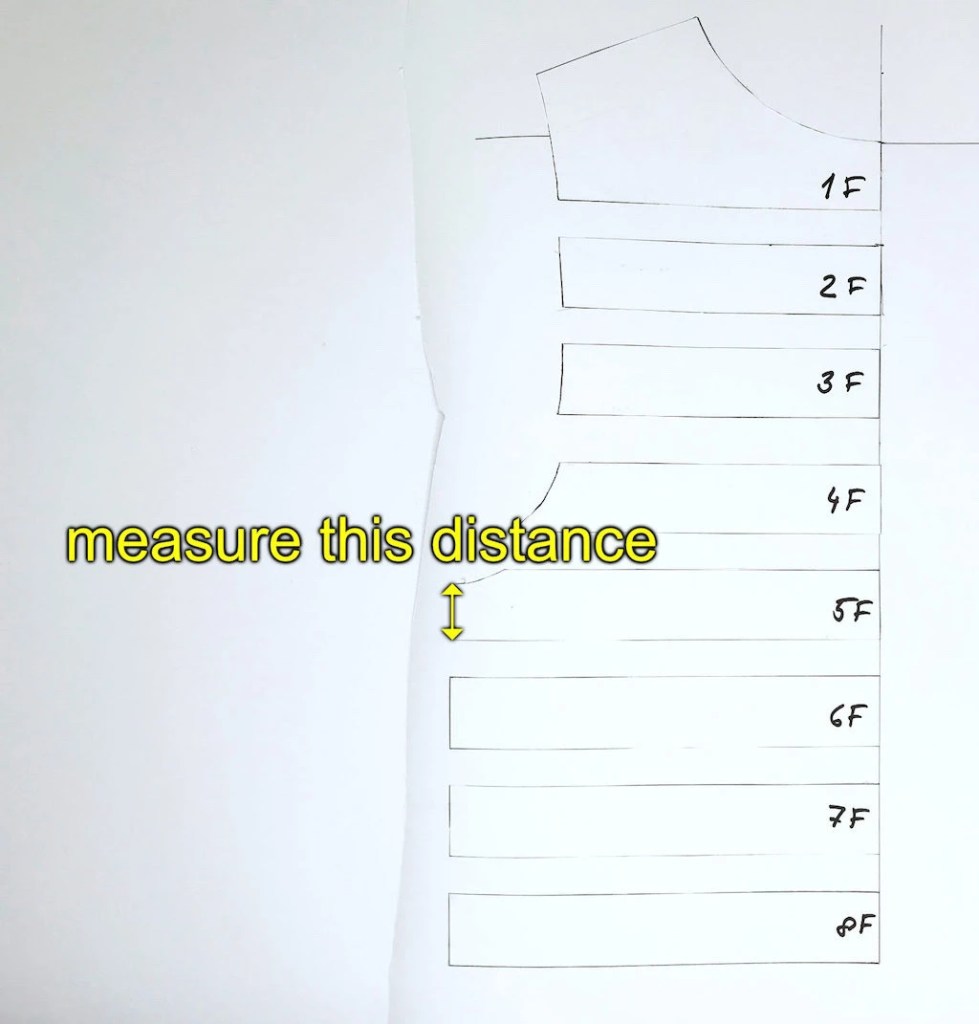
2. Below the neckline draw horizontal lines that are 3 cm (1 3/16”) apart dividing the bodice FRONT pattern into segments of equal width. The number of lines and segments depends on your bodice pattern (see the image below). If the last segment of your bodice cannot be made full length (3 cm – 1 3/16”), simply cut away that incomplete part.

3. Number the segments (this is important, remember? 🙂 and slash the pattern along the horizontal lines (see the images below).
4. Draw a T-shape on a sheet of paper and start gluing the segments from the top to the bottom. Again, spread them evenly – make the distance same as on the sleeve pattern 2 cm (13/16”) as you did with the sleeve pattern (see the image below).

5. Outline the pattern, cut it out from the paper and the bodice FRONT is ready (see the image below).

Apply the same steps to the bodice BACK pattern piece.
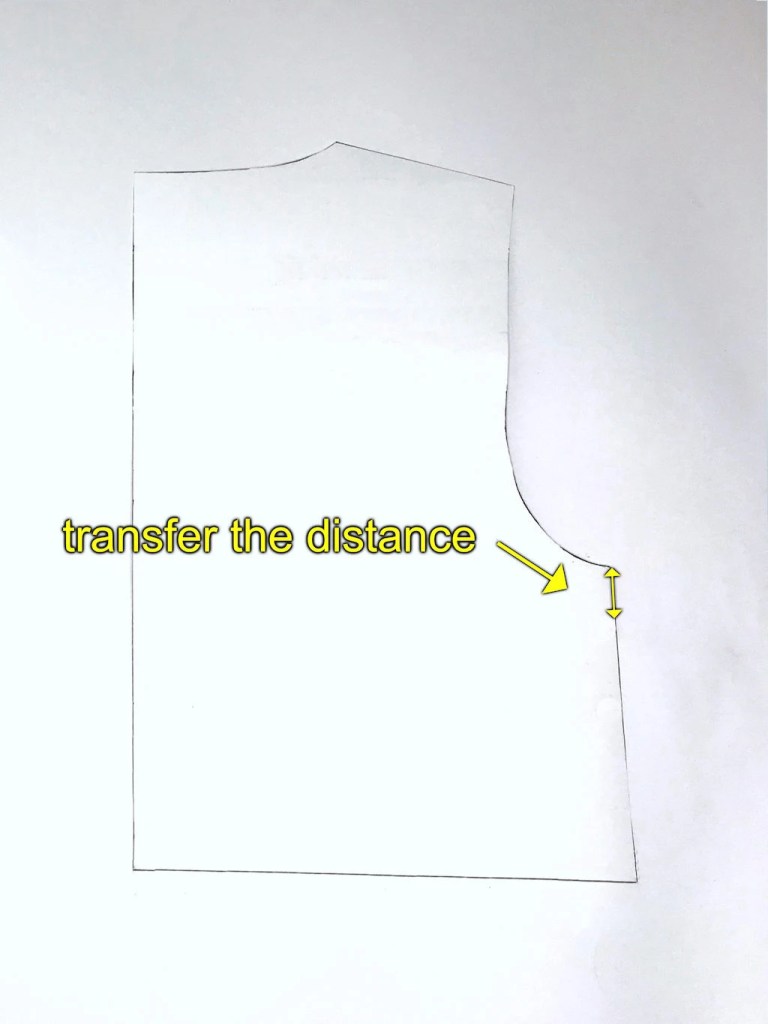
Keep in mind that the lines under the armhole should match at the side seam. At the bodice FRONT measure the distance between the armhole and the line below it. Transfer this measurement to the bodice BACK and make the distance between the armhole and first line below it even (see the images below).
7. Draw the first line below the armhole (see the image below).
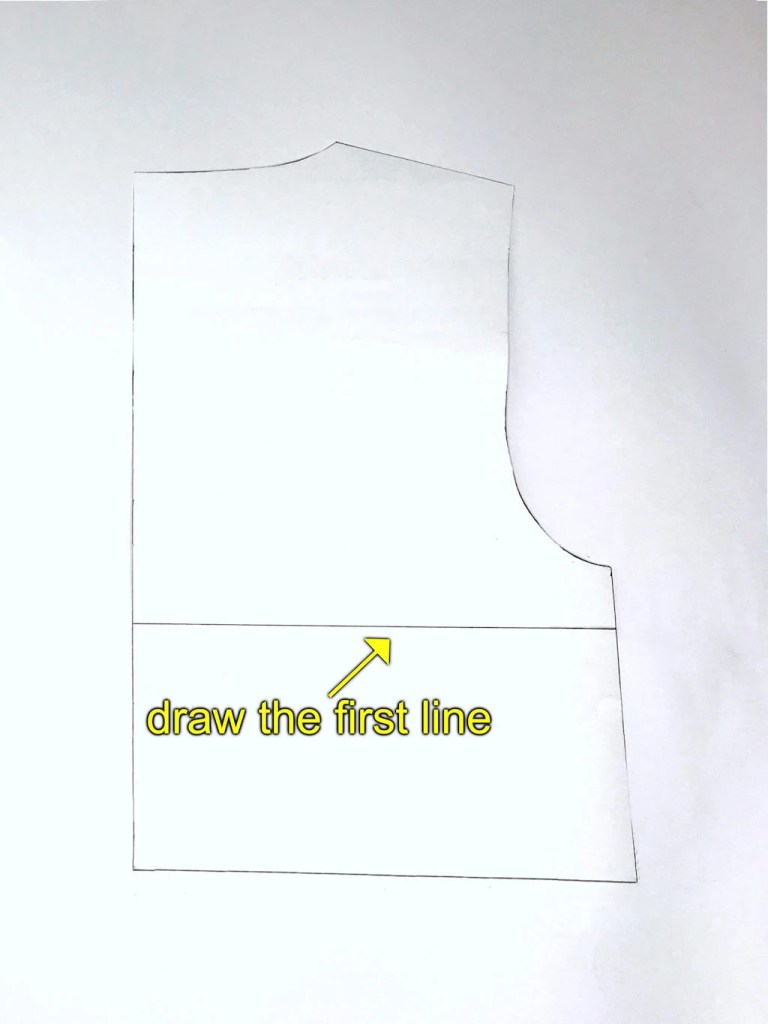
8. Draw all the remaining horizontal lines keeping the distance between them equal – 3 cm (1 3/16”). Don’t forget to number the segments so that you can arrange them correctly after slashing.

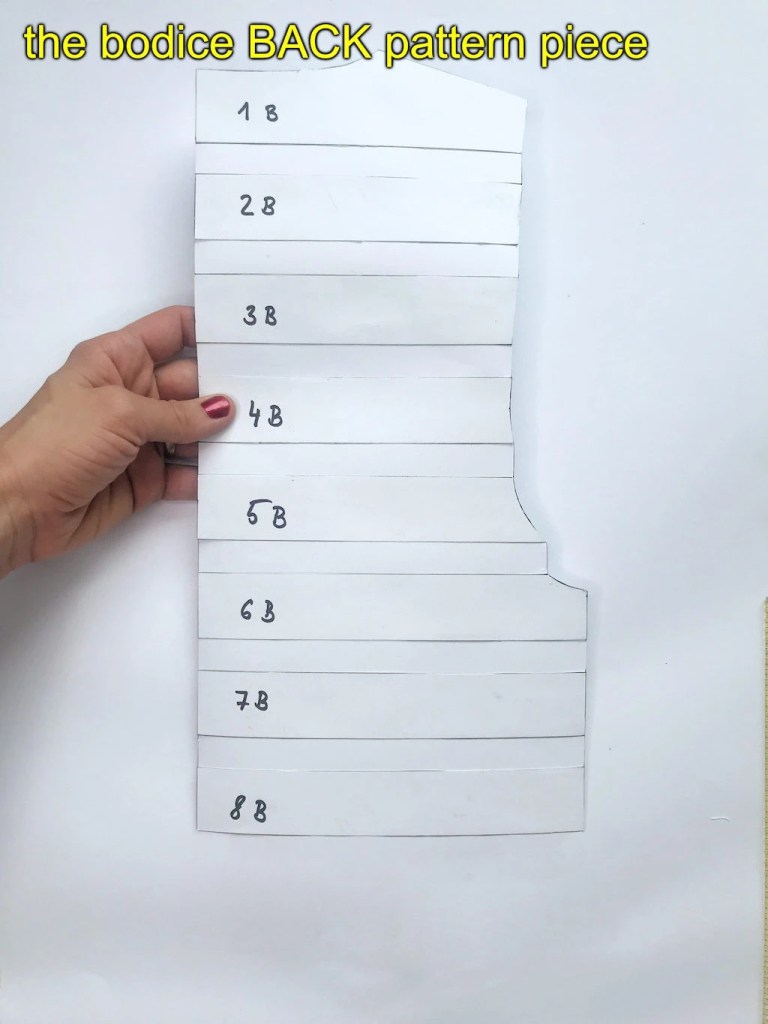
9. Slash the segments and glue them evenly 2 cm (1 3/16”) apart as you did with the bodice FRONT pattern piece. At this phase, the bodice BACK is ready and you can cut the pattern out from the paper.
How to draft the skirt of the beige dress?
Drafting a pattern on a piece of paper would be really time – and paper-consuming. I recommend sketching the future pattern on a A4 sheet of paper noting all the dimensions and measurements.
1. Take the following measurements:
1) From the bottom of the bodice to your ankles.
2) From the bottom of the bodice to your ankles.
3) From your knees to your ankles.
Put down all three measurements (see the images below).


2. First, calculate the total amount of horizontal segments for the skirt (see the formula below). The segments have to be identical with the ones designed on the bodice. That means they will be 3 cm (1 3/16”) wide.
number of segments = bodice to knees measurement / 3 (for measurement in cm)
number of segments = bodice to knees measurement / 1 3/16 (for measurement in inches)
ROUND THE RESULT DOWN TO A WHOLE NUMBER.
3. To make the skirt consistent with the bodice, these segments have to be slashed and spread horizontally using a 2 cm (13/16”) spacing.
At this phase you will calculate the complete length and width of the skirt pattern according to the following formula:
skirt length = number of segments * 5 + knees to ankles measurement (for measurement in cm)
skirt length = number of segments * 2 + knees to ankles measurement (for measurement in inches)
skirt width = complete bodice front width + complete bodice back width
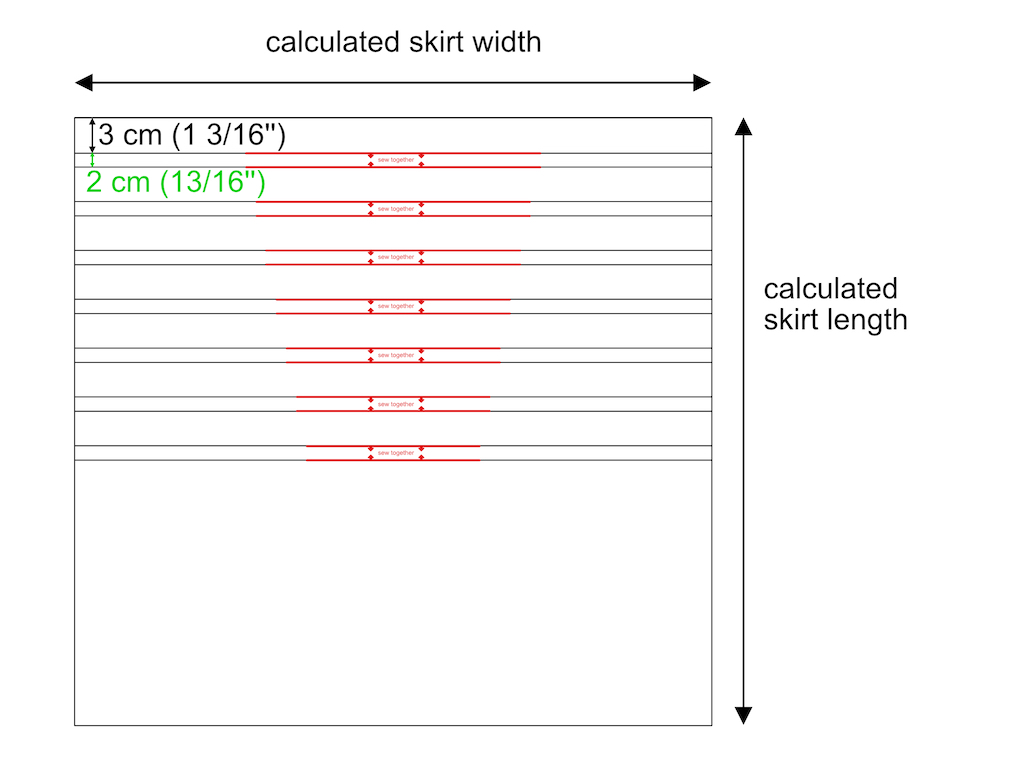
4. Draw the sewing scheme for the skirt. From the waist to the knees, draw horizontal lines (future tucks); below the knees there will be no tucks. The scheme below is an illustration and has fewer tucks (and lines) than you will have on your skirt.
Black colour indicates the horizontal lines, while the red lines indicate the width of the future tucks. These tucks should be gradually narrower and narrower. The narrowest one should be aligned with your knees.
How to sew a Narcissa Malfoy beige dress
Now it’s time to start sewing all the pattern pieces of dress together. Let’s begin with the sleeves as those are the easiest to sew.
Sewing the sleeves of the dress
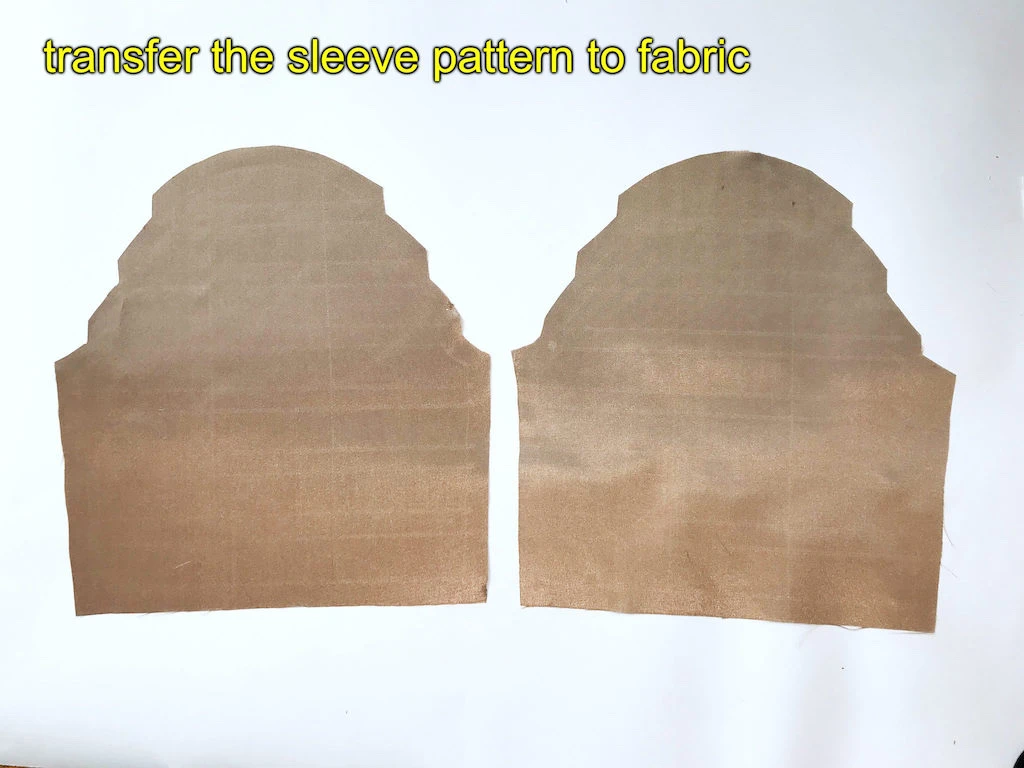
1. Transfer the sleeve pattern piece to the fabric. Do not forget to transfer both the horizontal and vertical lines you have drawn (see the image below). You will sew tucks following these lines. As the fabric is quite shiny, the lines are not that visible in the image below. But they are there.
2. Sew the horizontal lines. On the sleeve cap, sew the full lines, while below, continue with stitching together the middle part only (see the images below).

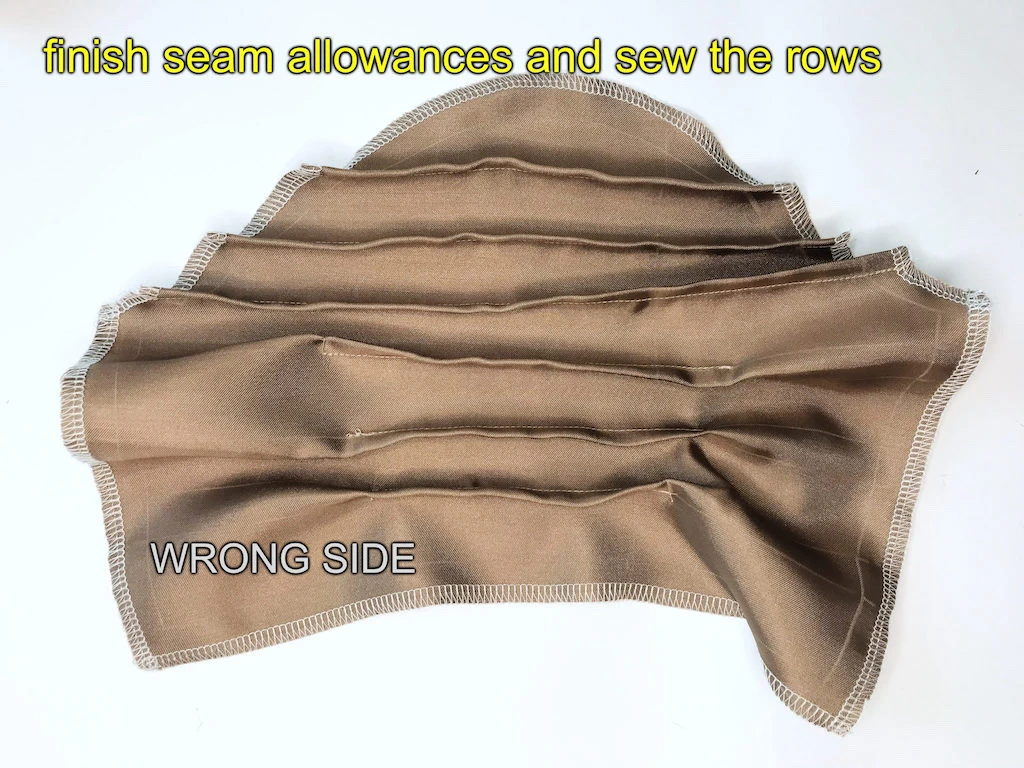
3. Press the sleeve. Make sure the folds on the wrong side head towards the sleeve hem (see the images below).


4. Sew the sleeve side seam, press it open and hem the sleeve (see the image below). Repeat these steps for both sleeves.


Sewing the bodice of the dress
Let’s start with the BACK pattern piece. Keep in mind that you will sew two symmetric parts of the bodice.
1. Just like before, transfer the pattern on your design fabric and cut out the pattern. The fabric looks too long, but don’t worry, sewing the tucks will result in the proper length of the bodice.

2. Sew the horizontal lines/tucks (see the images below).

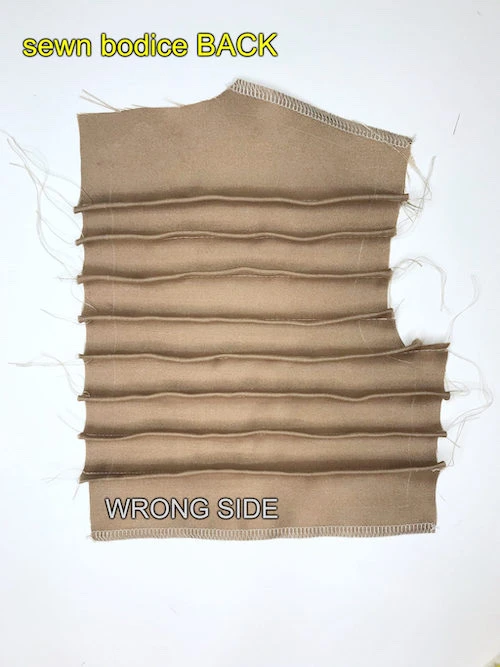
3. Press the bodice the same way you have pressed the sleeves and finish all the seam allowances except the one at the neckline (see the images below).


Make the other bodice BACK piece and continue with sewing the bodice FRONT.
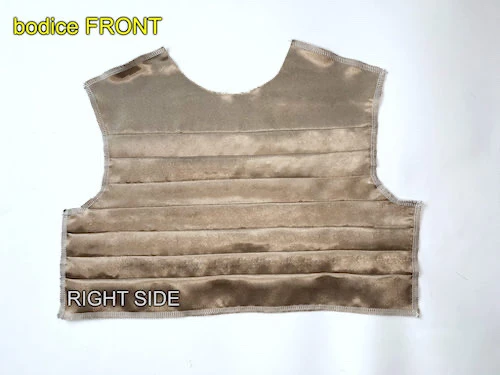
4. Transfer the bodice FRONT pattern piece with the drawn horizontal lines, cut it out and sew (see the images below).
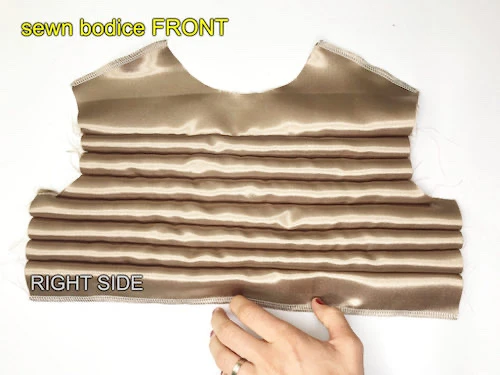

5. Press the bodice the same way you have pressed the sleeves and finish all the seam allowances except the one at the neckline (see the images below).

6. Sew the FRONT and BACK pattern pieces together at the shoulder and side seams, then press the seams open (see the images below).


7. Now, sew both set-in sleeves to the bodice and continue with preparing the skirt of the dress (see the image below.).

Sewing the skirt of the dress
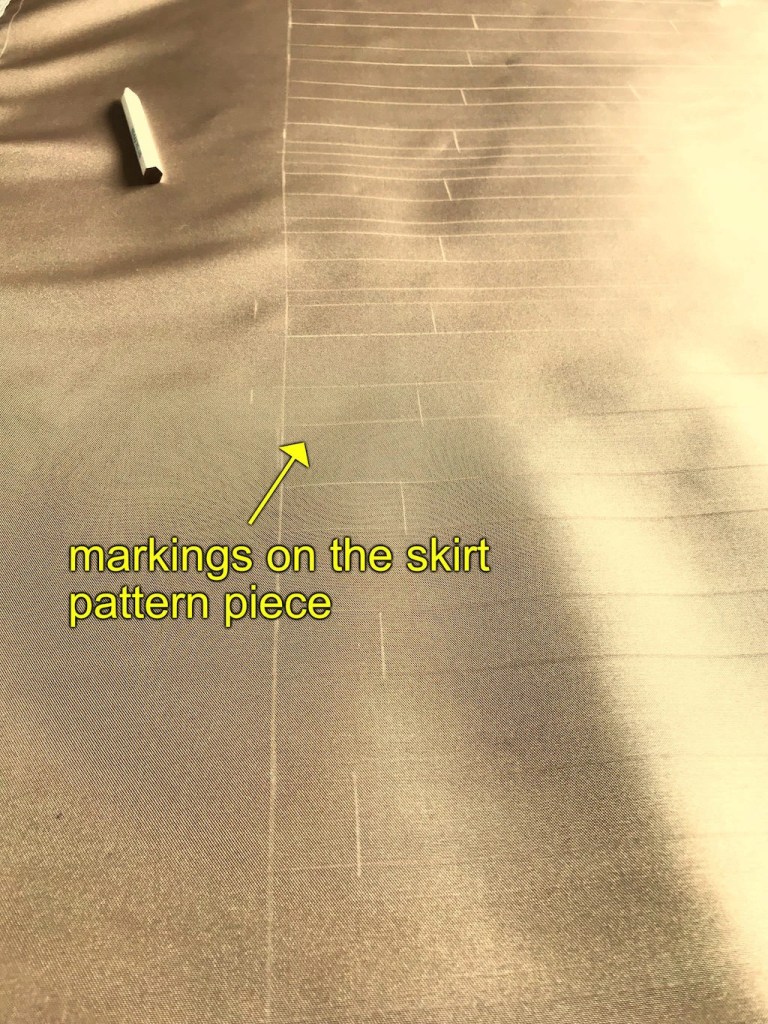
Prepare the fabric for the skirt, cut it according your calculations and draw horizontal lines on its wrong side. However, check beforehand that the markings can be removed once you have completed the dress.
1. Draw the horizontal lines as well as the beginnings and ends of each tuck (see the image below).
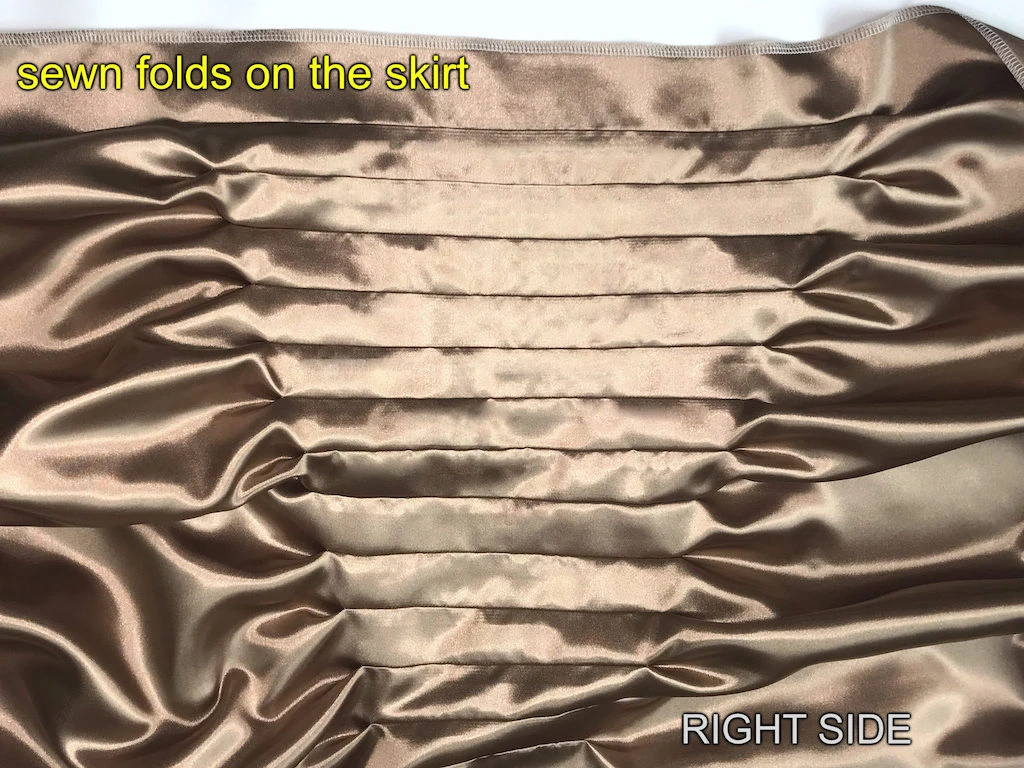
2. Sew the tucks along the markings and press them the same way you pressed the sleeve and bodice (see the image below). Now, the skirt should have the correct length: bodice bottom to ankles.
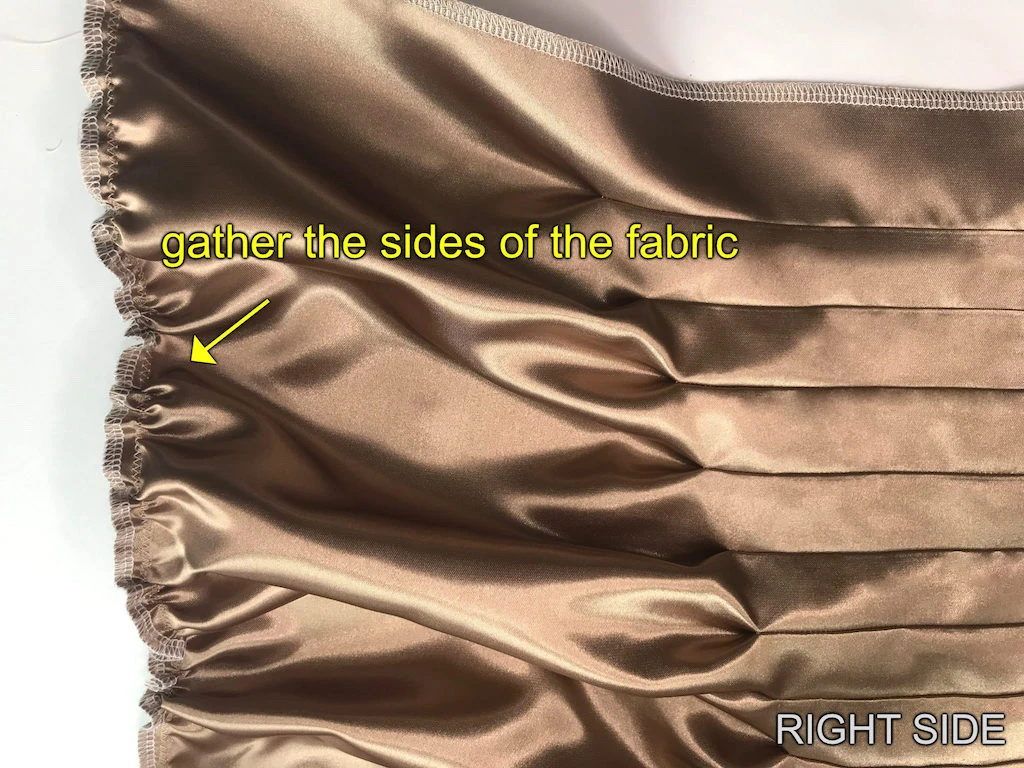
3. Gather the skirt on the sides to make them the same length as the centre of the skirt (see the image below).
Completing the Narcissa Malfoy beige dress
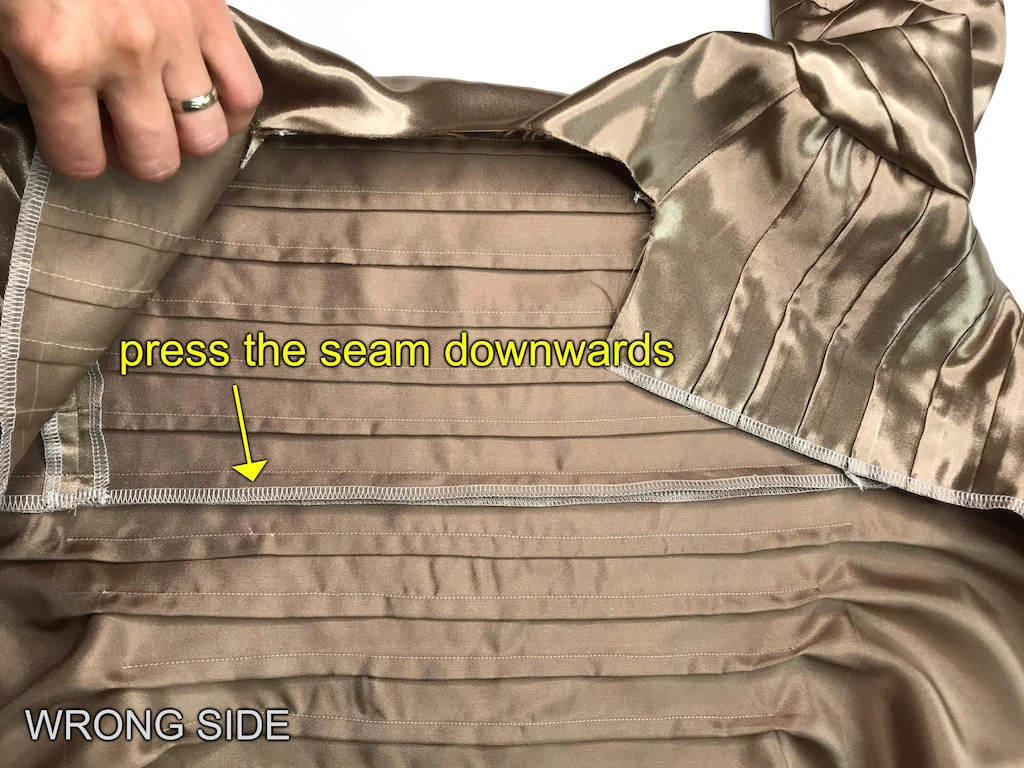
1. Sew the skirt to the bodice and press the seam downwards (see the image below).
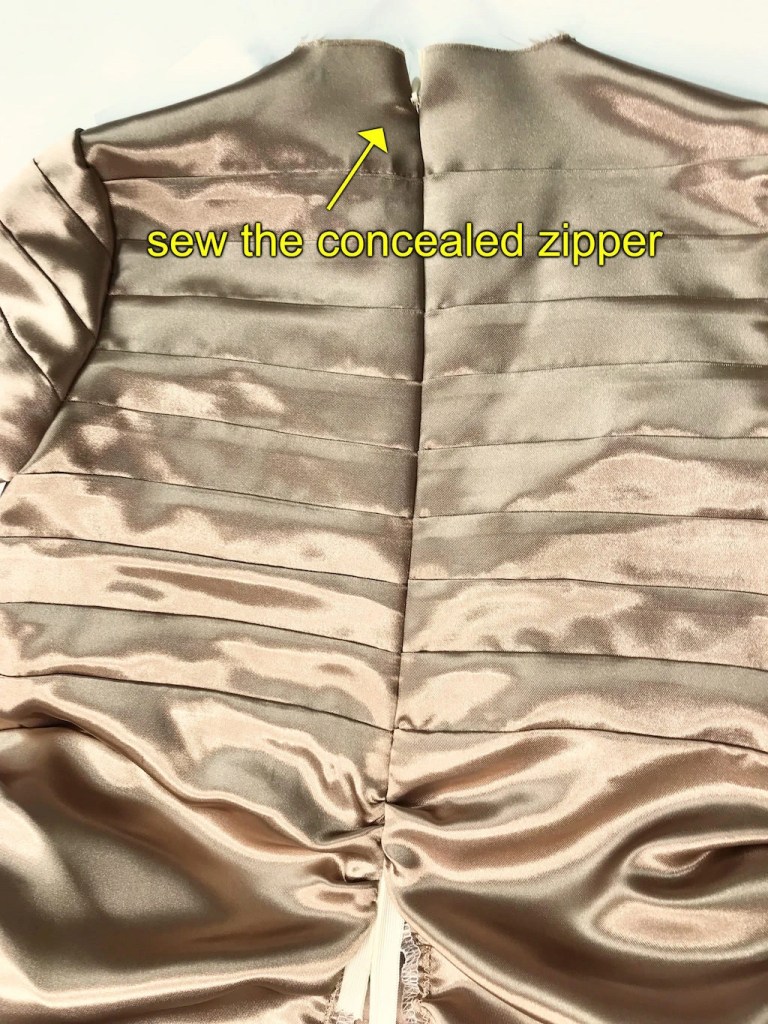
2. Pin (or baste) and fix a concealed zipper (see the image below). You can find a detailed tutorial on sewing an invisible zipper here.
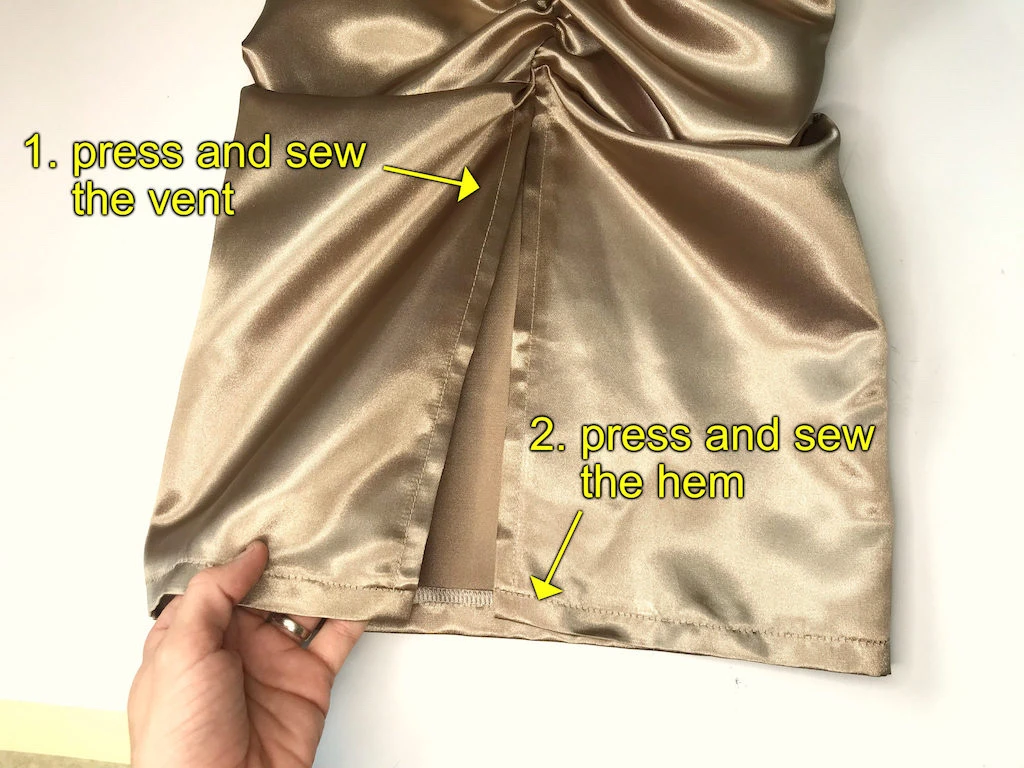
3. Sew the rest of the skirt from the bottom of the invisible zipper down to the knees leaving a simple skirt vent that will make walking comfortable (see the image below).

4. Pin and press the vent and topstitch it. Also pin, press and sew the hem of the skirt (see the image below).
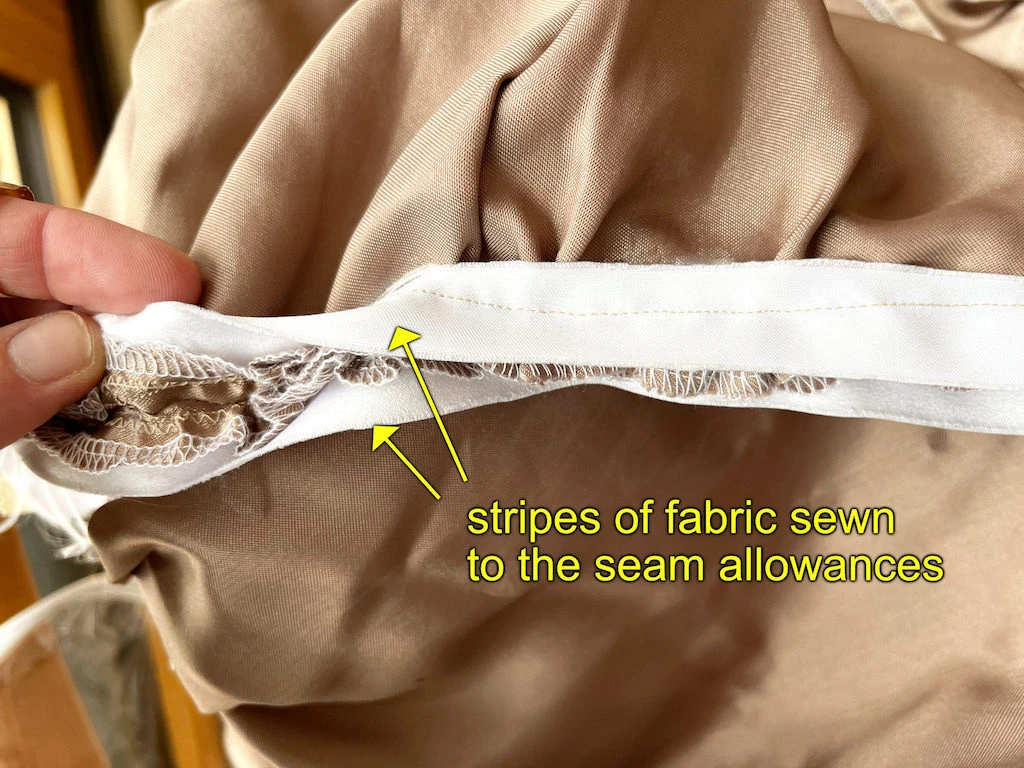
After wearing the dress, I have decided to sew a stripe of fabric under the gathered part of the skirt to hold the gathers in place (see the images below). Otherwise, the gathers get partially straightened.
The Narcissa Malfoy beige dress is almost finished, the only missing part is the neckline facing.
3. Prepare the facing for the neckline. Underline it, finish the seam allowances and sew the individual pieces together (see the image below).

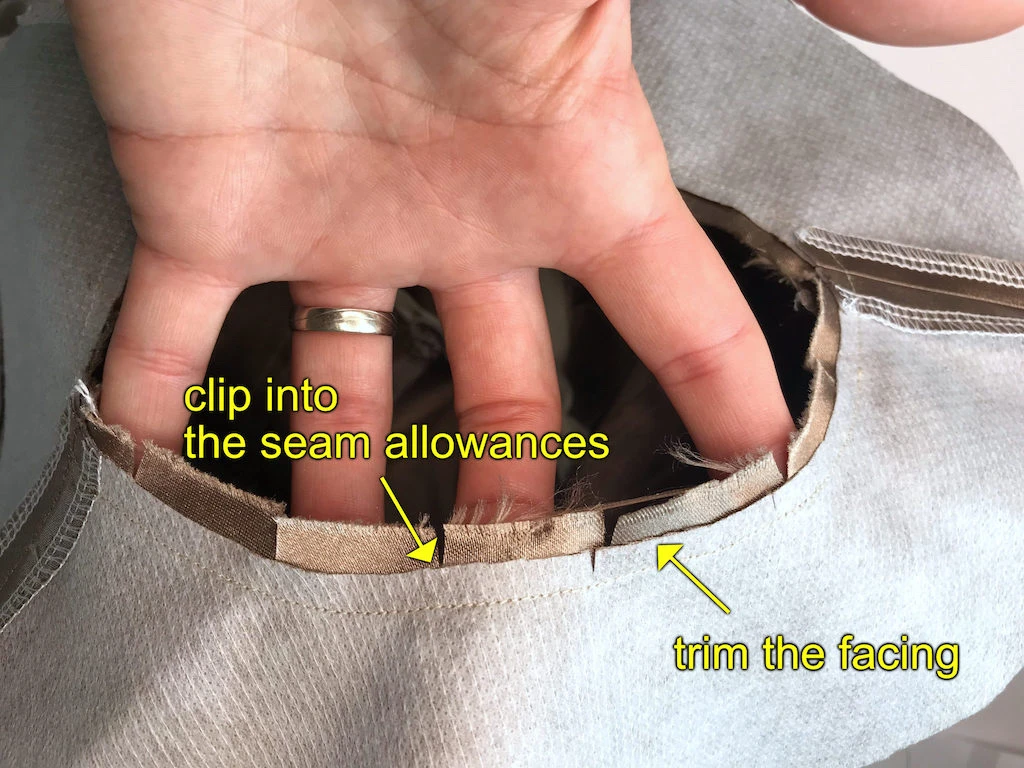
4. Sew the facing to the neckline right sides together. Trim the seam allowance of the facing and clip into the seam allowances (see the image below).
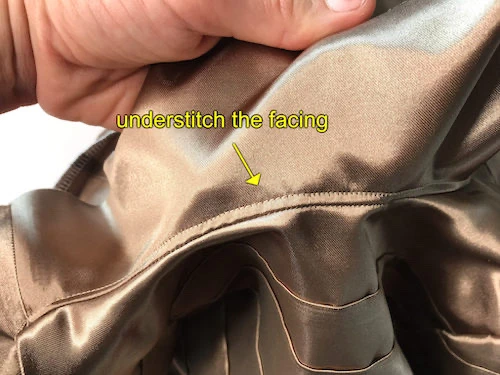
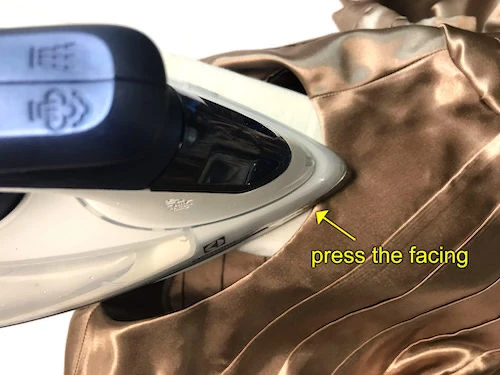
5. Understitch the facing, turn it inside and press the neckline (see the images below).
6. Fold, pin (or baste) the seam allowance of the facing and hand-stitch it to the concealed zipper. The seam allowance shouldn’t be too close to the zipper so that it does not get caught when you close the zipper. Check that the thread is not visible on the RIGHT side of the garment (see the images below).


Your Narcissa Malfoy beige dress is ready for its first party (see the image below).