
In many cases, problems like this don’t come from poor sewing or a badly inserted zip. They start much earlier: before the fabric is even cut.
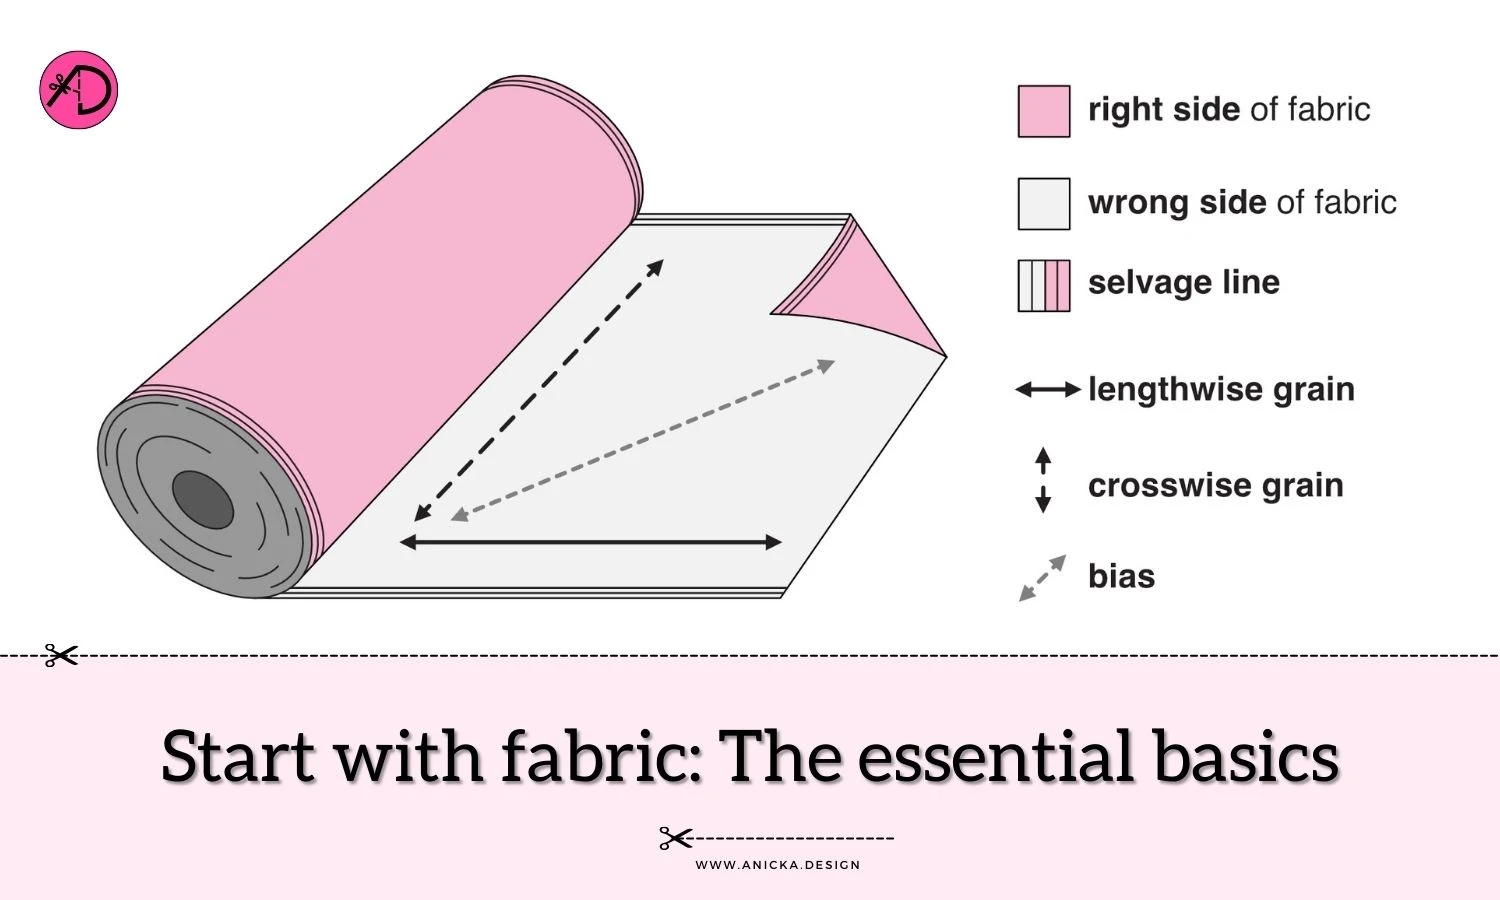
Preparing fabric properly may not be the most exciting part of a sewing project, but it plays a huge role in how your finished garment looks after wearing and washing. In this post, I’ll walk you through the essential steps of fabric preparation, from understanding grainlines to straightening and pressing, so your sewing results stay beautiful over time.
- Individual parts of the fabric
- How to identify the lengthwise grain using the selvedge line
- How to identify the lengthwise grain without the selvedge line?
- How to identify the right side of fabric using the selvedge line
- How to identify the right side of fabric without the selvedge line
- How to the fabric the way before sewing
- How to create the perfect rectangle of fabric by pulling threads
1. Identify the lengthwise, crosswise grain and selvedge line
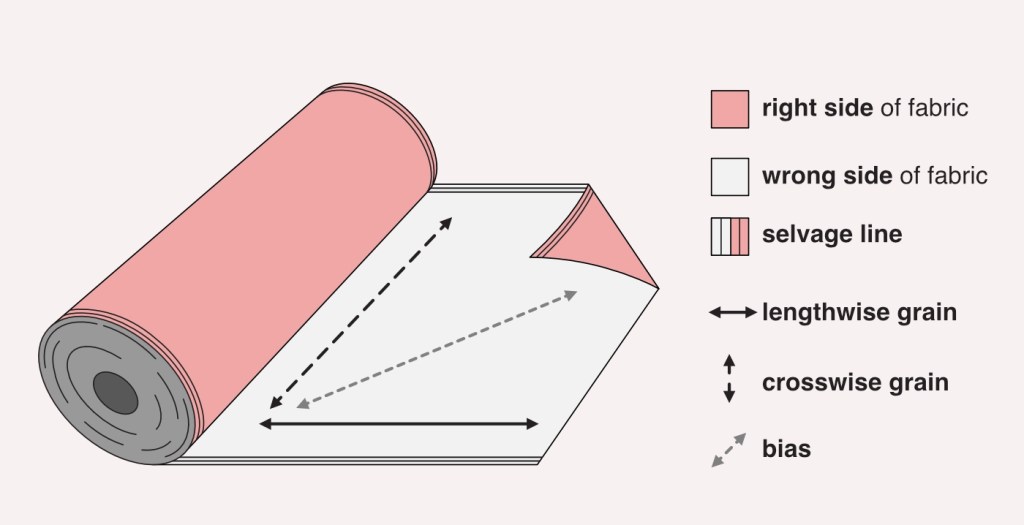

What is lengthwise grain (warp)
The lengthwise grain consists of the yarns that run along the length of the fabric. Fabrics on bolts, as you see them in shops, are rolled in this direction.
Most patterns instruct you to place the pattern pieces parallel to the lengthwise grain (with the exception of patterns designed to be cut on the bias). For this reason, it is important to be able to identify the lengthwise grain correctly.
What is crosswise grain (weft)
The crosswise grain, also called the weft, consists of the yarns that run perpendicular to the lengthwise grain. They are woven through the lengthwise yarns and determine the width of the fabric. Most fabrics are about 150 cm (59 inches) wide.
What is selvedge line (selvage line)
The selvedge is the edge of the fabric, where the yarns are usually denser than in the main body. It runs along the lengthwise grain and is typically about 1–2 cm (3/8 – 5/8 inch) wide on both sides (see image below).
What is the bias
The bias runs at a 45° angle to the lengthwise grain. Woven fabrics stretch the most along the bias, which is also why bias-cut strips are used for making bias binding.
a) How to identify the lengthwise grain using the selvedge line
The selvedge ALWAYS runs along the lengthwise grain (warp) (see the image below).
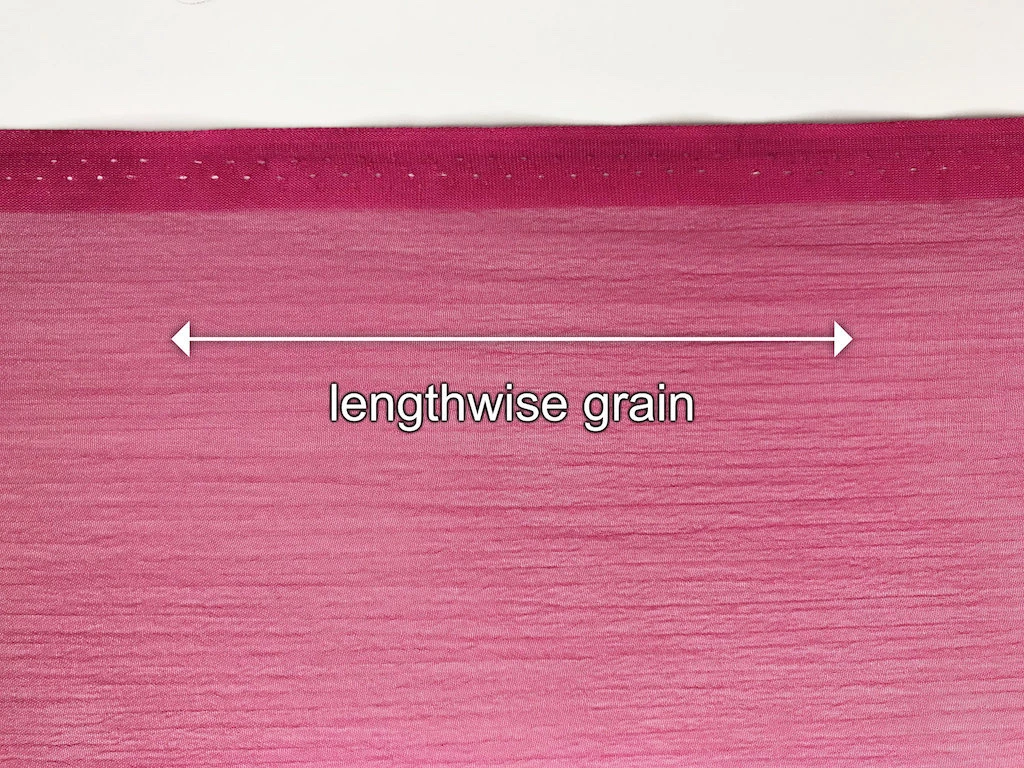
b) How to identify the lengthwise grain without the selvedge line
- The fabric stretches least along the lengthwise grain.
- Lengthwise yarns are stronger than crosswise yarns.
- In plain weave fabrics, there are often more yarns along the lengthwise than the crosswise.
- Stripes almost always run along the lengthwise grain.
- In fabrics with a nap (like velvet), the nap follows the lengthwise direction.
- Long surface textures or “wrinkles” (such as in chiffon) usually lie along the lengthwise grain.
2. Identify the right side of the fabric
a) How to identify the right side of fabric using the selvedge line
Before you start working with the fabric, examine the selvedge carefully to determine which side is the right side and which is the wrong side, as it’s not always obvious at first. On the right side, you’ll often see tiny raised fibres around the small holes along the selvedge (see image below).

b) How to identify the right side of fabric without the selvedge line?
Sometimes you might come across some scraps of fabric that no longer have the selvedge line. Try to identify the right side by thorough examination of the fabric.
| Fabric | Right side |
| With printed pattern | Side with printed pattern and bright colours |
| With nap | Side with the nap |
| Sateen fabrics | Shinier side of the fabric |
| Blends | Sometimes they have a shinier side – that is the right side |
Some fabrics look the same on both sides, especially if they have no print. For example, crystal organza (mirror organza has a shiny right side), georgette, chiffon, and plain weave fabrics without nap or print. In these cases, it doesn’t matter which side you use.
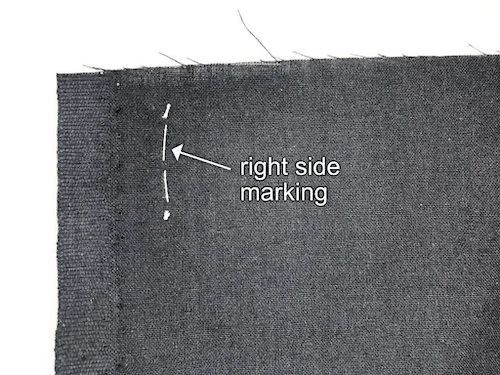
3. Mark the right side and lengthwise grain
A few centimetres (or an inch) away from the selvedge — but not directly on it — mark the right side and the lengthwise grain with a few basting stitches. Make sure the marking is a little distance from the cut edge of the fabric. This is how I mark the fabric along the selvedge (see image below):

I also recommend making a marking like this when you store fabric scraps that no longer have a selvedge. For example, pieces from which the selvedge has already been removed or cut from the middle of a fabric. This will help you identify both the right side and the lengthwise grain when you use the scraps later.
4. Pretreat the fabric the way you plan to treat the finished garment
Whenever you buy a fabric, check the laundry symbols. Many fabrics can be washed (by hand or machine) or dry cleaned. Treat the fabric the same way you plan to care for the finished garment.
If you plan to wash it, follow the recommended temperature. Hand wash if required, or use a gentle machine program with low temperature and spin. I always wash new fabrics separately to avoid colour bleeding, especially natural fibres or fabrics you haven’t used before.
If the finished garment will be dry cleaned, treat the fabric the same way from the start. This will be your guide for pre-treatment.
5. Create the perfect rectangle of fabric by pulling threads
This step is important when preparing fabric for sewing. Begin by clipping 2–3 cm (about 1 inch) into the fabric between the selvedge and your thread marking.
Move the selvedge aside and pick a thread along it. Hold the thread and gently pull the fabric away, as if gathering it (see image below).
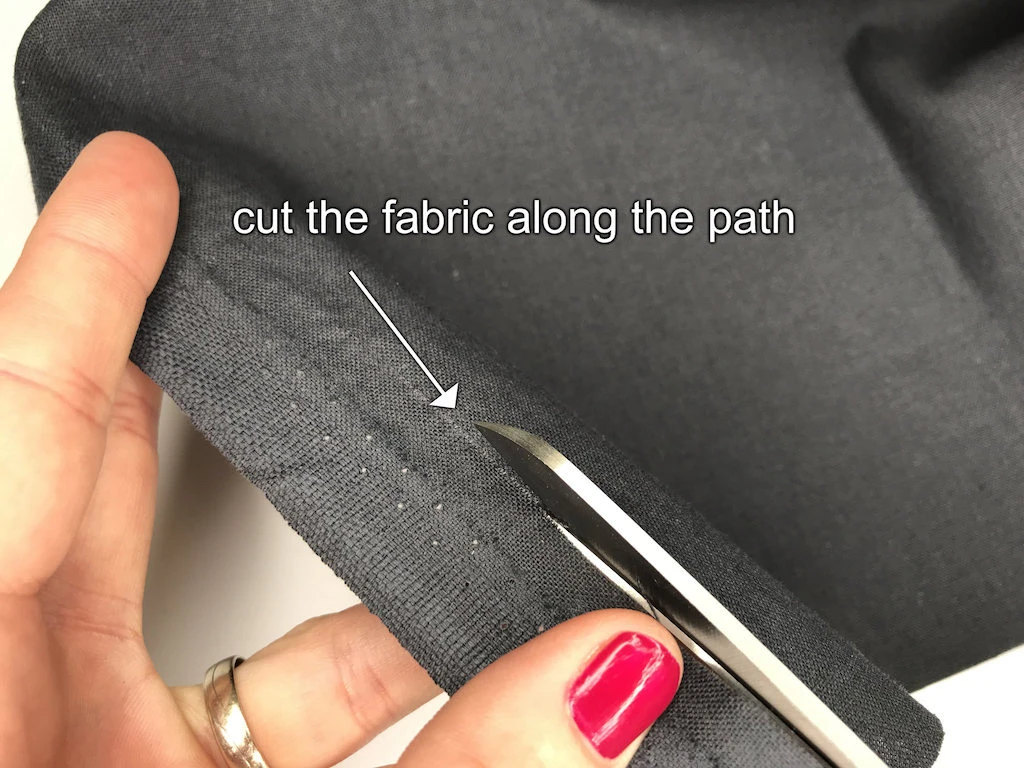
If the thread breaks, start again with a new one. As you pull, a visible “path” forms along the selvedge (see image).

a) Clip into the fabric along the selvedge line.

b) Pick a thread along the selvedge line.

c) Hold the thread you have picked and pull the fabric away from the thread.

d) Path created by pulling out the lengthwise thread.
b) Pull crosswise thread
The very same process applies to the crosswise grain (see the images below).
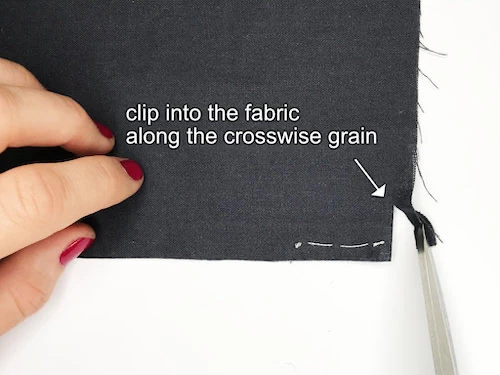
a) Clip into the fabric along the crossgrain (perpendicularly to the selvedge line).

b) Pick a thread along the crosswise grain.

c) Hold the thread you have picked and pull the fabric away from the thread.

d) Path created by pulling out a crosswise thread.
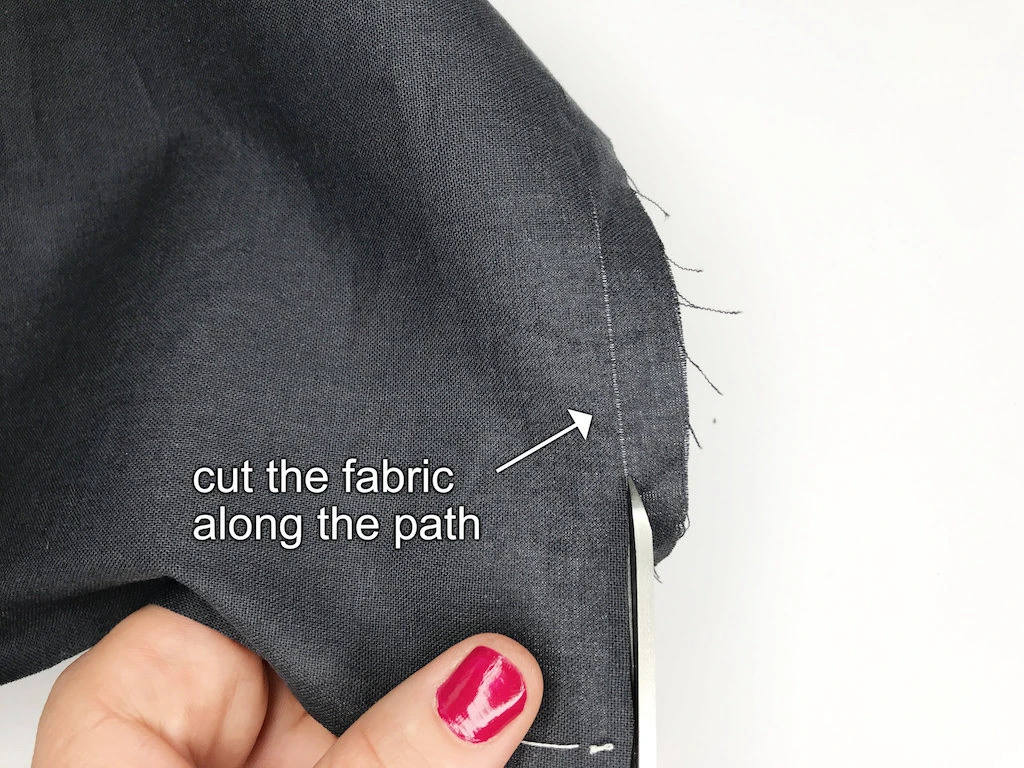
e) Cut along the path created by the pulled out crosswise thread.
After you have cut along lengthwise grain, removed the selvedge line and cut along the crosswise grain, you should end up with an almost perfect (or perfect, depending on the quality of the fabric) rectangle.
6. Press the fabric properly
Fabrics are usually wrinkled to some extent after washing, drying and pulling threads out of them. Press the fabric from the wrong side or use a pressing cloth from the right side of the fabric to prevent shine that can be caused by the hot iron.
Depending on your design fabric, you may use some steam, however, be moderate. NEVER IRON IT ON THE BIAS. Pressing the fabric on the bias may cause it to pucker or stretch in a way you don’t fancy at all.
7. Transfer the pattern pieces, cut and sew
Now that your fabric is properly prepared, transfer the pattern pieces to it, cut them out and finish your garment or another project. As you have an exact lengthwise edge of the fabric, measurements taken from this edge will be accurate as well.


