


A three step zigzag stitch also referred to as a multi step zigzag stitch, 3 step zig zag stitch or triple zigzag stitch is a type of stitch that uses three smaller stitches in one diagonal line (see the image below).
Just like the simple zigzag stitch, it is built in all sewing machines, even the very basic ones. It is handy and can be used for numerous purposes like finishing raw edges of fabric, decorative purposes, sewing elastic waistbands and so on.
In this tutorial you will learn:
- The difference between a simple zigzag stitch and a three step zigzag stitch
- When should you use a triple three step zigzag stitch
- How to sew an elastic waistband with a three step zigzag stitch
- How to sew a lettuce hem with a zigzag stitch (separate blog post)
What is the difference between a simple zigzag stitch and three step zigzag stitch?
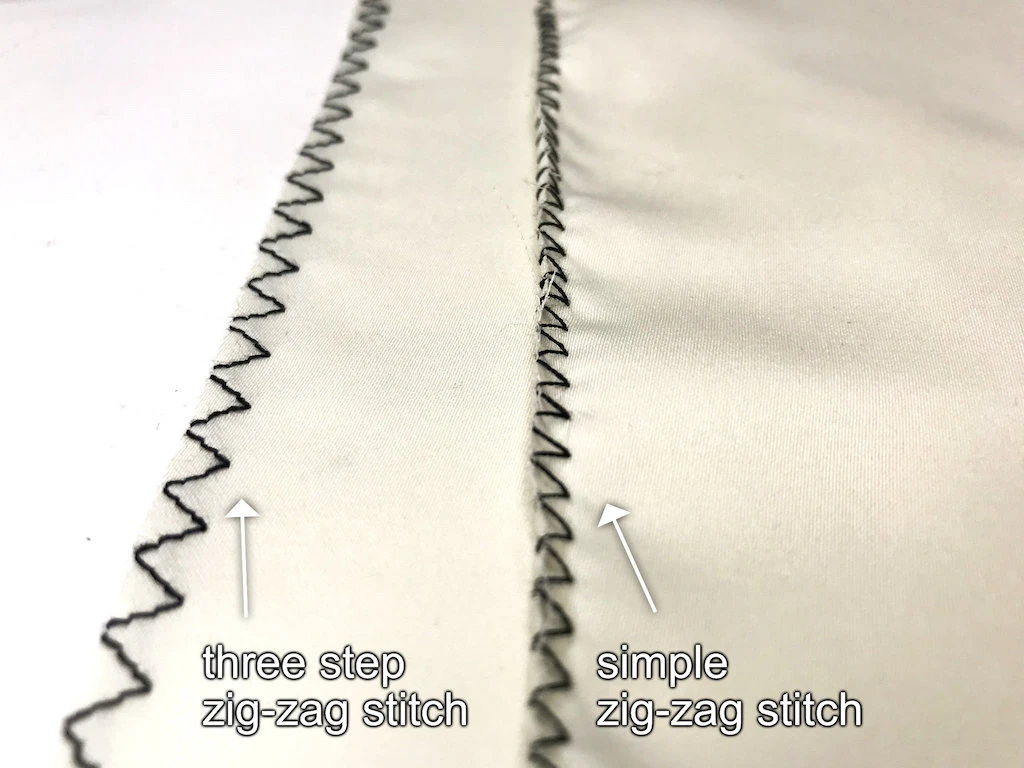
A simple zigzag stitch creates one diagonal stitch in one step while a three step zigzag stitch makes three small stitches in one step. In the illustration and the photo below, you can see the difference between the two. There are some cases in which it is more appropriate to select a 3-step zigzag instead of a simple zigzag (see the image below).


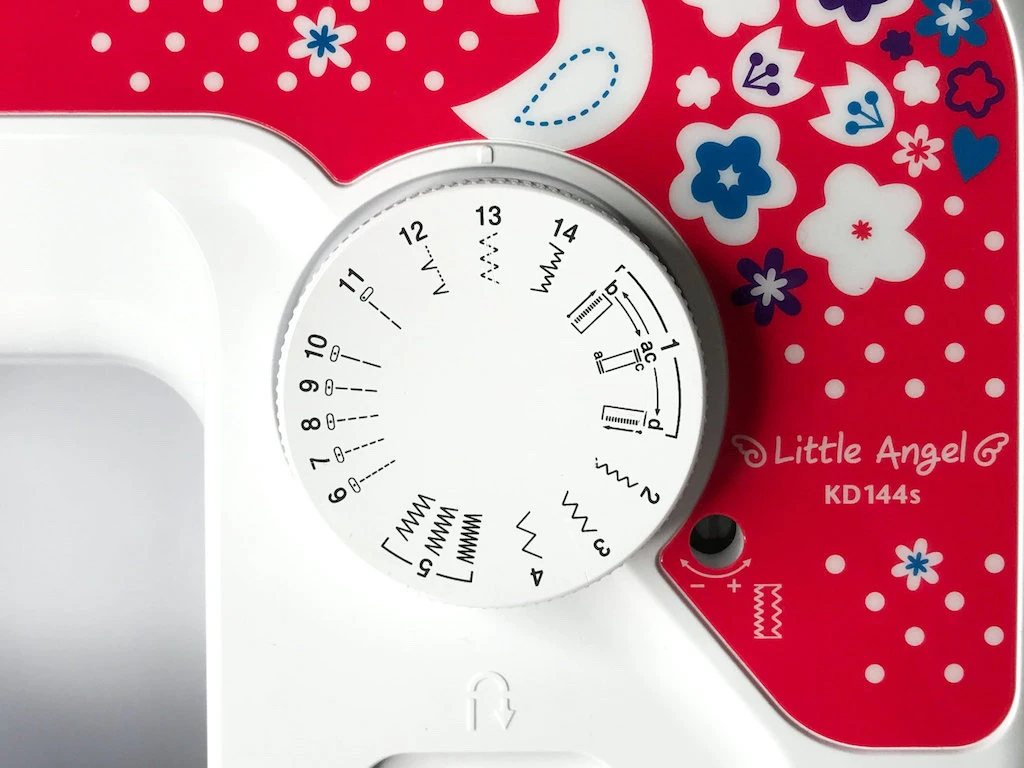
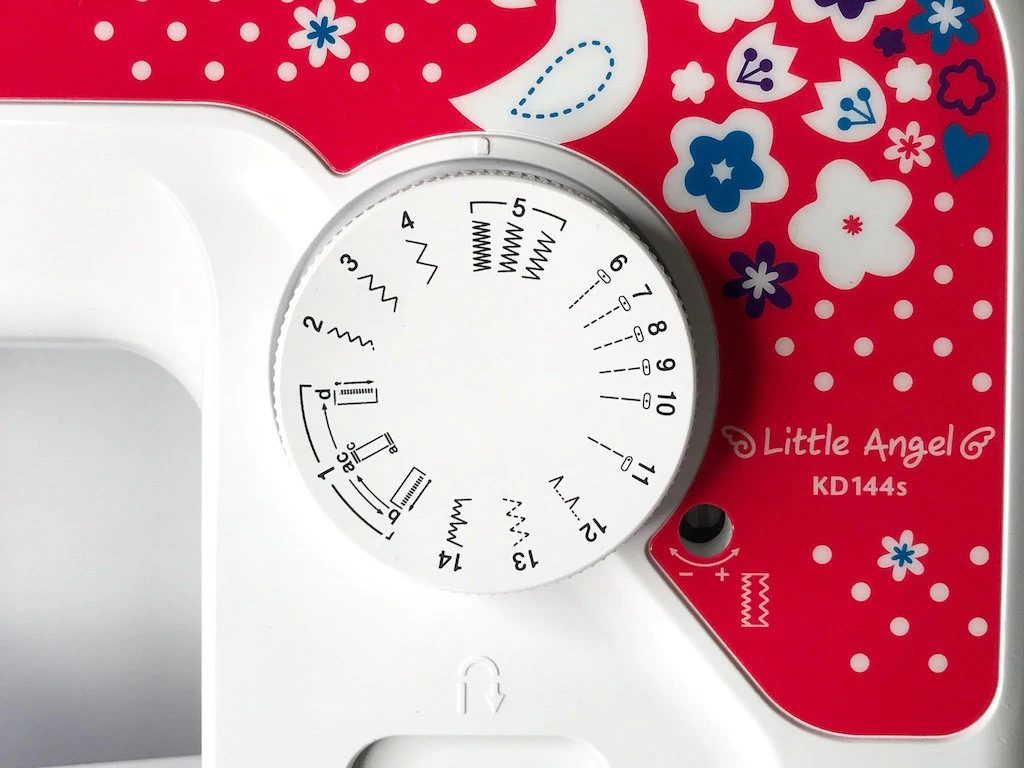
Our sewing machine is a basic one and the parameters (width and length) of the stitch cannot be changed (see the image below). If you own a more advanced sewing machine, adjust the stitch width and length if needed. In this tutorial, I’ll be working with a three step zigzag stitch of maximal width and length.
When should you use a triple zigzag stitch?
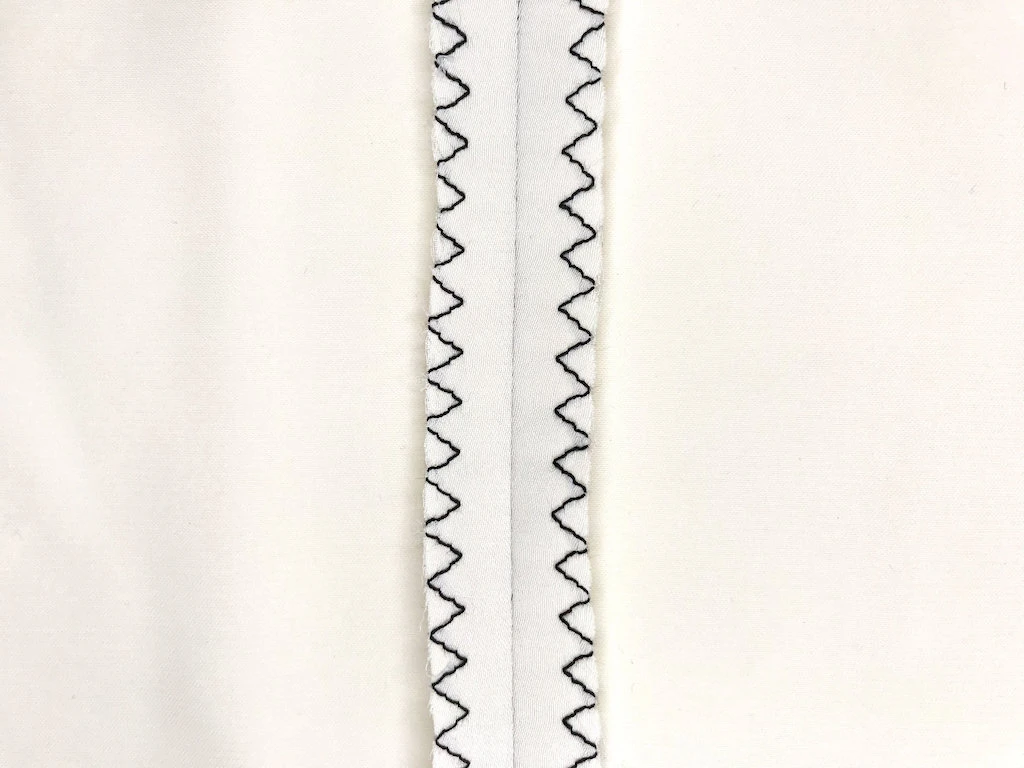
Use a triple zigzag stitch instead of a simple zigzag stitch for fabrics, where a simple wide zigzag stitch would create a tunnel on the fabric along the stitches (see the example below).
Another great application is sewing strong elastic stitches. The triple zigzag stitch can stretch and un-stretch together with the fabric. In the image below, you can see the waist of a gathered cotton skirt.

A triple zigzag stitch can also be used for knit fabric. For example sewing the waist of yoga pants, leggings, sweat pants etc. (see the image below).
How to finish edges with a triple zigzag stitch?
Select a triple zigzag stitch on your sewing machine with the stitch width and length suitable for your project and sew along the raw edges of the fabric.
In the image below, you can see a finished seam allowance of micro satin with a tree step zigzag stitch.
How to sew an elastic waistband with this stitch?
Sewing an elastic waistband is amazing for different garments like gathered skirts, yoga pants or leggings. Again, use this method if you have a very basic sewing machine without any other elastic stitch types. The triple zigzag seam is a guarantee for the elasticity of the seam at waist.
In this tutorial, I’ll show you how to sew an elastic waistband to children’s leggings.
The elastic band I am using can ultimately be stretched to its double length, but I am not going to stretch it that much. Always take into consideration the stretchiness of your elastic band and how much you intend to stretch it. Sewing with the band stretched to its maximum is quite tricky.
1) Prepare the elastic waistband first. Cut the correct length that is needed for your project.
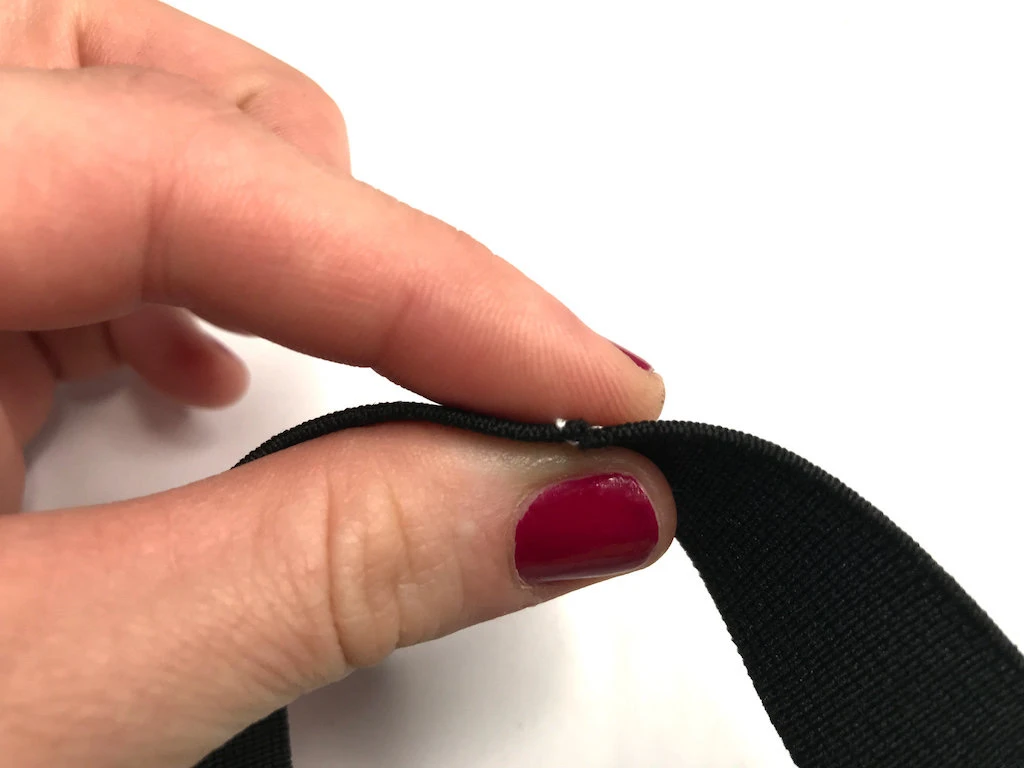
2) Fold the elastic band into half and mark the folded edge with a pin. This will be the middle of the elastic waistband (see the image below).

3) Unfold the elastic and fold each end towards the pin in the middle. Mark the folded edges with pins (see the images below).
Pins at the elastic are used as markings that will help you align it with the waist of the garment you are going to sew.

Now the elastic waistband is divided into 4 equal parts.
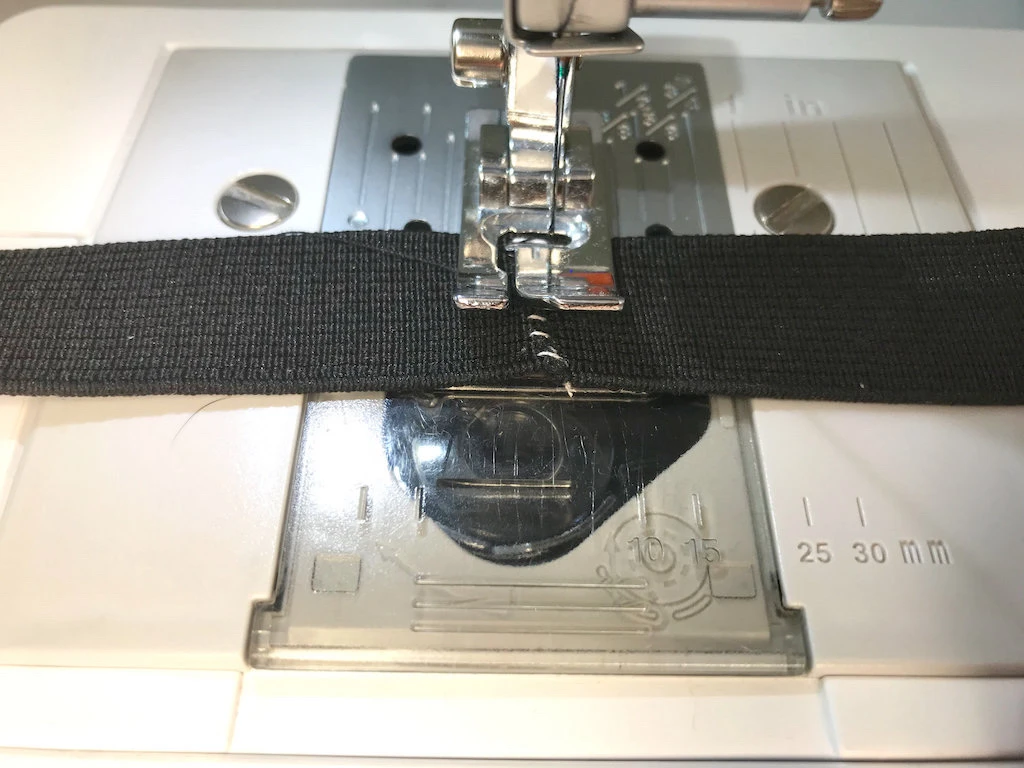
4) Baste the two ends of the band together connecting them at their edges, do NOT overlap the edges (see the images below). Use the same thread you used to thread your sewing machine. In the images below I am using a contrasting thread so that you can see it properly. Basting is not necessary, yet it is helpful as to sew the two ends without it requires some practice.

5) Select a dense (very short stitch length) and wide zigzag stitch on your sewing machine.
6) Place the basted ends under the presser foot and sew.
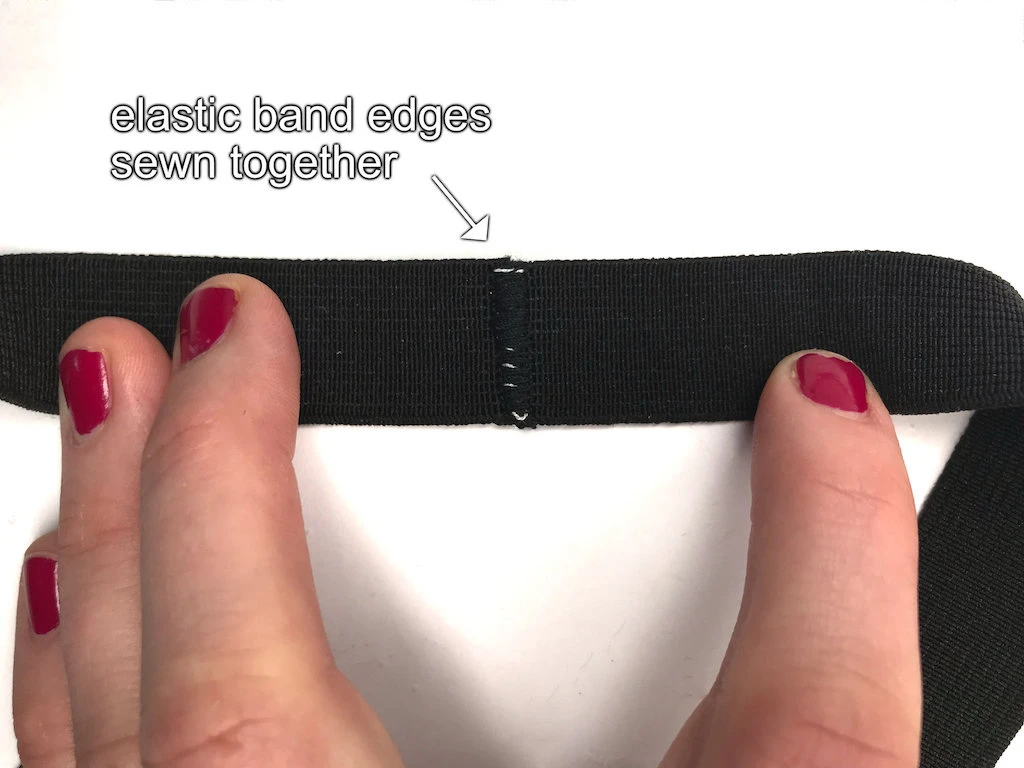
The dense zigzag stitch will create a strong bond (see the image below). You can also see bits of white basting thread. If you use the same thread as for the sewing machine, you will not notice it.
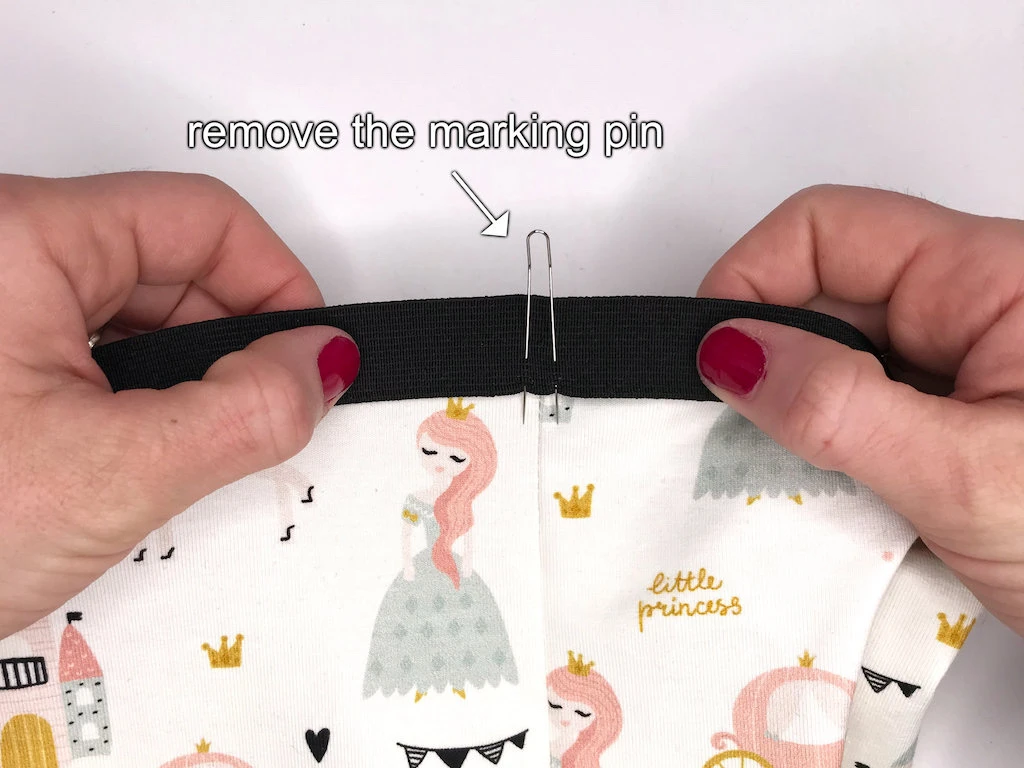
7) Pin the elastic waistband to the garment (in this case leggings). Use classic or Clover fork pins. Align the waistband accurately. The pin in the centre of the elastic waistband should match the center front of the garment (there might be a seam) while the sewn part of the waistband should match the center back (there also might be a seam). The pins on the sides should be on the side half distance between the centre front and centre back. You might need to measure this distance (see the images below).

Align the pin in the center with the center front seam.

Use another pin (classic or Clover fork pin) to pin the elastic to the waist.
Remove the pin that was used as a marking.
8) Set the stitch to triple zigzag and sew. If the waistband is a bit shorter (to hold it better at the waist), you will have to stretch the elastic while sewing. Stretch it equally in opposite directions, however, do not pull too hard. While doing so, make sure you are NOT preventing the feed dogs from grabbing the fabric.

The sewn waistband looks like this (see the image below):

If you stretch the elastic band, the 3 step zigzag stitch will stretch with it.

Hi!
Thank you for sharing your expertise!
Cheers 😍
You’re welcome :). I’m glad you found this post useful. Anicka