


In my previous blog post, I have closely described how to draft a bubble skirt (also known as a balloon skirt) pattern with an elastic rib jersey waist. In this post, I will explain how to sew such a skirt. If you do not have a bubble skirt pattern yet, use the simple pattern calculator below that helps you draft one.
This tutorial contains a bubble skirt pattern calculator that can compute the dimensions of individual pattern pieces based on your body measurements.
In this easy skirt tutorial you will find the following:
- Bubble skirt pattern calculator
- Handy tips for bubble skirt fabric selection
- How to prepare the rib-jersey casing at waist
- How to sew a bubble skirt
Bubble skirt pattern calculator
We do not store, nor share any data you put into the form above.
Calculated pattern dimensions


Useful tips for fabric selection
Fabric for lining: If you are a beginner, I do not recommend using thin, lightweight, and foremost slippery fabrics that are in general used as a lining. They require good skills and experience to cut and sew. My suggestion is a lightweight plain-weave cotton fabric.
Design fabric: use light to medium weight fabric that does not crease badly or has a or have a crease-resistant finish. It’s better to avoid heavy fabrics like velvet, Duchesse satin, corduroy, thick denim, etc. These create too much bulk at the skirt waist. Using thin knit jersey fabrics is a good choice too. Take into consideration that ironing a bubble skirt is tricky at its lower part.
To sew a balloon skirt, I have chosen the following fabrics: a pink cotton design fabric with a flower pattern. And a pink plain weave fabric for the lining. I am also going to sew the skirt from FRONT and BACK pattern pieces.
Prepare the rib-jersey casing at waist
1. Cut the rib jersey fabric according to the dimensions from the pattern calculator above. Do not forget to include seam allowances.
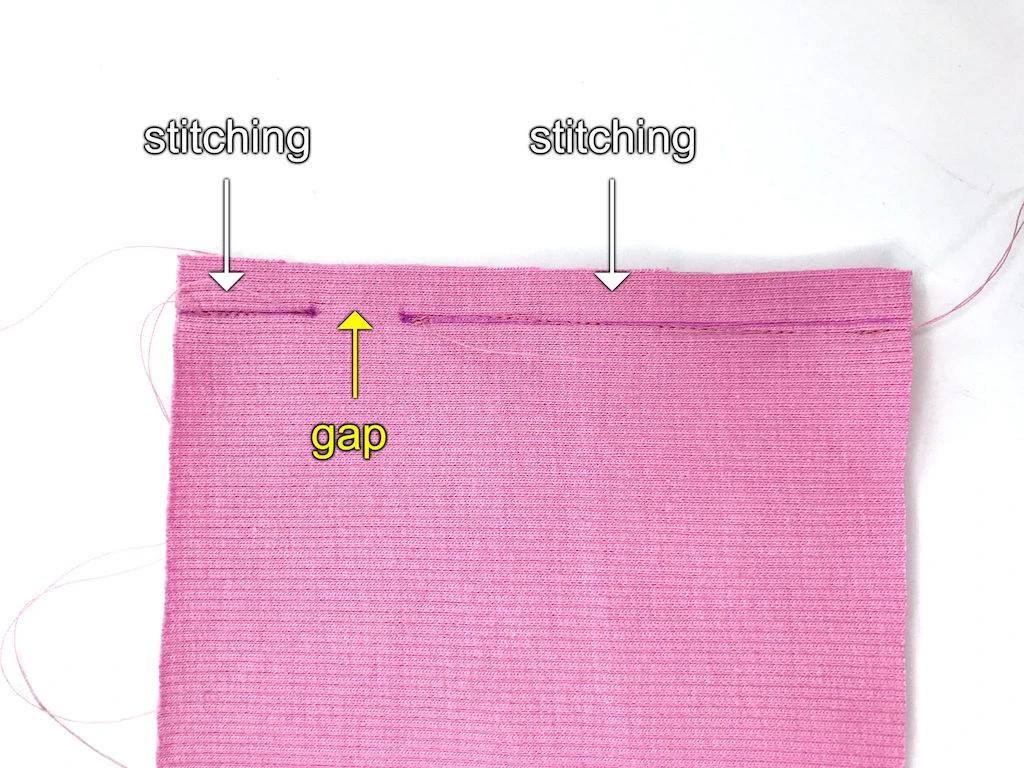
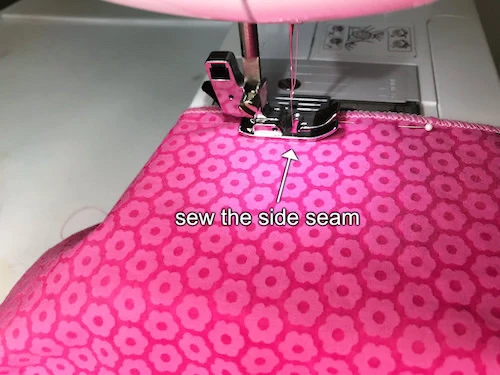
2. Fold the rib jersey in half RIGHT sides together and sew the side seam. Skip a short part of the seam in order to leave a gap for inserting the waistband. You may draw the markings where to sew and where to stop sewing right on the jersey fabric (see the images below). I’ll insert a narrow elastic (2,5 cm – 1 inch), therefore the gap may be small. For wider elastics, make the gap wider.


The sewn seam should look like this (see the image below).
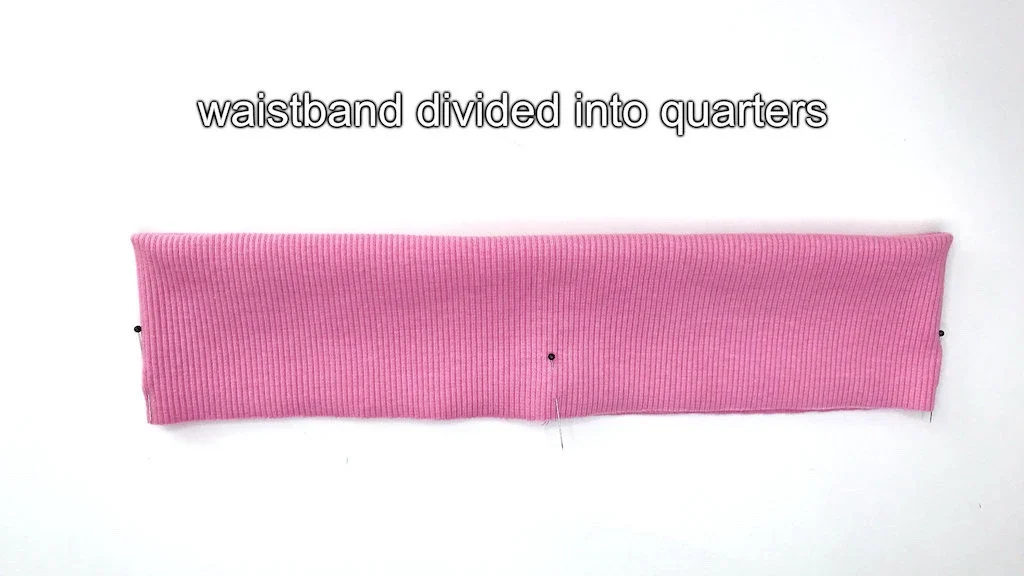
3. Fold the jersey in half along the waistline so that you can see its RIGHT side. Position the seam on one of the folds on the right or left-hand side. Mark the opposite fold with a pin (see the image below).

4. Place the first pin opposite the rib jersey seam/ Mark each new fold on the side with new pins (see the image below).


You have just divided the rib jersey waistband into quarters using the seam and three pins. It should look something like this (see the image below). This helps you pin the jersey to the skirt waist properly.
Now, let’s sew the skirt itself. The prepared casing will be used later on.
How to sew the bubble skirt
Make sure you have prepared all the fabrics for sewing: washed, dried, and pressed.
1. Cut all the remaining pattern pieces if you haven’t done so (the lining and the design fabric) according to the pattern calculator results.
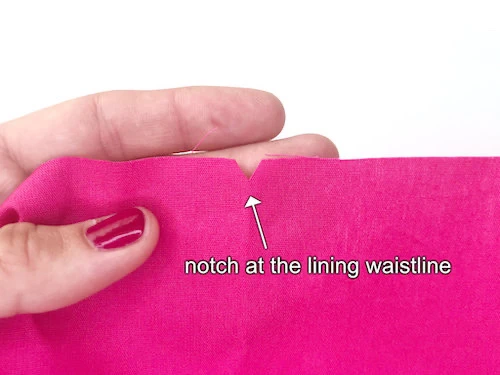
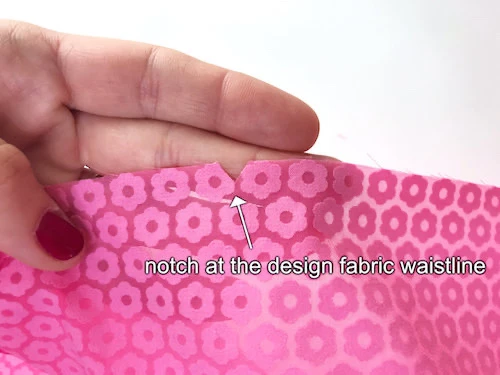
2. Make notches (small v-shaped cuts in the seam allowance) at the design fabric and lining waist. These will help you to properly position the pattern pieces before sewing them together.
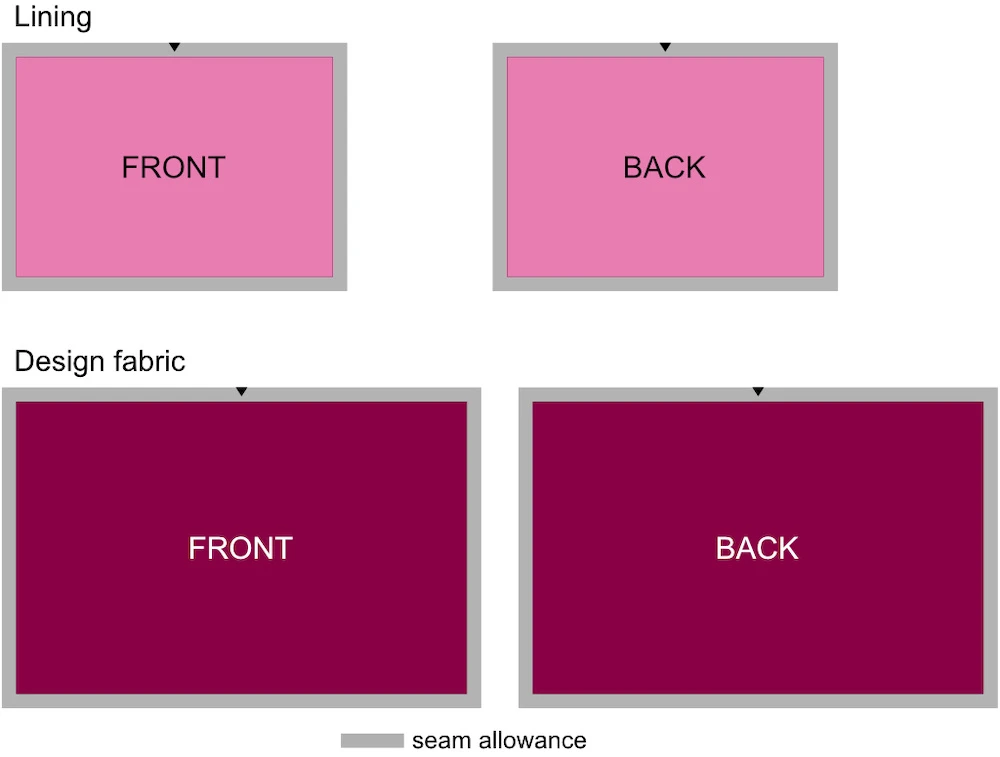
If you have a FRONT and BACK pattern piece, make one notch in the center of the waist (see the images above).
If you have one piece for the FRONT and BACK, make three notches dividing the waist into quarters (see the images above).
I have separate FRONT and BACK pattern pieces. I made one notch on the lining FRONT waist, and one on the lining BACK waist. Also one on the design fabric FRONT waist and design fabric BACK waist.
2. Finish all seam allowances of the lining and design fabric but the waist. The waist seam allowance will be finished later in the process of sewing.
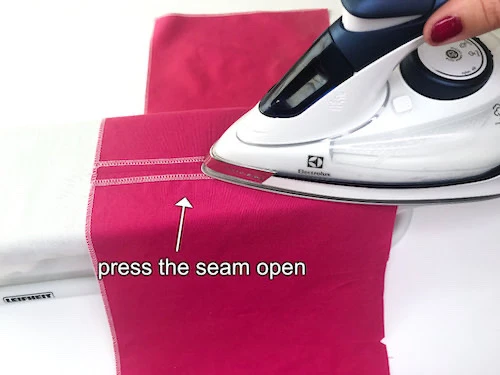
4. If you have a FRONT and BACK design fabric pattern piece, sew them together and press the seams open. Also, sew together the lining FRONT and BACK and press the seams open. If you use fabrics that are prone to fraying badly, use a short straight stitch.
In case you have the lining and the design fabric as one piece, skip this step and go directly to the next one.

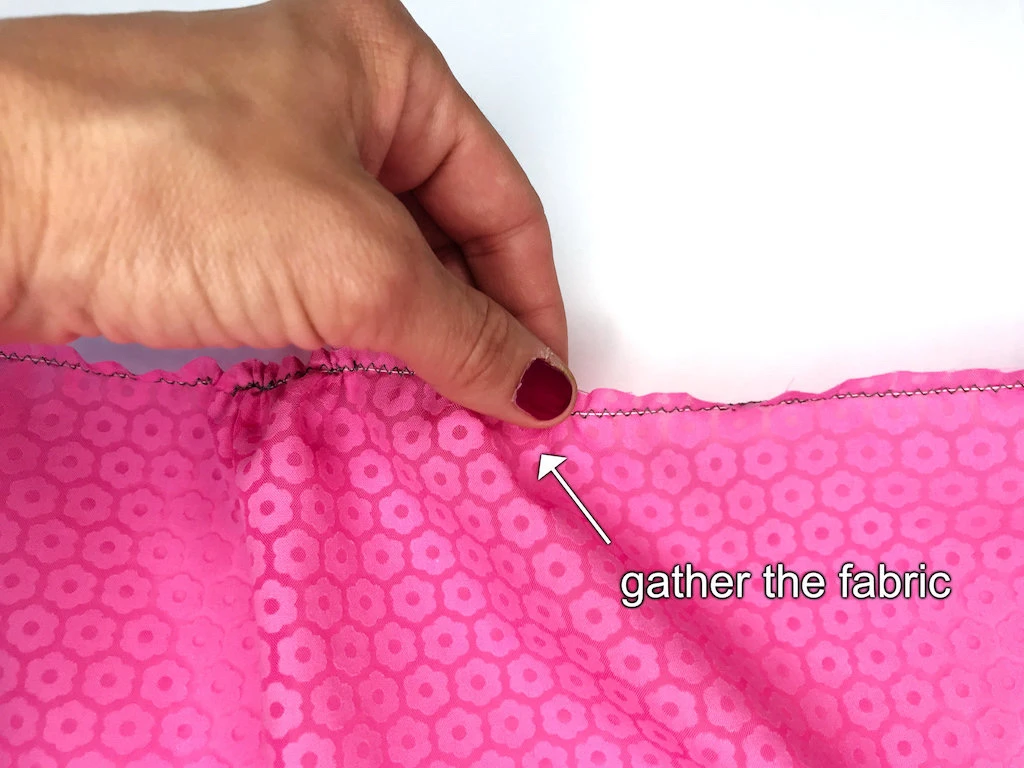
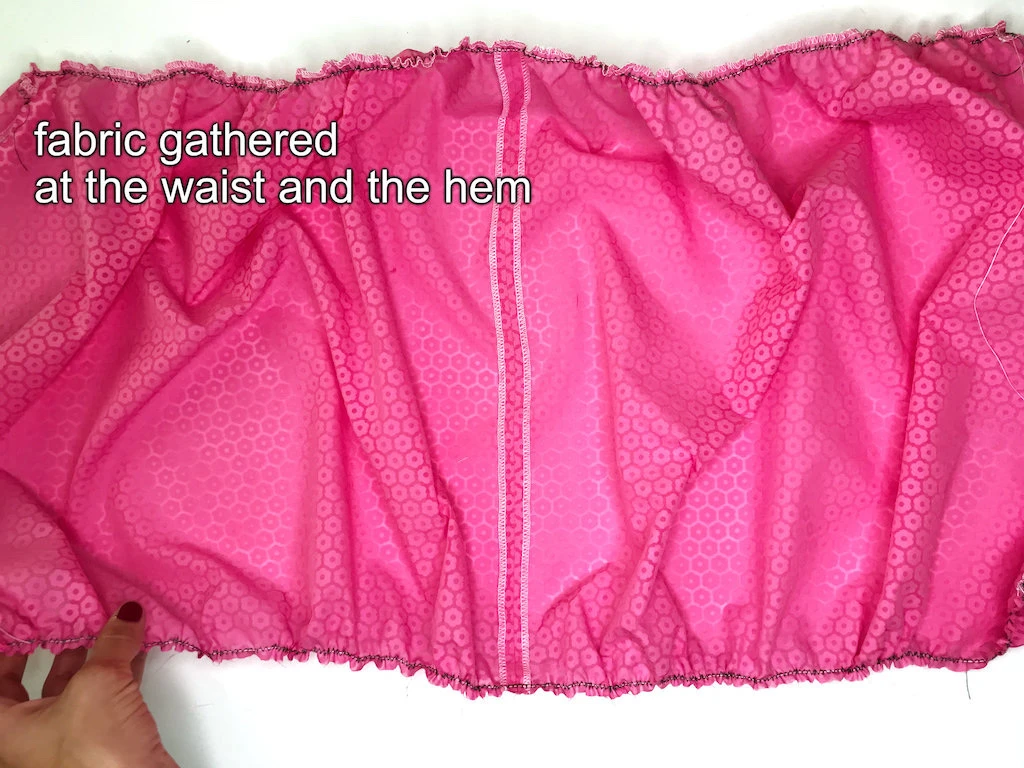
5. Gather the design fabric at the waist and at the “hem” so that it matches the width of the lining. I use a basting thread and a zig-zag stitch to do so. however, feel free to use any other method for gathering fabric that works for you (see the images below).

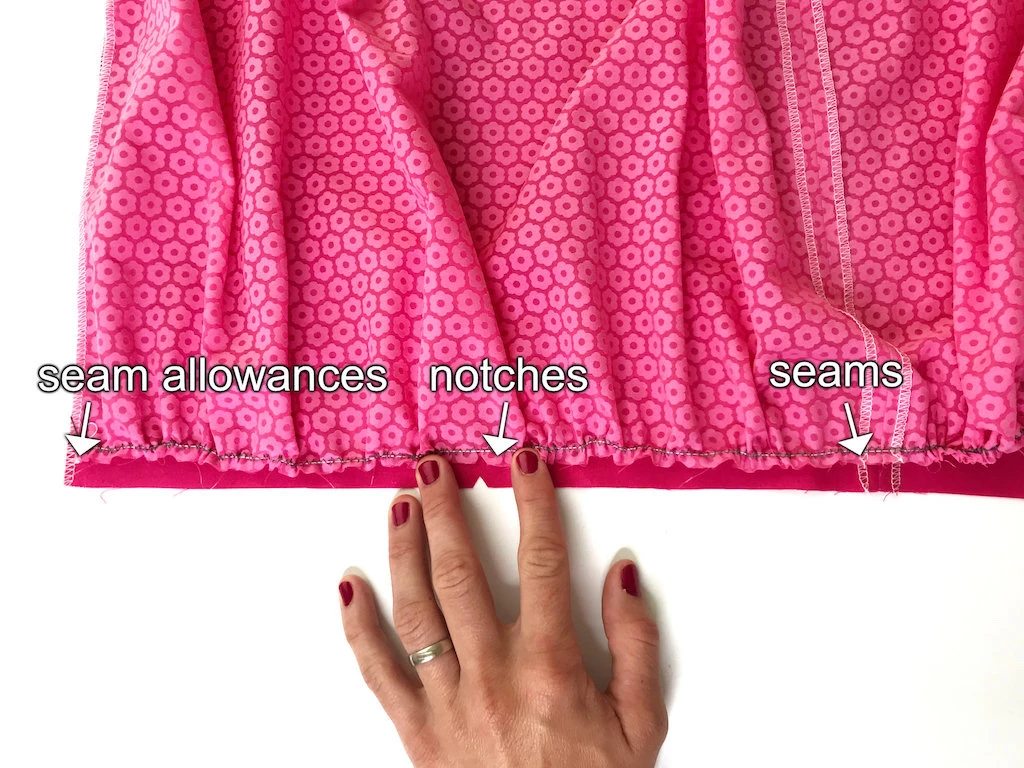
As soon as the gathered design fabric width matches the lining width, stop gathering. The seams and the notches at waist of the design fabric and lining should match. In the image below you can see what I mean.
Make sure you leave the seam allowance of the design fabric un-gathered on the sides (see the image below).
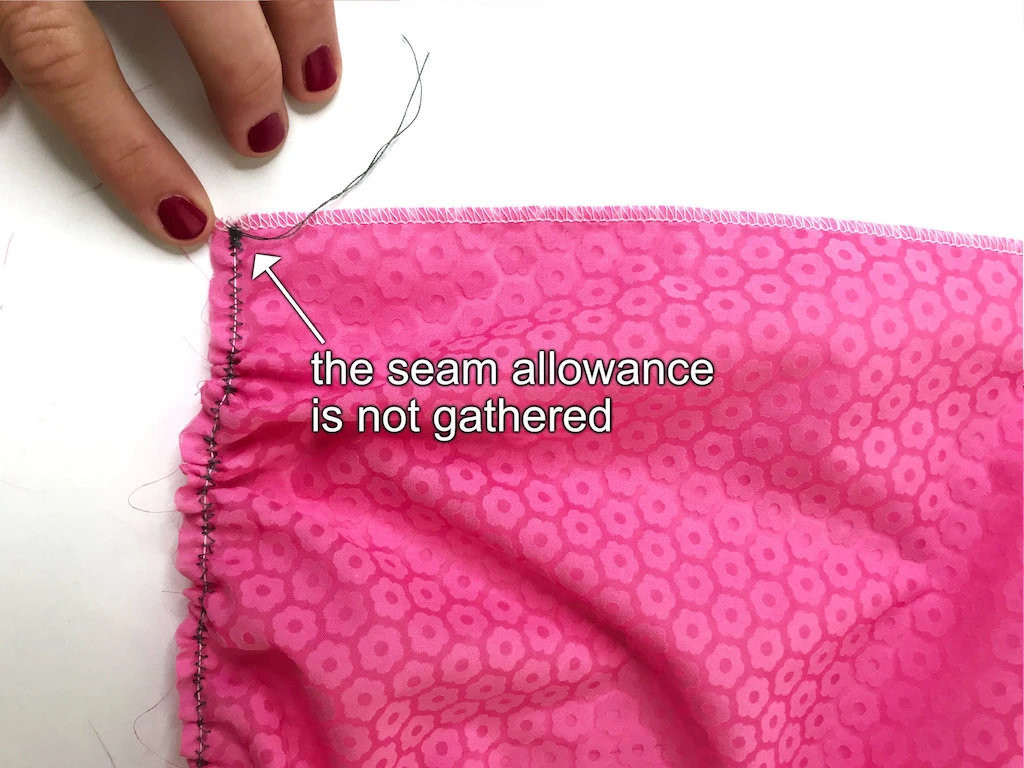
At this phase, the design fabric should look like this (see the image below).
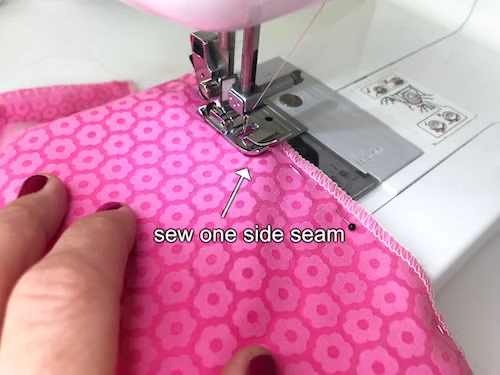
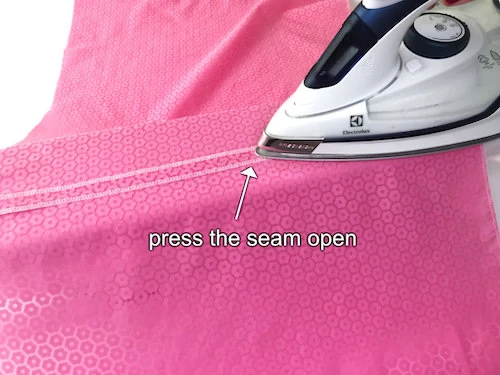
6. Sew together the side seams of the lining and side seams of the gathered design fabric. Again, use a short stitch length for fabrics that fray badly. Press both side seams open (see the images below).


7. Pin the “hem” of the lining with the “hem” of the design fabric RIGHT sides to fix them, aligning the side seams accurately, and sew the two together (see the images below).

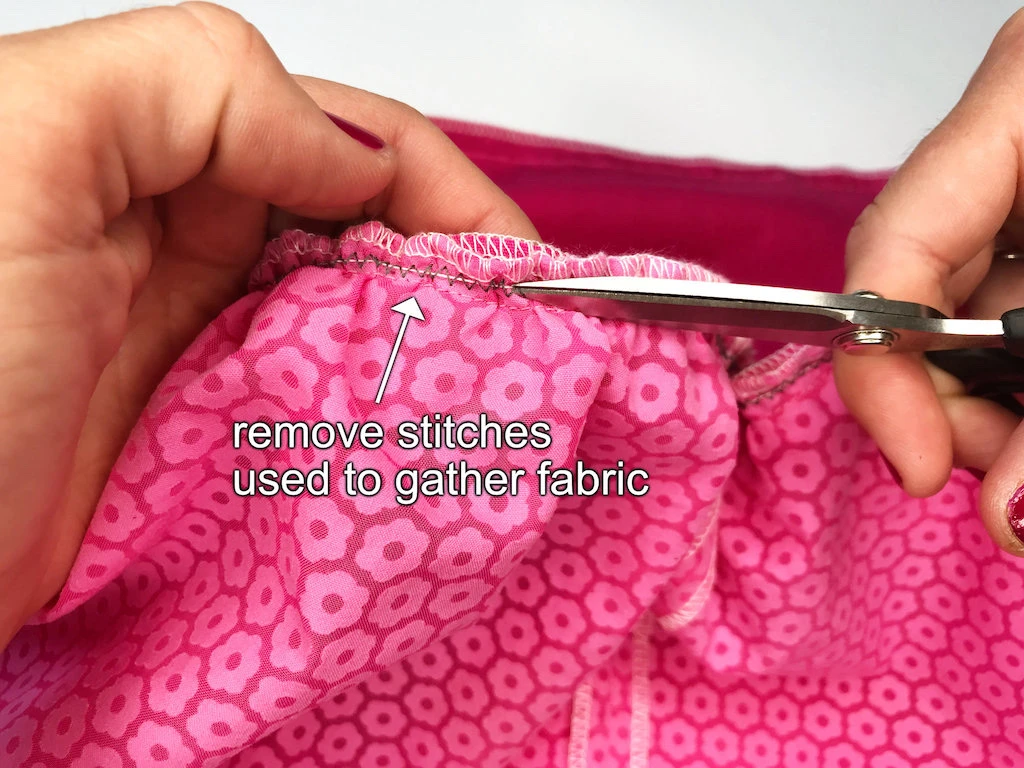
After you are done sewing, remove the stitches used to gather the design fabric.
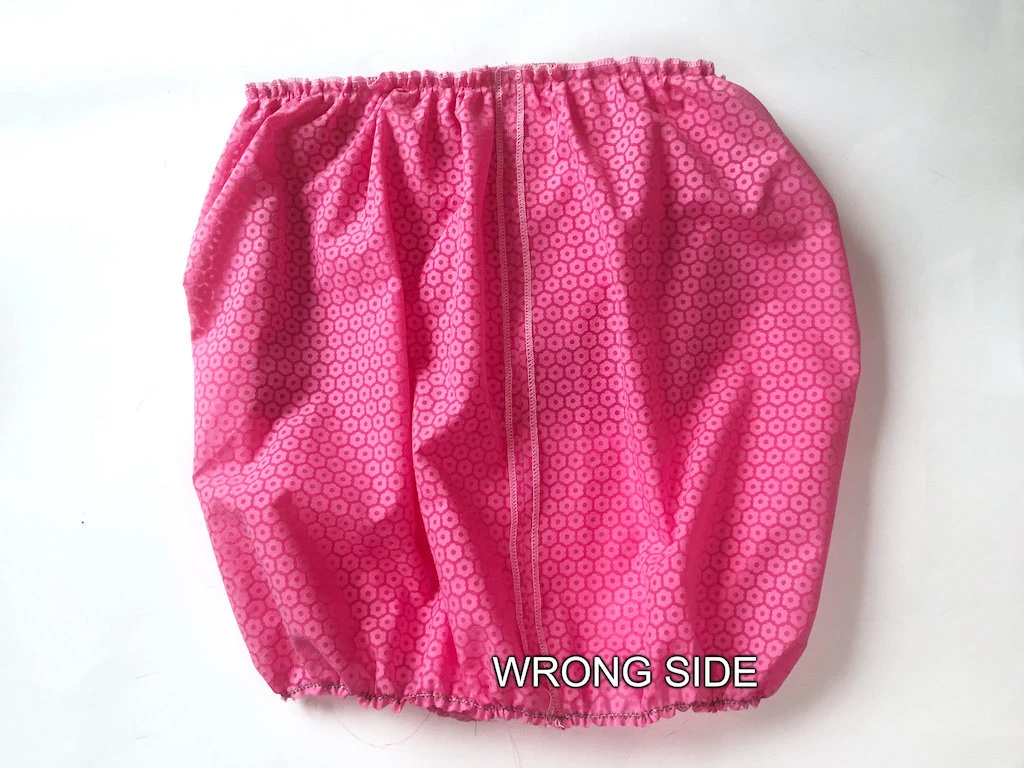
Now, the partially sewn bubble skirt should look like this (see the image below).
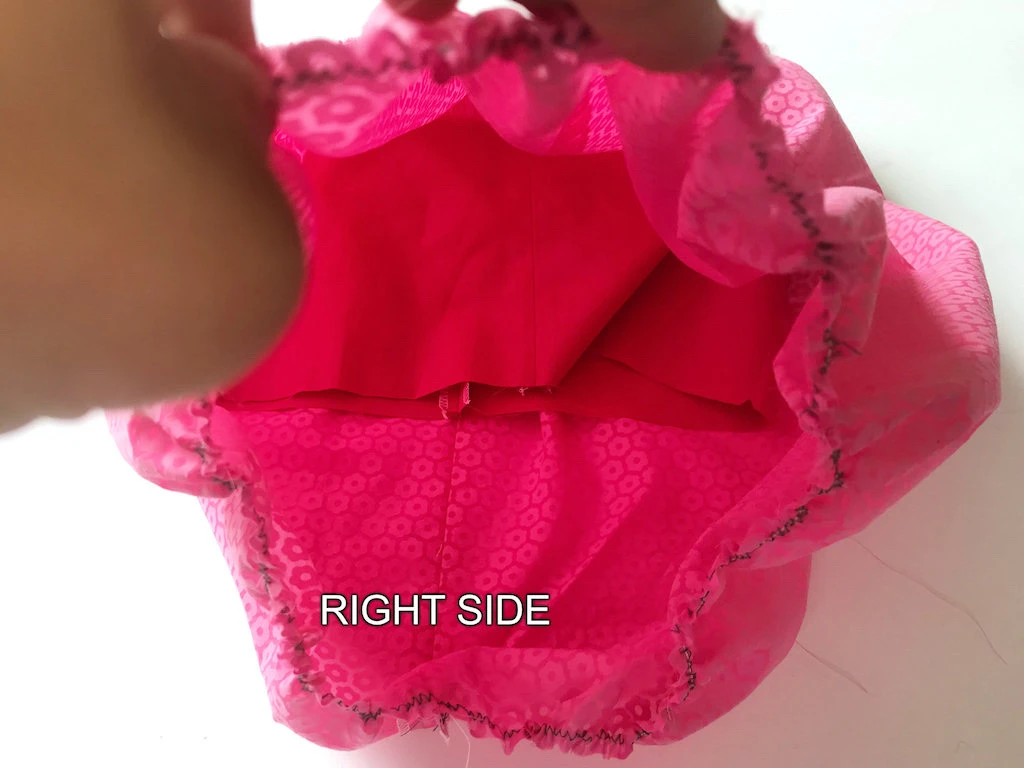
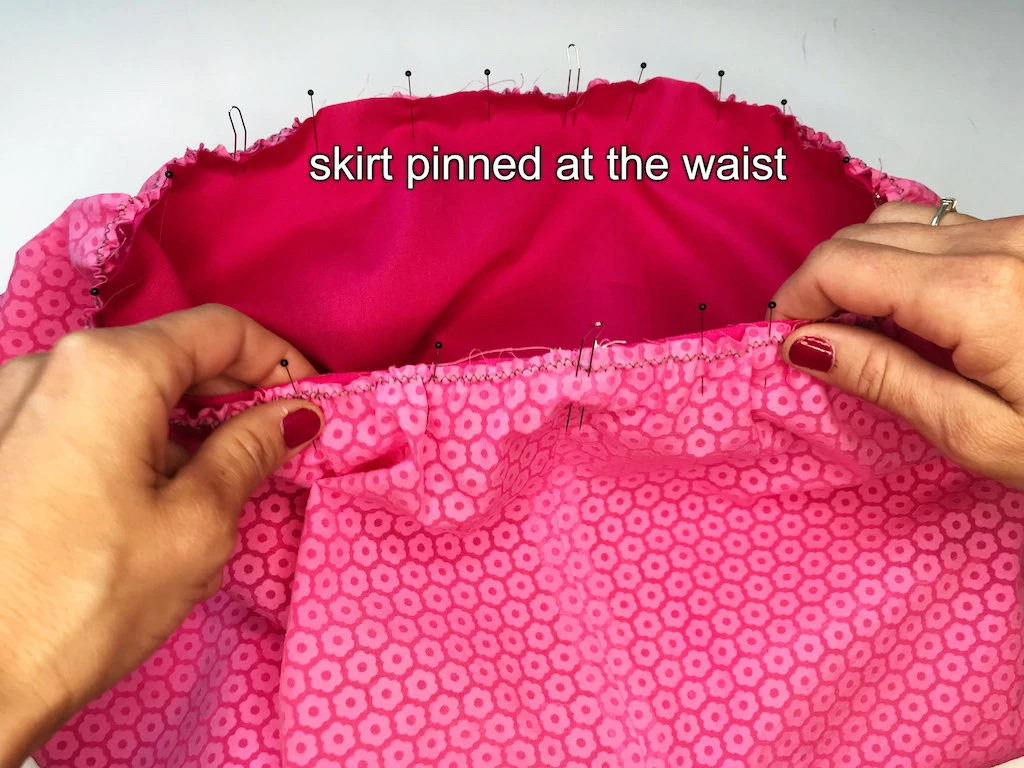
8. Take out the lining (see the image below). Fold the design fabric so that you can see its RIGHT side and pin the design fabric and lining waist together.

At this stage, you can notice how the bottom of the skirt has folded and a bubble shape of the skirt is being formed.

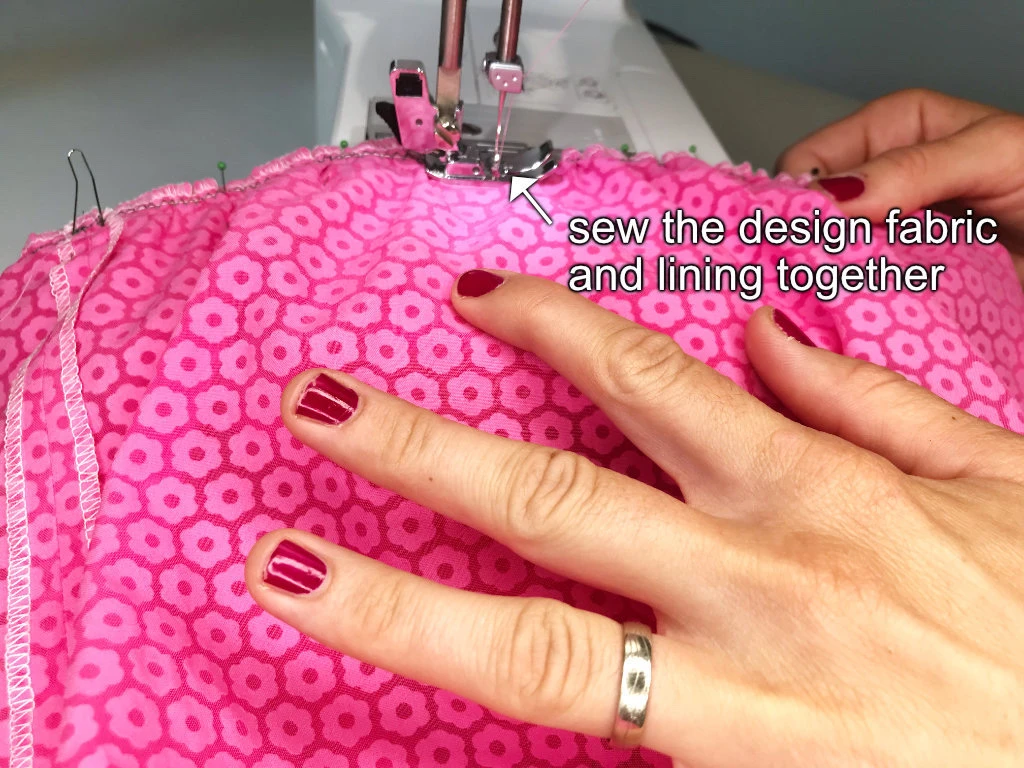
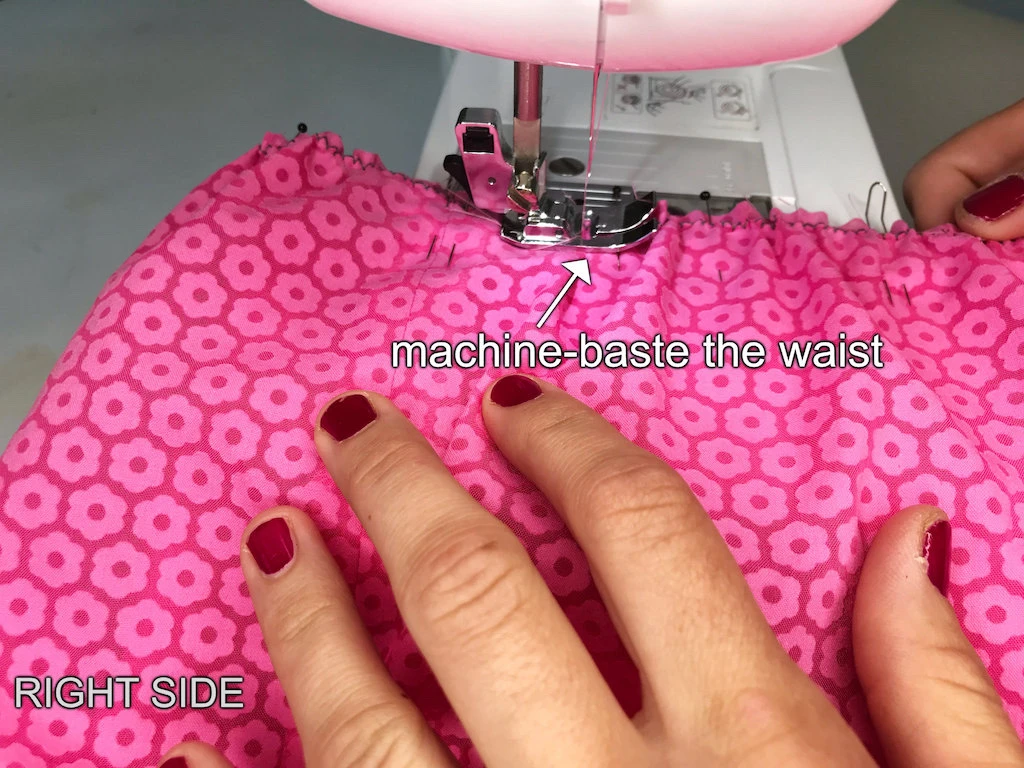
9. Machine-baste the lining and design fabric together at the waist (see the image below). (To machine-baste: use a long stitch and a low upper tension setting.)
Remove the stitches you have used to gather the design fabric. The bubble skirt is almost finished. To complete it, just the rib jersey waistband remains to be sewn.

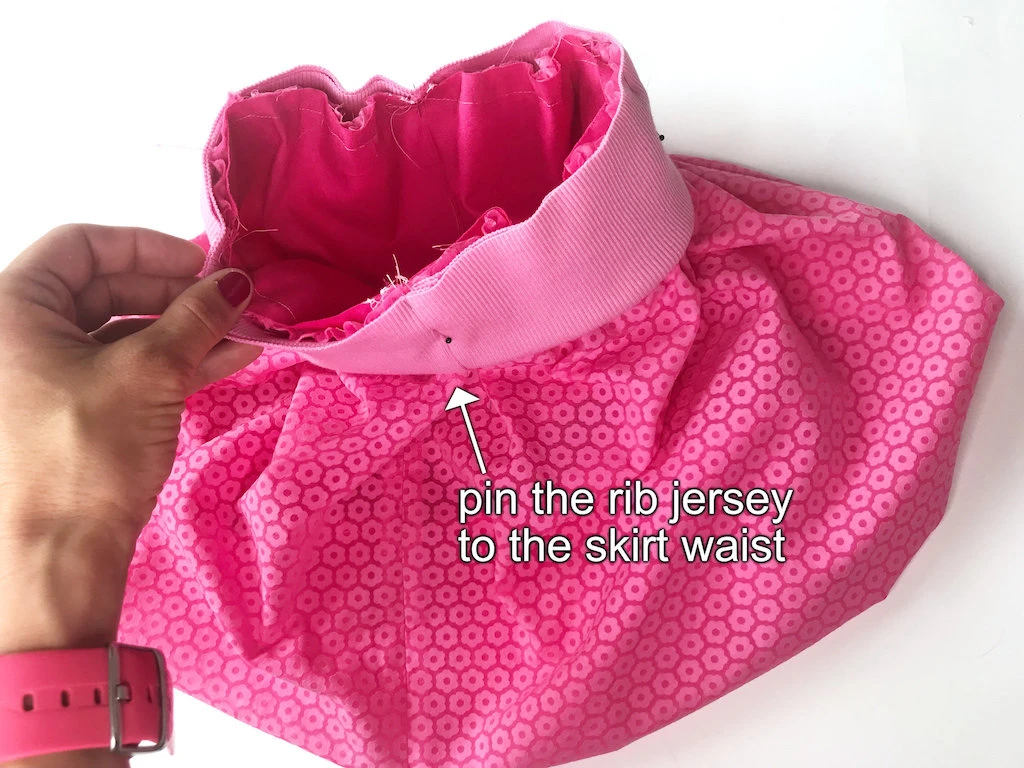
11. Now take the rib jersey piece for the waist and align the pins inserted in it with the skirt side seams and notches (see the image below). When attaching the jersey to the fabric, make sure you can see the opening for the elastic. Once the skirt is finished, this gap will be on the inside of the skirt.

11. Sew the jersey to the skirt waist. An overlock machine (or serger) is the ideal option to do so. If you do not own an overlock, use an overlock stitch on your sewing machine. If you have a very basic sewing machine that does not have an overlock stitch, use a 3 step zig-zag stitch instead. The three-step zig-zag stitch keeps all the three layers firmly together, providing the stretchiness of the final seam at the same time.
While sewing all layers together, slightly stretch the jersey waistband so that it lies nice and flat on the design fabric (see the image below). Be sure you are not preventing the overlock or sewing machine from feeding the fabric. Also remove the pins before they reach the knife of your overlock (serger) machine!


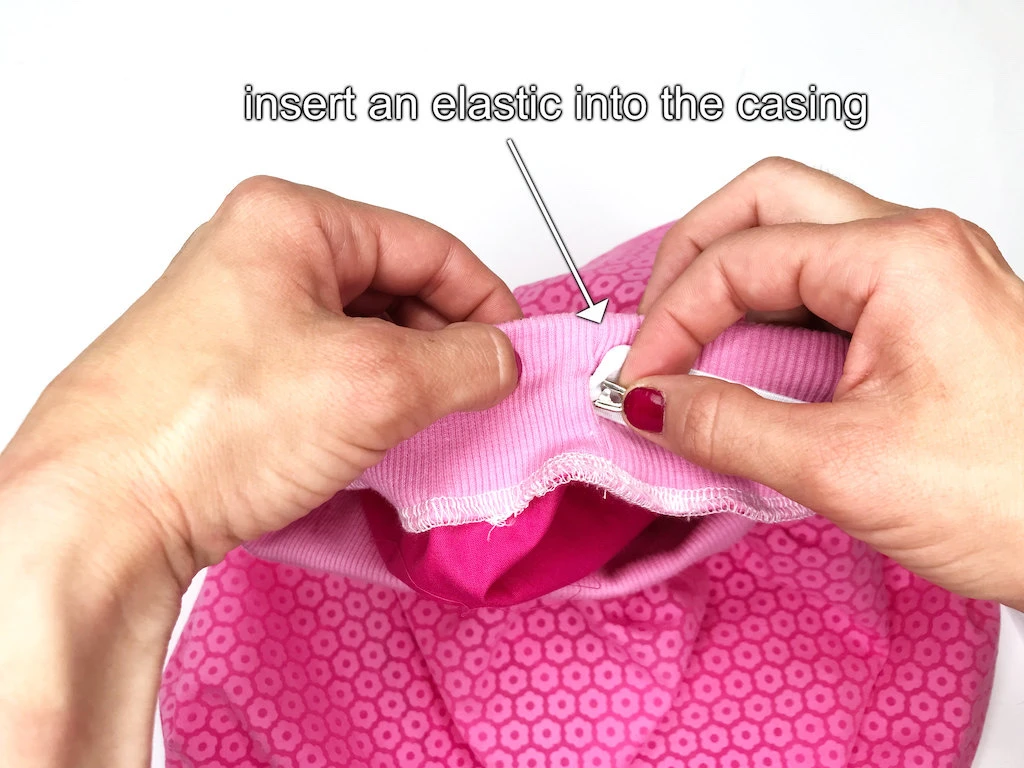
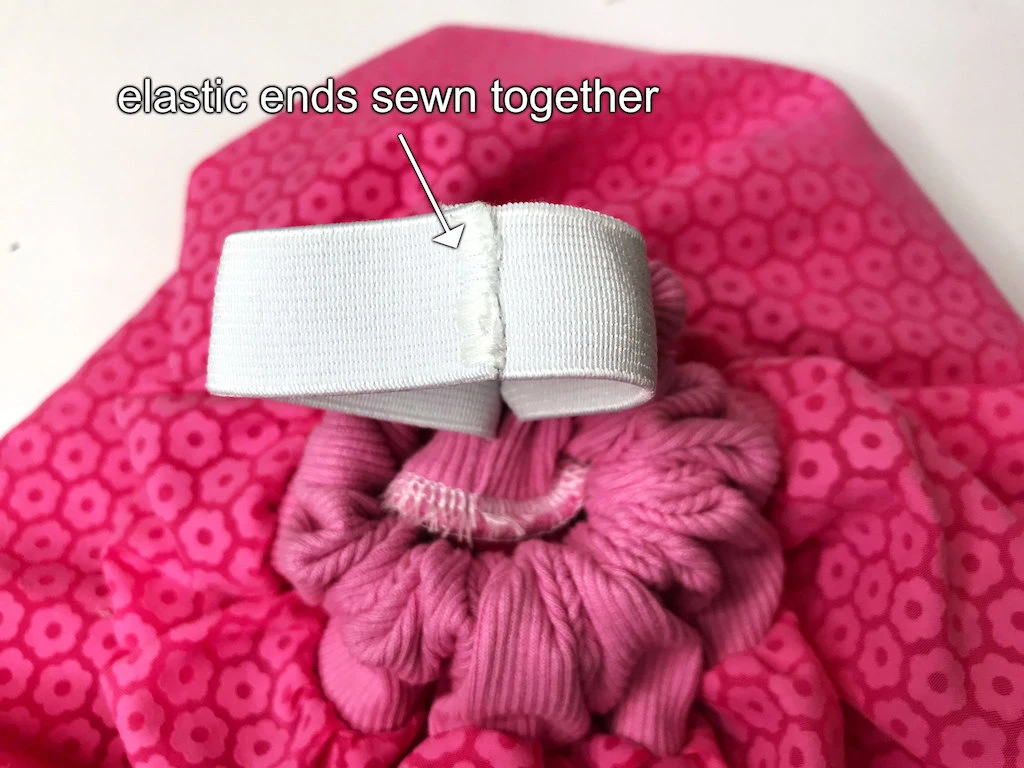
Insert an elastic band into the rib jersey casing and sew its ends together. I use a dense zig-zag stitch to do so. Remove the basting at the waist and your balloon skirt is ready.
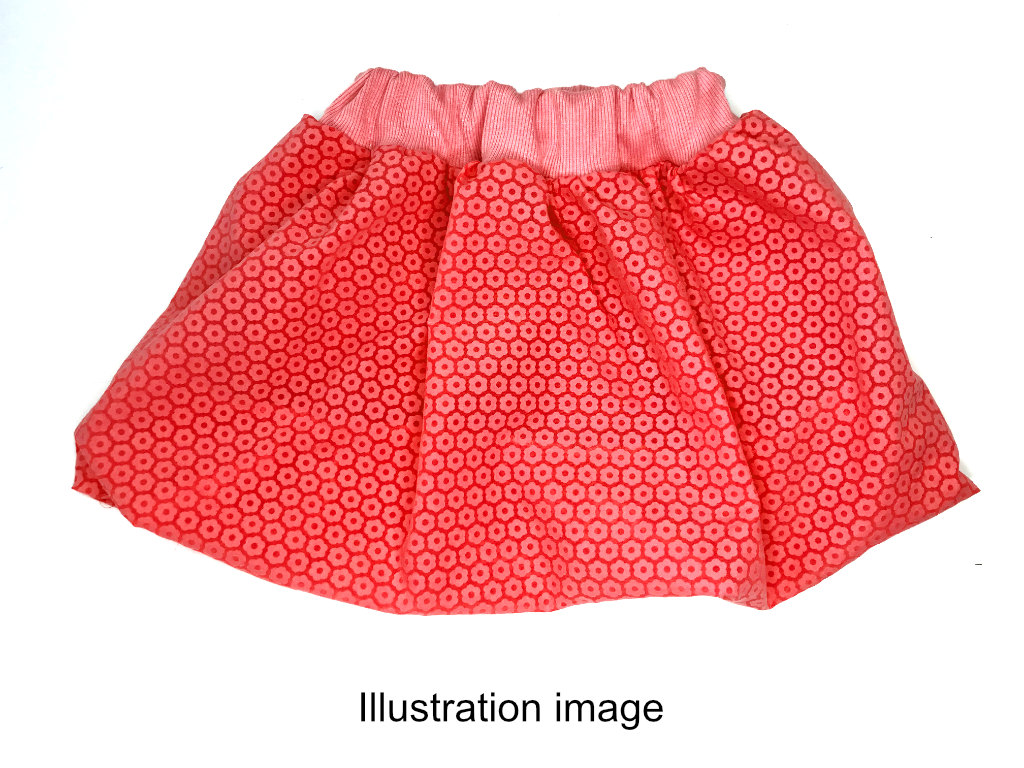
In the image below you can see the finished balloon skirt.

Download
Conclusion: How to Sew A Bubble Skirt
As you can see, sewing a bubble skirt is relatively easy and does not require any advanced skills or equipment. Therefore I consider it a suitable sewing project for sewing beginners. The simple skirt pattern is straightforward to prepare and the result is a pleasant summer girls’ skirt.