


There are many different ways to decorate hems. One very easy hem to make yet really attractive is a so called lettuce (or frilled) hem. It looks pretty on children’s clothing, summer dresses, free time clothing, lingerie or nightwear. You can sew this type of hem using a classic sewing machine or an overlock machine.
In this tutorial, you will learn:
- What a lettuce hem is?
- How to sew a lettuce hem on a sewing machine?
- How to sew a lettuce hem on an overlock machine?
- How to sew a lettuce hem with a nylon woolly thread on an overlock machine?
What is a lettuce hem?
A lettuce (frilled) hem is a simple finish of hems that creates a frilled or wavy effect on the edge of the hem. You can apply it on light to medium weight knits and soft woven fabrics. Keep in mind, that the fabric has to stretch in the direction you intend to hem it. Always test the stretchiness of the fabric before sewing this type of hem on a finished garment. Do not use it for heavy and stiff fabrics like duchess satin.
The most common usage of a lettuce hem is to finish garment hems made of knit fabrics.
How to sew a lettuce hem on a sewing machine?
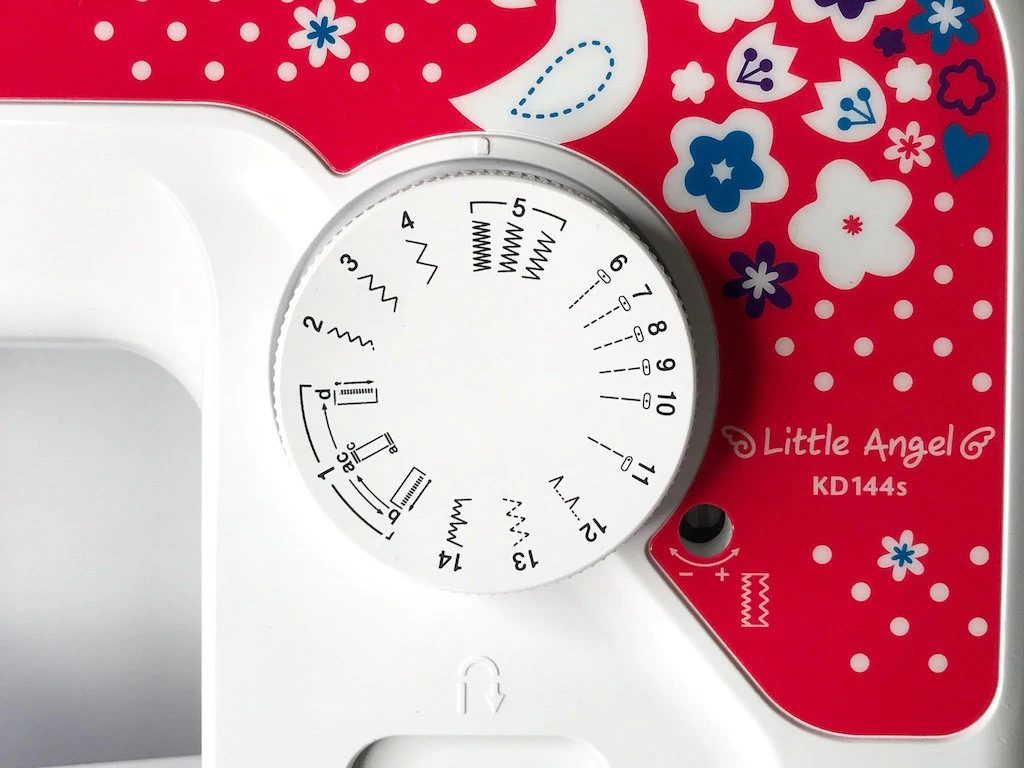
Set the sewing machine to a simple zig-zag stitch. Select stitch width 3 – 4 mm (8 – 6 stitches per inch) and short stitch length so that the stitching will be dense. About 1 mm (25 stitches per inch). My Brother sewing machine is a very basic one and the setting looks like this (see the image below).
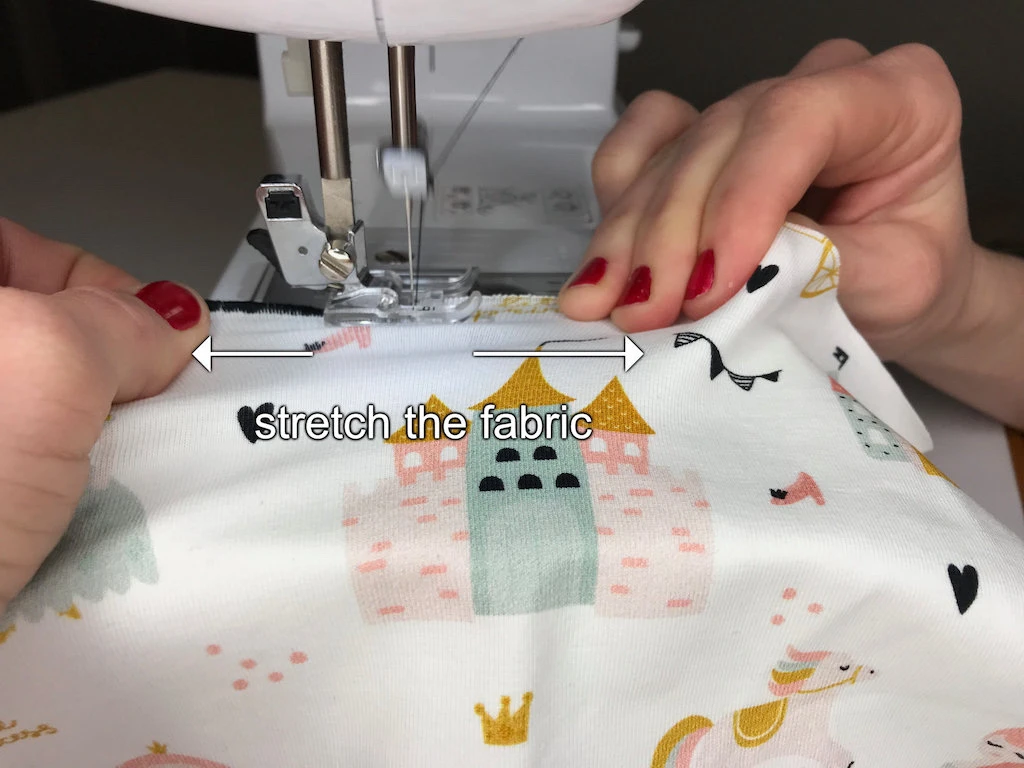
Position the fabric under the presser foot and sew along the raw edge of the fabric. Stretch the fabric edge in both directions (towards you and away from you as shown in the image below). Make sure you are not preventing the sewing machine from feeding the fabric. While sewing, check that you are stretching the fabric evenly (see the image below).
As you can see, even with a very basic sewing machine the result is very nice (see the image below).

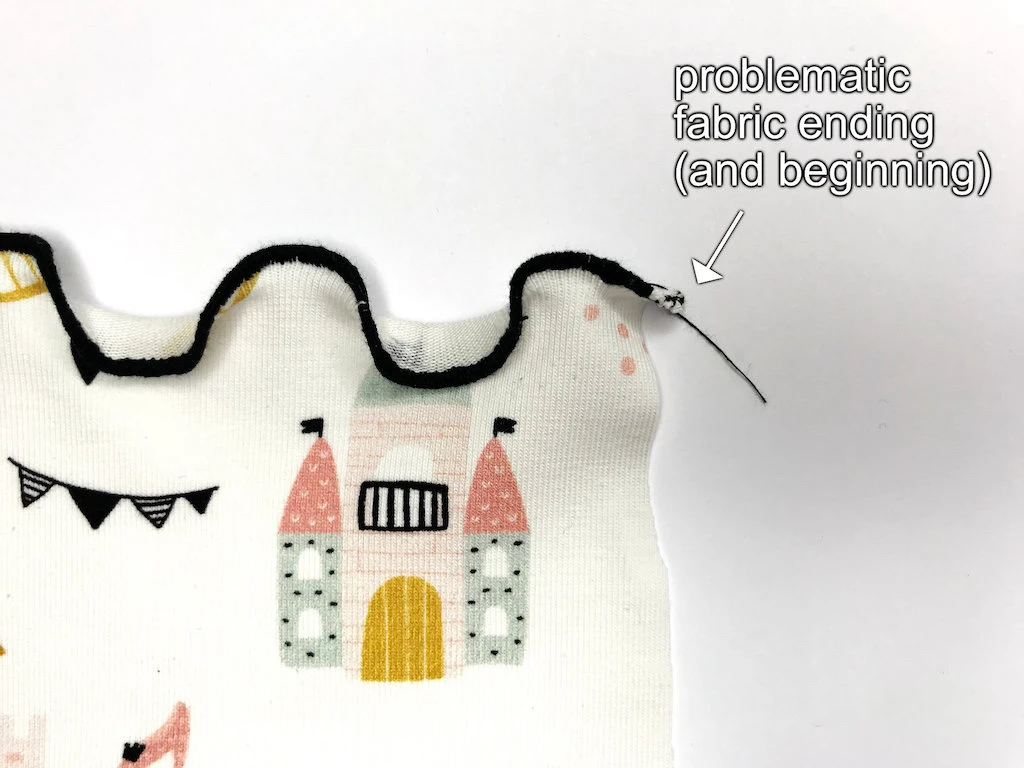
The only problematic parts of the hem are the beginning and the end where you cannot stretch the fabric into both directions (see the image below). But this should not be a big problem, you can hide these edges in the seam allowance of the garment.
How to sew a lettuce hem on an overlock machine?
If you own an overlock machine, you can use it to create the lettuce hem. The basis of a lettuce hem is a rolled hem. Usually, where there is an R sign on different places on the machine indicating a rolled hem setting for that specific machine.
Generally speaking, set your overlock machine the following way:
- Use the corresponding number of threads for a rolled hem (usually three threads, using the right needle with the left needle removed).
- Set the differential feed level to its minimum. There might be a small icon indicating that the fabric will be slightly stretched.
- Select the rolled hem stitch type on the machine.
- Set the stitch width to a minimum to create a nice and slim hem.
- Set the stitch length to a minimum as well, so that the raw edge of the fabric won’t be visible.
- Stretch the fabric towards yourself (if necessary) while feeding it to the overlock machine. Make sure you are not stretching too strong thus preventing the overlock from feeding the fabric to the overlock machine.
If you are unsure about the corresponding setting on your overlock machine, read the relevant section in the machine manual. Some machines may be more complicated to set up for a rolled hem.
I own a Baby Lock Victory BLS 3 overlock machine and the following photos with more detailed settings are described accordingly.
1. Set up three-treads for the machine
Most overlock machines can use up to four threads to sew a string of stitches. For the lettuce hem only three threads are used. Cut the thread above the left needle. Remove thread going through the left needle and the needle itself. You can leave the corresponding thread cone on the cone holder.

Be careful when removing the needle. Hold it tight so that it does not slip into the machine (mine did while I was preparing the overlock machine for this tutorial and I have no idea where it is 🙁 ).

2. Set the differential feed level to minimum
When the differential feed level is set to a minimum, it slightly stretches the fabric while it goes through the machine. The minimum is always less than 1 (0.6 on my Baby Lock machine). There may be an icon indicating fabric stretching (see the image below).

3. Select rolled hem stitch type
Most overlock machines have a setting for different stitch types. Search for a rolled hem stitch setting (usually marked R) and set it on your machine (as it is the foundation of the lettuce hem).

4. Set stitch width to minimum
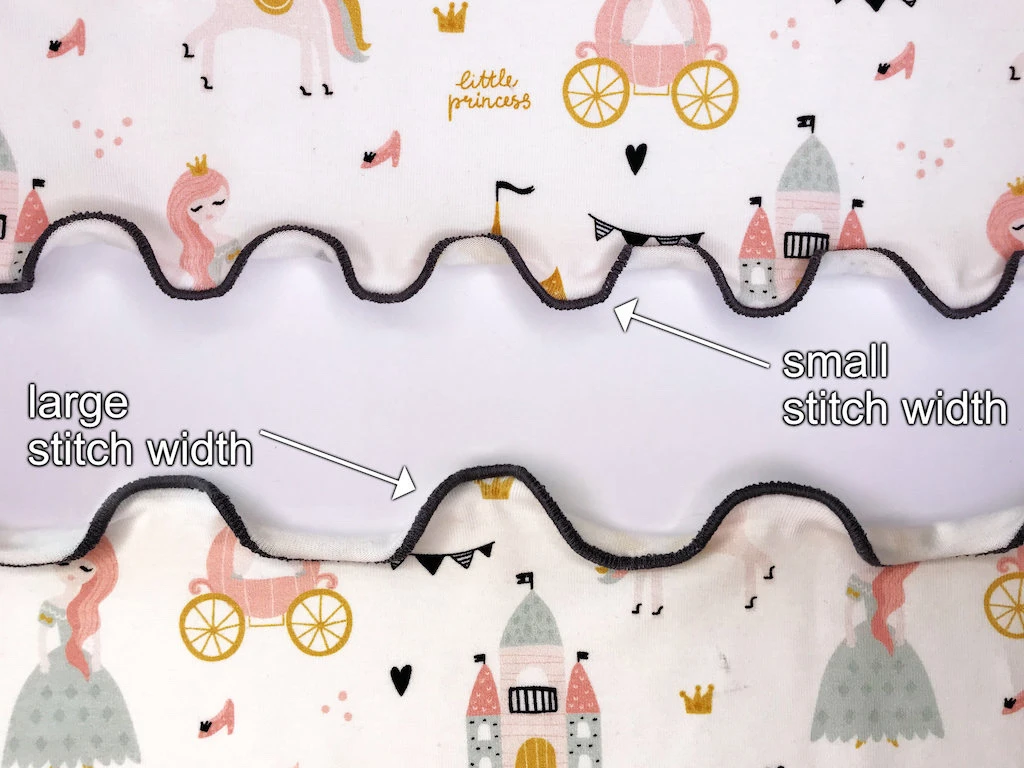
Set the stitch width to a minimum (3.0 on my machine). I do not recommend using a wide stitch because the final hem might be too bulky as the stitching is very dense (see the image below).

5. Set stitch length to minimum
A small stitch length ensures that the stitching is dense and so leaving no space between the stitches. A long stitch length would reveal the raw edge of the fabric. Use this setting only if you like the result.

In the image below you can see a draped gathered skirt made of multiple layers. Each layer is finished with a lettuce hem. I used a knit stretch 100% polyester fabric, which visually resembles a classic woven chiffon fabric.

How to sew a lettuce hem with a nylon woolly thread on an overlock machine?

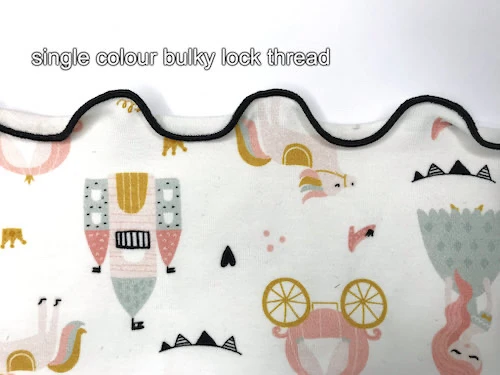
A nylon woolly thread, compared to a classic polyester overlock thread, has a higher volume and coverage (see the image below). In addition to this, it is also more shiny although the picture does’t really capture this quality. For this tutorial, I used Gutterman bulky lock threads. Multi colour and black.

Use the wooly thread in the upper looper
To use a nylon woolly thread on your overlock machine, do the following (if you are not sure whether it’s possible with your kind of machine, check the machine manual.) Replace the upper looper thread of your overlock machine with a woolly thread.
For the lower looper, use a classic overlock thread of the same or another colour similar to the woolly thread.
For the right needle, too, use either a classic overlock thread of the same or a very similar colour to the woolly thread.
It is not necessary to replace all overlock threads with woolly threads. The upper looper wraps the edge of the fabric and is most visible on the hem.
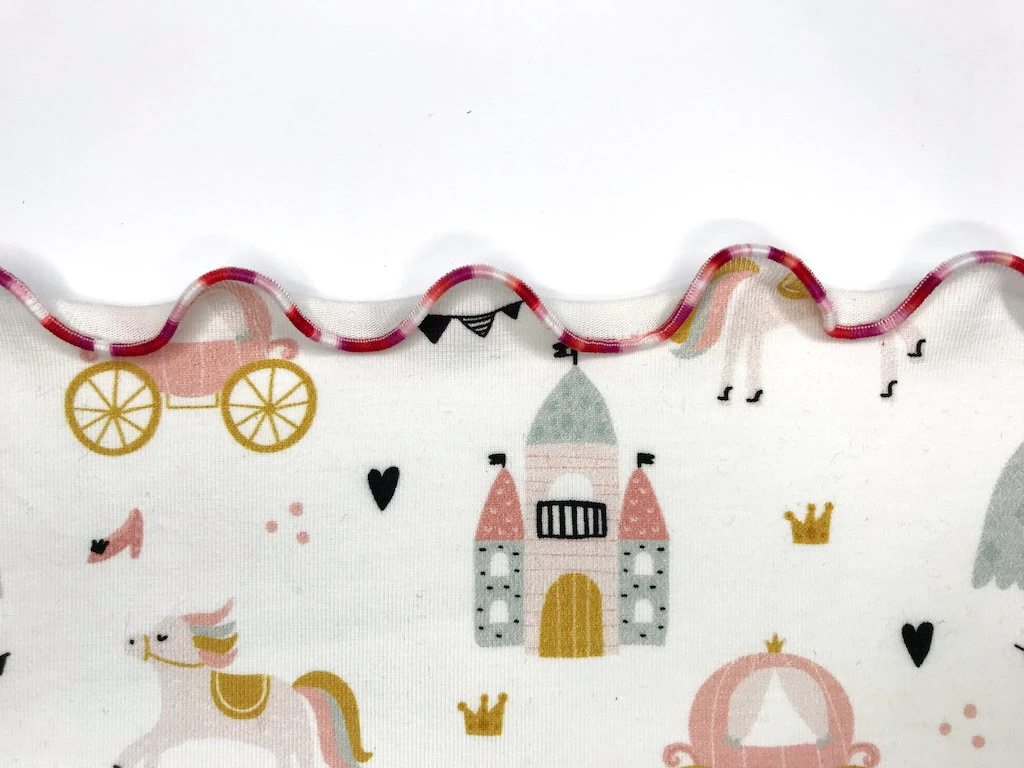
If you are using a multi colour woolly thread, there will be a tiny variation on the final hem when you use to thread the right side needle. In the image below, you can see the difference between a classic thread and a multi colour woolly thread in the right side needle.
With a classic white thread, there is a slim white stripe running along the colourful hem. On the other hand, with the multi colour thread in the right side needle, the slim stripe is multi coloured too (see the image below).

In my opinion, the final lettuce hem sewn with a woolly thread (either multi colour or uni colour) is more attractive as it has a smoother and neater look than with a classic thread. Nevertheless, I recommend buying one. See for yourself as all depends on your taste in the first place.
Conclusion: What Is A Lettuce Hem And How To Sew It?
Nice and easy to sew hemming is possible with both sewing and overlock machines. Even with a very basic one the results are really neat. When you are in a training mood, find a few pieces of various fabrics and experiment. I am pretty sure, you will use the lettuce hem in some of your sewing projects.
A lettuce hem, also called a frilled hem, adds a wavy, frilled effect to fabric edges. You can create it using a sewing machine with a zig-zag stitch or an overlock machine set for a rolled hem. Stretch the fabric gently while sewing to achieve the frilled look. Experiment with different threads for varied effects, and enjoy adding this decorative touch to your sewing projects!