


A super easy, yet visually appealing way to finish and decorate hems of skirts, trousers, sleeves or edges of armholes is by applying a bias tape to them. Make your own binding or. buy a bias tape you like and sew.
In this tutorial, you will learn:
- What a bias tape is
- How to sew bias tapes with a standard presser foot
- How to sew bias tapes with a dedicated presser foot
What is a bias tape?
A bias tape (also referred to as a bias binding or a bias binding tape) is a narrow stripe of bias cut fabric folded towards the inside. It is used to finish edges of fabric anywhere on a garment. There are, of course, other possibilities. For instance, you can also use these tapes to decorate fabric. In the image below, you can see a dress with a three quarter circle skirt. Its edges are finished with a bias tape. Also the horizontal stripes are binding tapes sewn to the skirt.

The bias binding is cut on the bias so that it has give and can be bent when applied on circular shapes (like armholes or neckholes). In the image above, you can see how the tape smoothly follows the curved edge of the bodice circular skirt of the sleeveless dress.
A bias binding can be made of any type of fibre (cotton, polyester, blends, silk) or fabric (satin, muslin, taffeta, plain weave fabrics).
In stores you can buy bias tapes that are already folded, pressed and prepared for sewing straight away. You can choose from a large variety of colours and widths (see some examples below). They are usually made of cotton or polyester.

How to sew a bias tape with a standard presser foot
Wrap the bias binding around the edge of fabric and pin it.

Place the fabric with the pinned bias tape under the presser foot and sew close to the bias tape edge.

While you are sewing, fold the tape in half wrapping the edge of the fabric before it goes under the presser foot of the sewing machine.

In the image below, you can see the result of sewing the tape with a standard presser foot.

How to sew bias binding with a dedicated presser foot
Our Brother sewing machine comes with a presser foot, that is dedicated to sewing bias binding tapes. It has one limitation – you can sew tapes that are about 1 cm (3/8 inch) wide (width before folding the tape in half). As you can see, only quite narrow bias tapes can be sewn using this presser foot.
Your sewing machine might come with a different presser foot for sewing bias tapes. As I have a Brother sewing machine, in the images below I’m going to briefly demonstrate how to use this one.

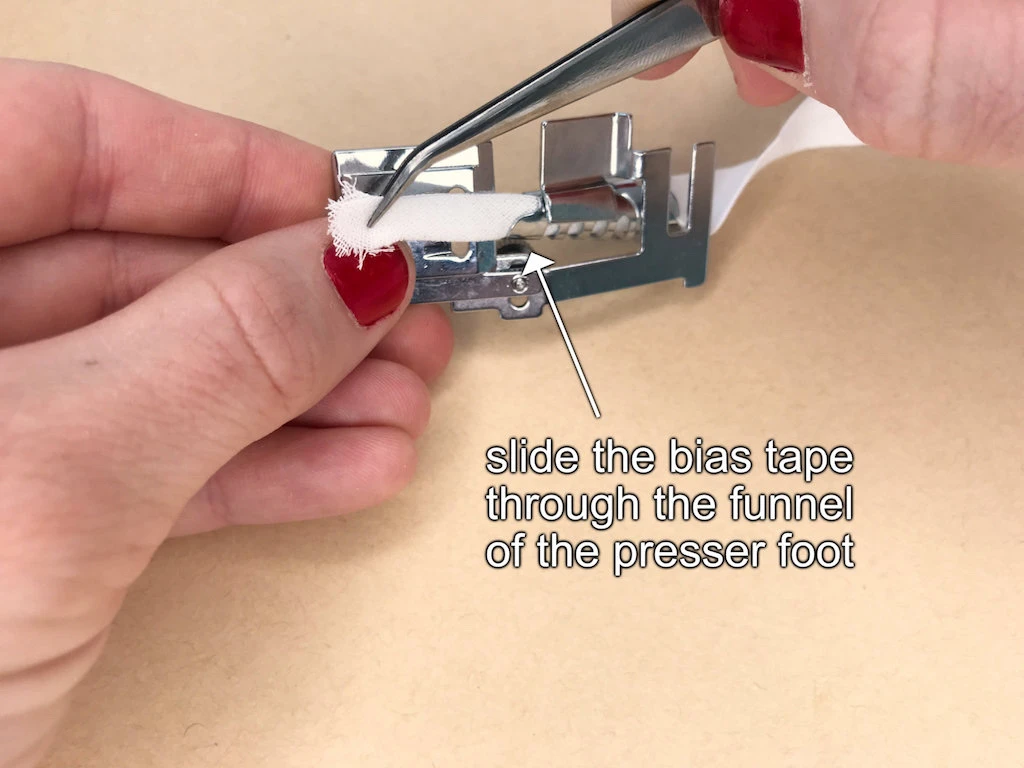
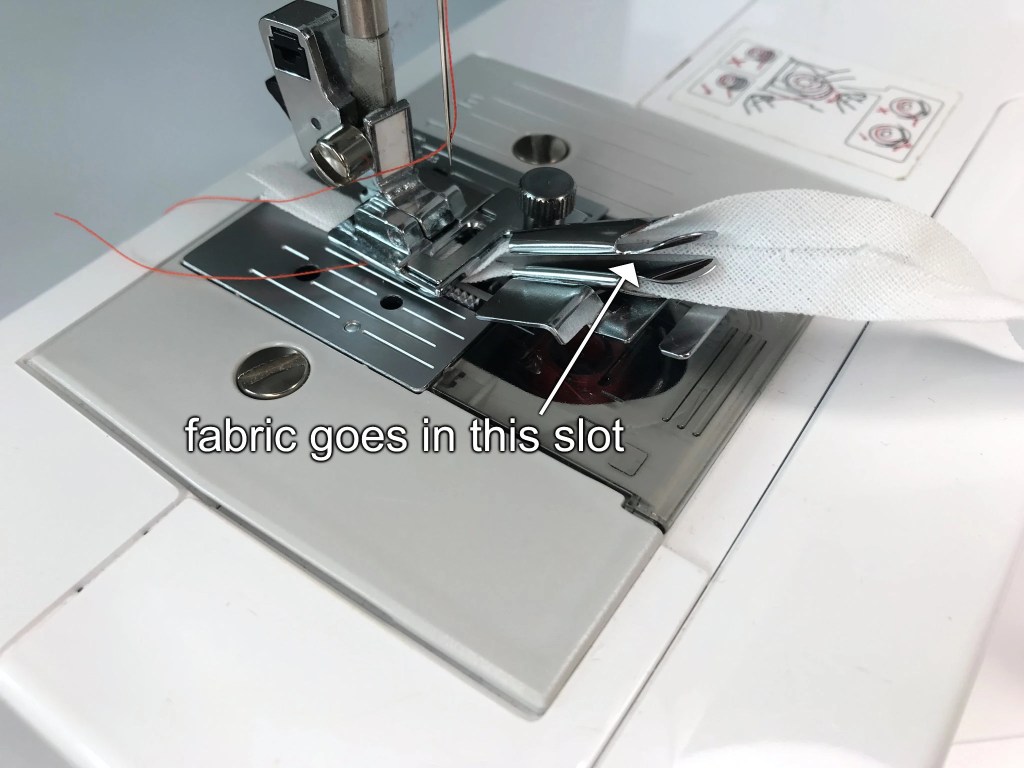
Although getting the tape through the funnel of this presser foot is a bit cumbersome, sewing the bias tape with it is amazing. All you have to do is to feed the fabric edge properly to the presser foot (see the images below).

The result is really nice with both matching colour and contrasting colour (see the images below).
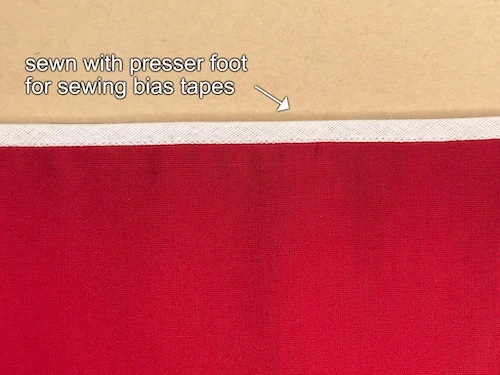
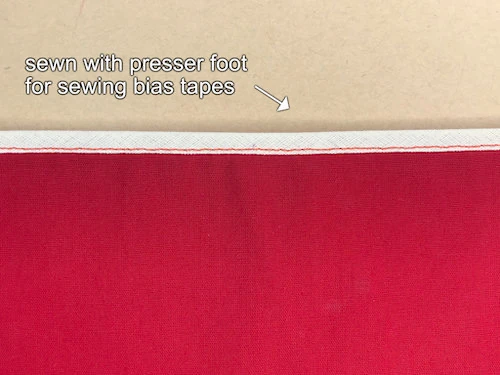
The stitching is neater in comparison with sewing with the standard presser foot (see the image below).
