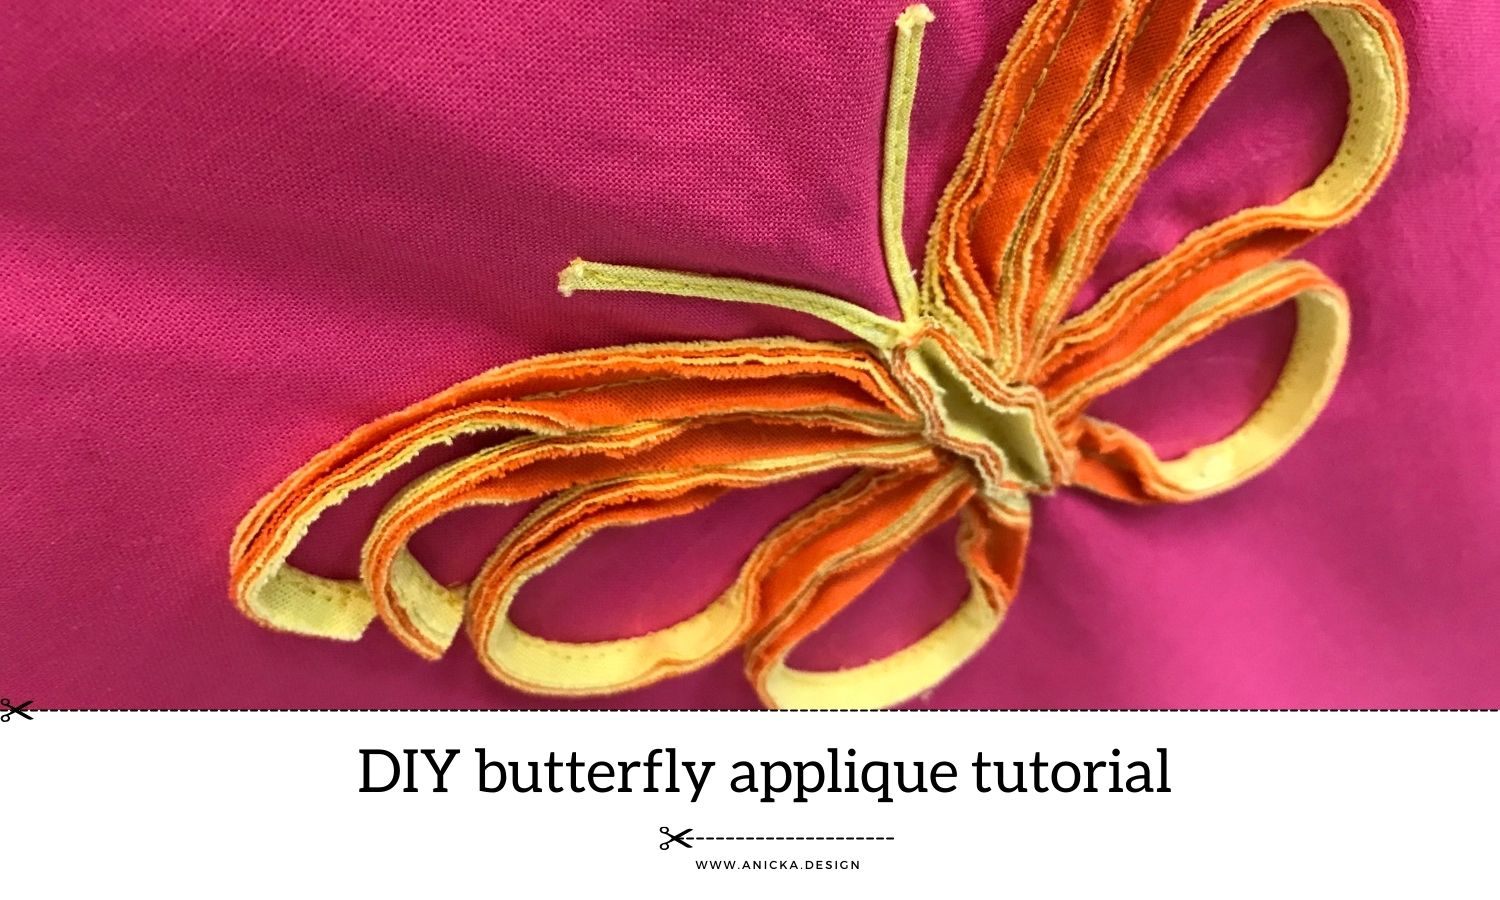

Having finished my first dress with faux-chenille-like appliques, I created another one utilising a slightly different technique of fabric manipulation. So I decided to make a butterfly applique.
Instead of cutting out a specific shape from selected fabrics, as on my first dress, I’ll cut stripes of stacked fabrics on the bias and sew them in the desired shape.
In this tutorial, I will show you how to create a butterfly you can sew onto t-shirts, dresses, or tunics. It all depends on your creativity. Your home decor such as pillows, bed throw blankets and many other items may gain a lot more attractive look.
1. Prepare cotton fabric for the butterfly applique
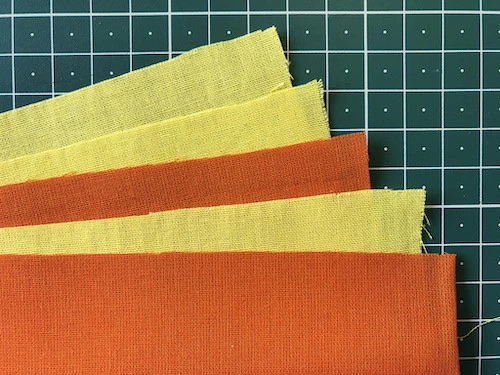
Select two woven cotton fabrics of different colours for the butterfly and also choose a base fabric you are going to use for your project. For my butterfly, I chose orange and yellow while pink for the base material.
Pretreat all fabrics the way you normally would when working on any other sewing project. Prewash the fabric and tumble dry or let dry and iron.
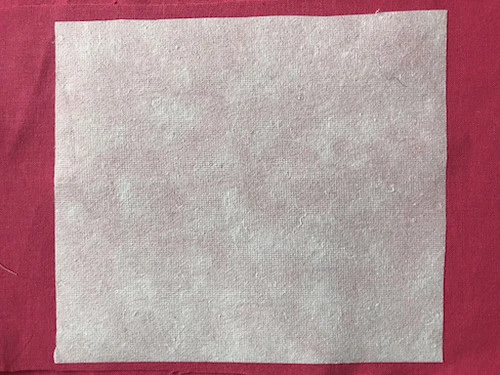
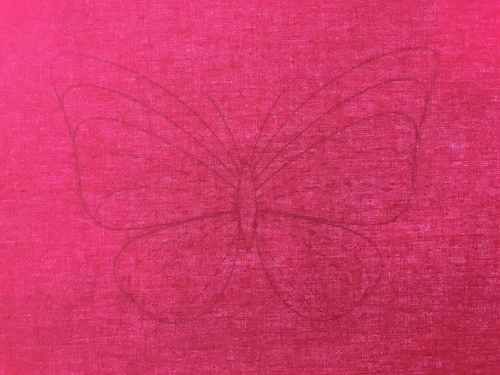
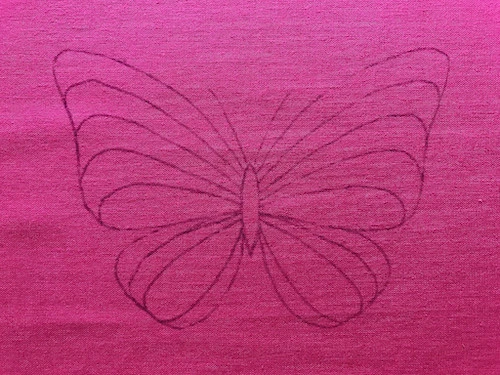
Imagine where you wish to place the butterfly and iron an embroidery stabiliser from the wrong side of the base fabric. This is really an important step. It’s very likely that without it the base fabric will get distorted in the process of sewing.


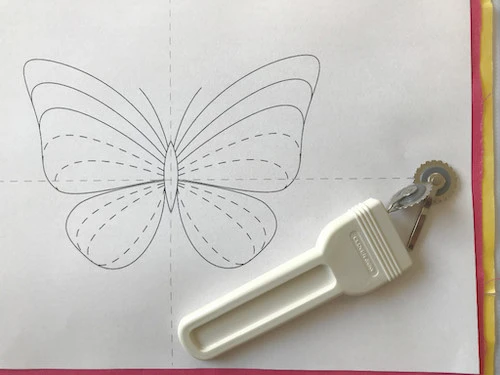
2. Download and transfer the template
Download the free butterfly template below (.pdf format) and print it. The A4 paper format is suitable for any home printer. Set the printer to black & white and make sure the scale is set to 100%.
You can transfer the template in several different ways (see the instructions below).

Transfer method I: Transfer paper and tracing wheel
You can transfer the template using a tracing wheel and transfer paper. Put the transfer paper with the coloured side up. Place the fabric right side down on the tracing paper. Place the image with the butterfly on the top of the fabric and trace the template. To create exactly the same applique as in the image at the beginning, trace the solid lines of the butterfly only. (I have also traced the dotted lines in case I change my mind later and decide to add more material to the wings).
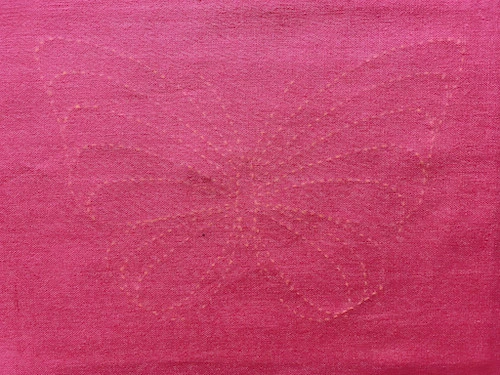
Transfer method II: Marker and tracing pad
If you have a tracing pad, you can trace the template using a water-soluble marking pen. Test the fabric marker on a scrap of fabric to make sure it can be washed out. (This is the method I prefer to use.)
Work in the following order: tracing pad, paper with butterfly template, fabric with the right side up. Do not forget to turn the pad on and trace (see the images below). If you cannot see the butterfly clearly, make your workroom darker. To create exactly the same applique as in the image at the beginning, trace the solid lines of the butterfly only. (Again, I have also traced the dotted lines just in case I change my mind later and decide to add more material to the wings).
3. Prepare stack for sewing the butterfly applique parts
For the individual parts of the butterfly, you are going to need stripes of stacked fabric. To create them do the following:
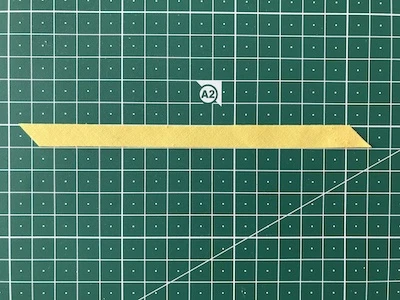
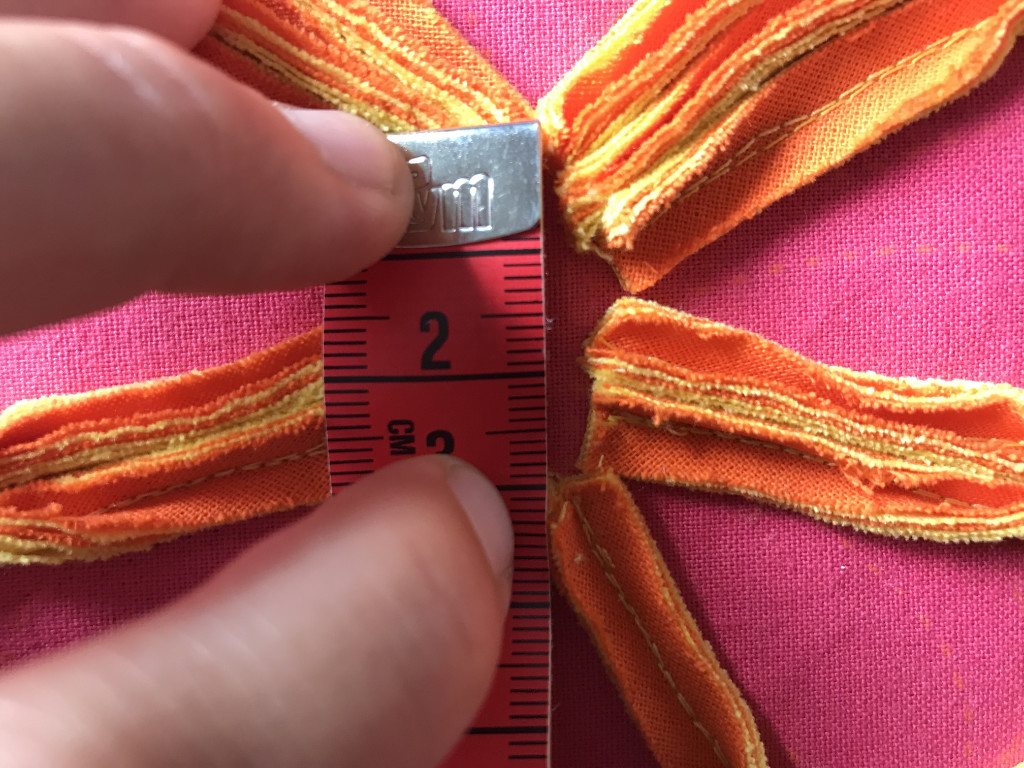
Cut out 5 rectangles of the fabrics you prepared for your butterfly. Three rectangles of one colour and two of the other colour.
Each should be about 15 cm by 35 cm ( 5 7/8 inch by 13 7/8 inch). I used 3 yellow rectangles and 2 orange ones.
Baste the stack together and mark the bias with a water-soluble marker (see the images below).
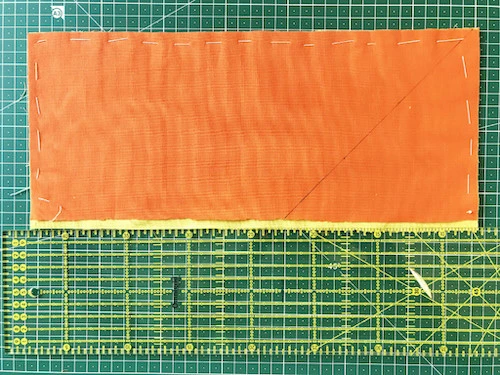
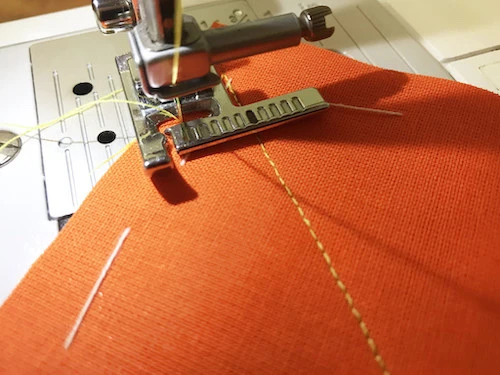
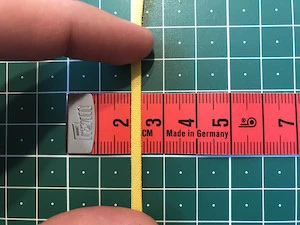
Sew straight lines on the bias about 1 cm (0 3/8 inch) wide. Use a sewing machine presser foot with a ruler (as I did) or a simple presser foot using its right side as a guide.
Sew 10 straight lines on the bias (see the images below).

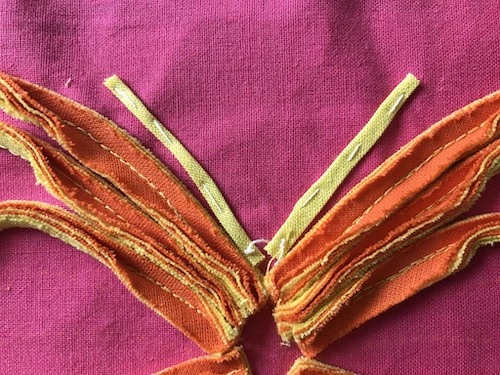
Slit individual stripes of fabrics with sharp scissors. Cut right in between the sewn lines until you cut all stripes. You will get 10 stripes of stacked fabric. For the butterfly wings you will use 8 of them, yet, it is useful to have some extras in case something goes wrong.
Do not discard the triangles on the sides left from the cutting as you are going to need them.
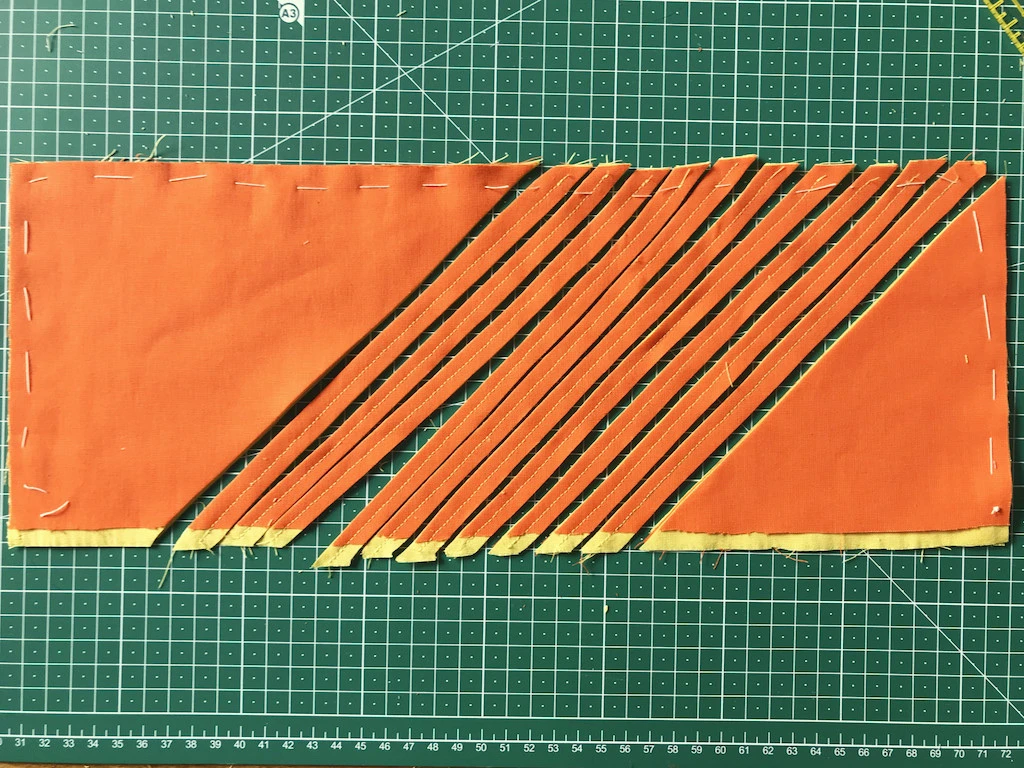
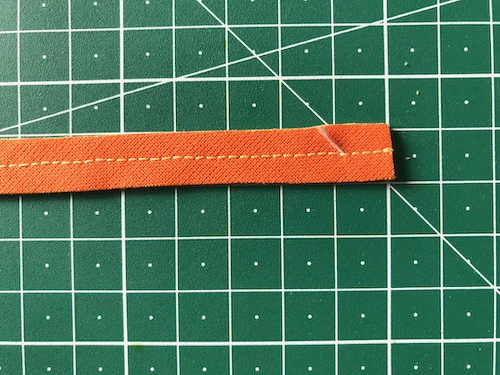
Cut off the pointy end from each stripe.

4. Prepare stripes for sewing the butterfly applique
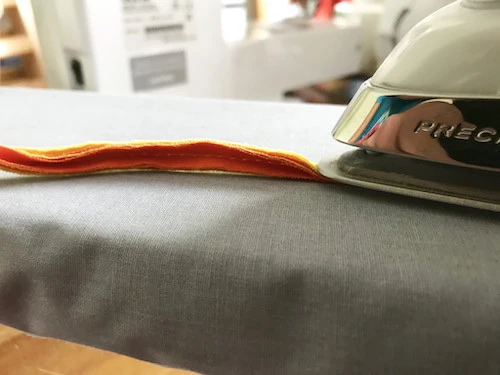
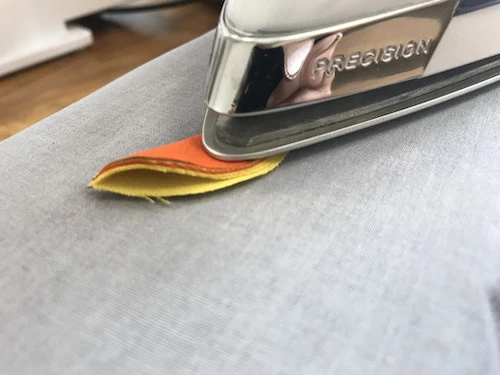
Bend each stripe in the middle, exactly on the stitching and iron it carefully. This is a little bit tricky so be careful not to burn your fingers (as I did :)). You should end up with a nice thick stripe (see the images below).

5. Sew the wings of the butterfly
Following the wing lines you have traced onto the fabric, start sewing each stripe in the way described below.
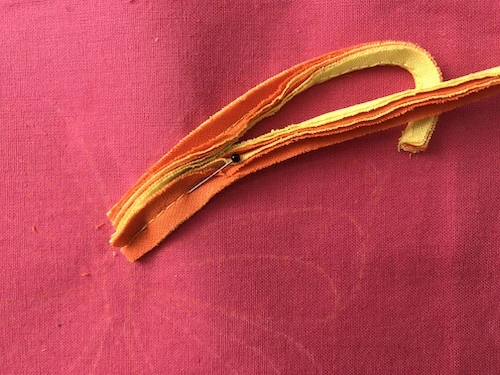
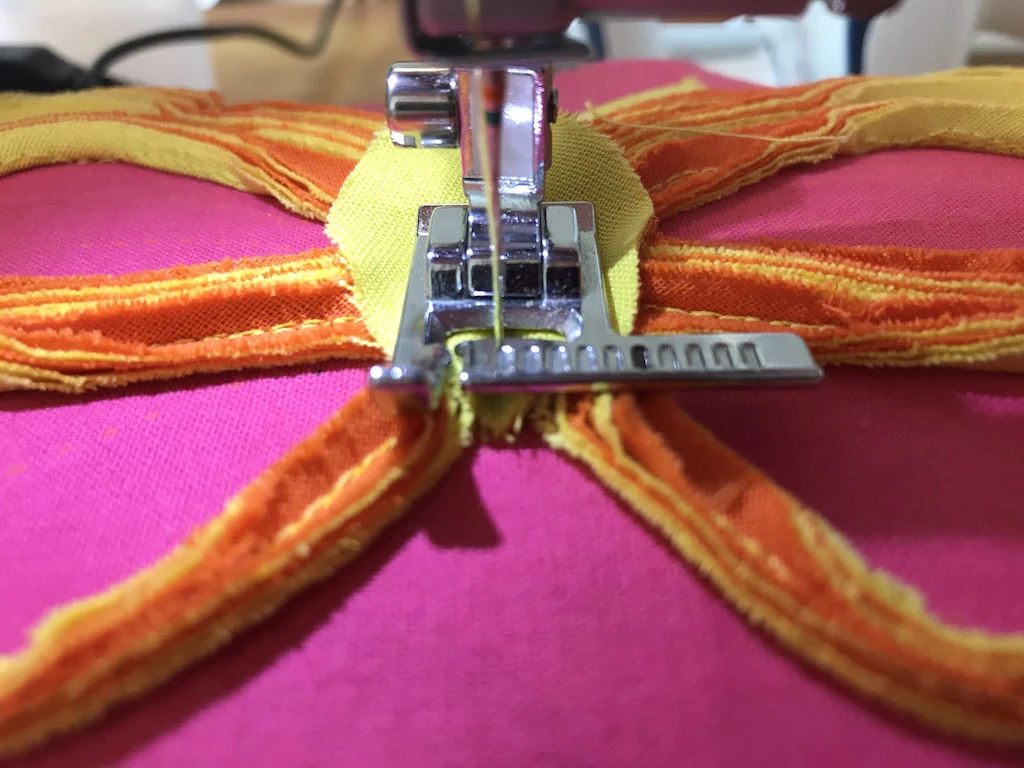
Pick one of the stripes you have prepared, pin it right next to the body of the butterfly. Start sewing next to the body and sew about two thirds sewing through the centre of the stripe. Secure the thread, lift the presser foot and cut away redundant threads.
Then ‘close’ the stripe and sew close to the bent side of the stripe. Sew until you reach the second line of the butterfly wing. Stop sewing, secure the thread and lift the presser foot. Cut away threads and redundant part of the stripe (see the scheme and images below).


1. Pin the stripe right next to the body.

2. Sew about 2/3 in the middle (red colour in the scheme).

3. Bend the stripe and sew at the bent edge slightly overlapping the first stitching (blue colour in the scheme).

4. Stop stitching at the end of the blue line in the scheme, secure thread and cut away redundant parts of the stripe and threads.
Repeat the process described above for the second line of the wing.
1.

3.

2.

4.
For the two looped parts of the wings do the following.
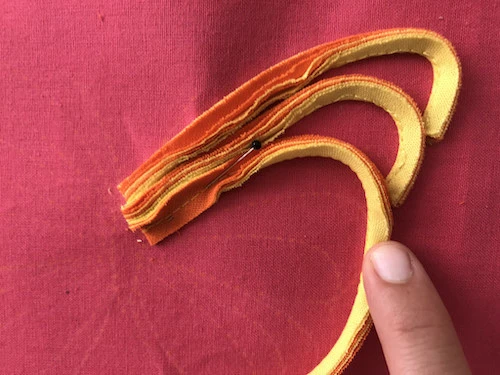
1. Pin the beginning of a stripe right next to the body and sew like before (red scheme line).
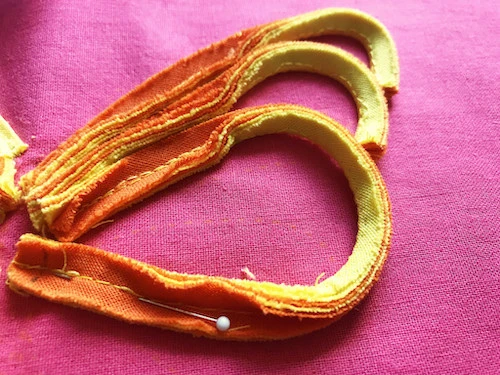
2. Pin the other end of the stripe next to the body and sew. Begin sewing next to the body (red scheme line).

3. Cut off the excess stripe and as the last step sew the curved part of the wing at the edge of the stripe (blue line).

4. Repeat the same process (1.,2.,3.) for the lower wing.
6. Prepare and sew antennae
Cut a 1 cm (0 3/8 inch) wide stripe of cotton fabric on the bias. You can cut away a stripe from the stack left from sewing the stacked stripes. Cut a stripe from one layer only.
Bend one-third of the stripe on the long side and iron. Bend the other third over the first one and iron again to get really thin stripes about 3mm wide (0 3/8 inch) (see the images below).

First, carefully baste the antennae where they belong and sew.

7. Create and sew the body of the butterfly
Measure the actual size of the butterfly body. In my case, it is about 3 cm (1 1/8 inch) long and about 1 cm (0 3/8 inch) wide.

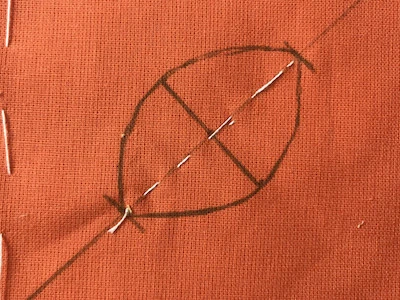
Take one of the cut-off triangles from cutting the stripes and mark a long line on the bias. On this long line mark a segment that is 2 cm (1 3/4 inch) longer than the actual length of the butterfly body (in my case 3 cm + 2 cm = 5 cm) (1 1/8 inch + 0 3/4 inch = 1 7/8 inch, 1 31/32 to be more exact). Draw a perpendicular line in the middle of this segment and make it 2 cm (0 3/4 inch) wider than the width of the measured body width (in my case 1 cm + 2 cm = 3 cm) (0 3/8 inch + 0 3/4 inch = 1 1/8 inch).
Draw the body of the butterfly. It should be lens-shaped.

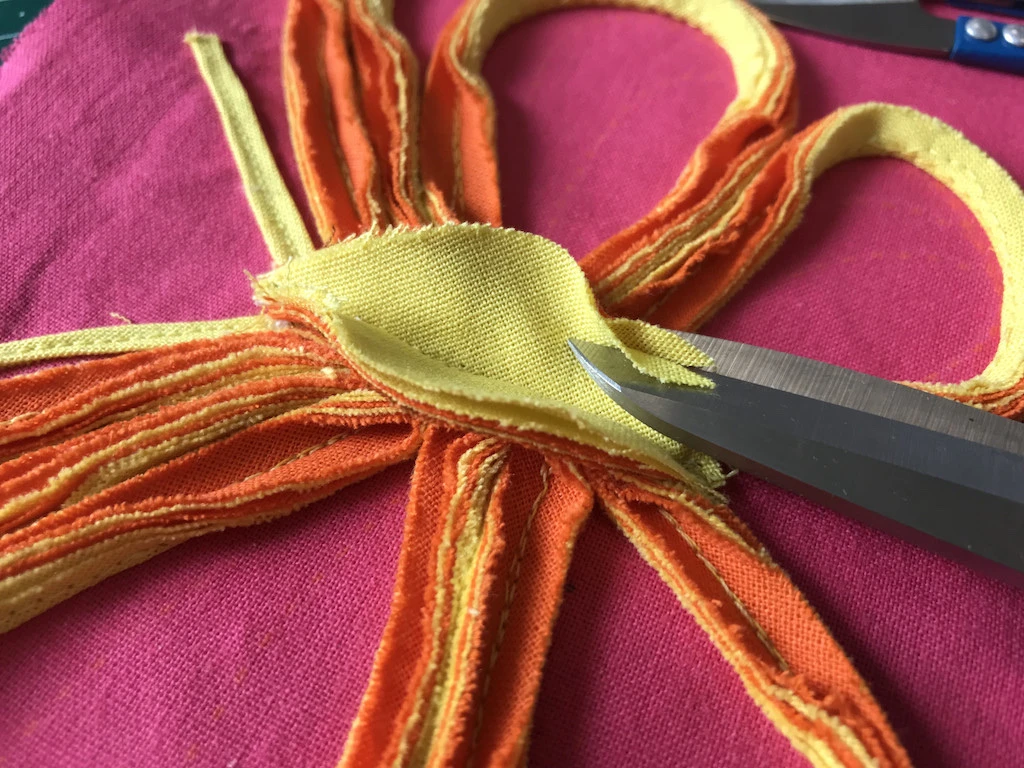
Baste along the centre of the body and cut out the body. Then bend it along the basting and iron.
Place the body in between the wings, baste it and sew.
The edges of the body will need some adjustment. Hold the scissors horizontally and cut a thin stripe of fabrics from all layers at once. Do this cut on both sides of the body and the butterfly is finished.

8. Complete your project
We have sewn the butterfly to an unfinished project. Complete it now. Whether it’s a dress, t-shirt or home decor. I have decided to sew my butterfly to the front side of a tunic. Unfortunately, I forgot to use the stabiliser right at the beginning and now I have to start over again. Do not make the same mistake :)! Good luck and let me know about your success.
Conclusion: How To Make a Butterfly Applique?
I hope you enjoyed this tutorial and that it inspired you to create your own designs based on this technique. If you liked this tutorial, please be so kind to rate share it. Thank you.