

Having finished my first dress with a heart applique followed by a tunic with a butterfly, I intended to make another dress for my daughter and decided to further experiment with the faux-chenille style I came across in Ann Small’s book.
While experimenting with fabric cutting, it occurred to me that creating small fabric applique might be both useful and interesting. Therefore, in this tutorial I will share with you how to make small faux-chenille style flowers you can fix to clothes, head bands and such like.
Since this project does not require big pieces of material, you can put to good some fabric scraps from your previous successful or less successful projects :).
The size of each flower described below is about 5 cm by 5 cm (2 inch by 2 inch).
1. Prepare fabric for the flower applique
Use tigtly woven, stretch cotton fabric. 100% cotton is very likely to fall apart while creating the centre of the flower.
For this type of flower, I recommend using a stretch cotton fabric. 100% cotton is very likely to fall apart while creating the centre of the flower. (This advice is based on my personal experience as I first started with a 100% cotton fabric, 150 gsm (grams per square meter), and the centre of the flower did not hold its shape at all. See the image below.)
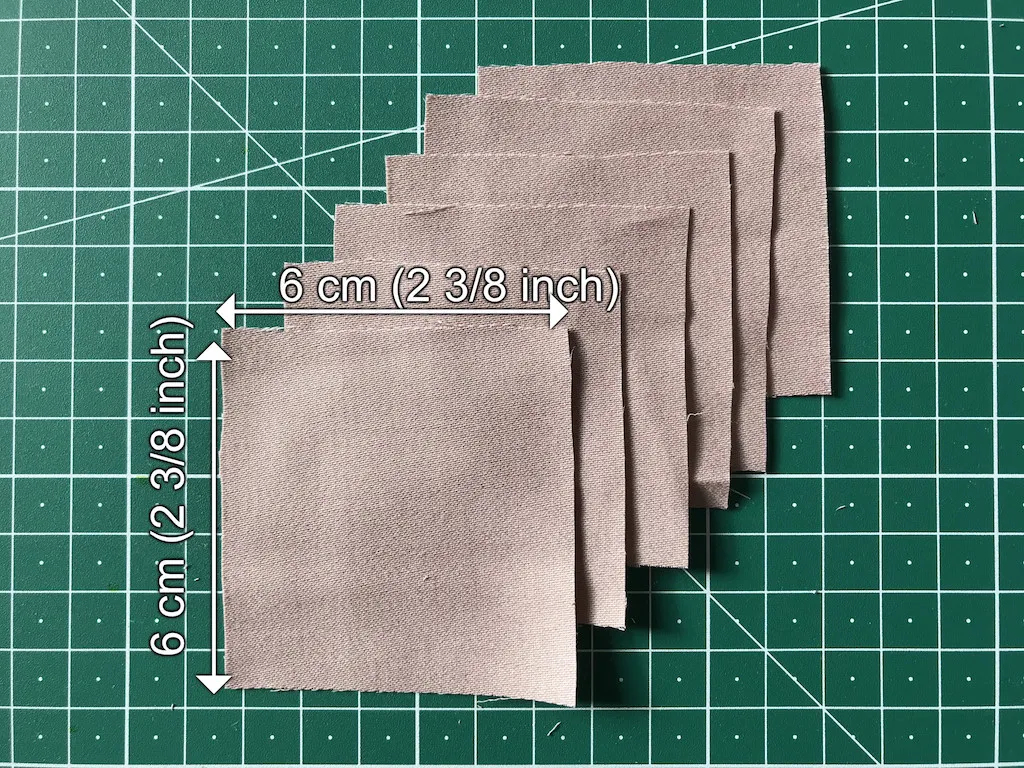
Cut 6 cotton rectangles 6 cm by 6 cm (2 3/8 inch by 2 3/8 inch).

100% cotton 150 and 130 gsm did not work well.
2. Prepare the cotton rectangles for sewing
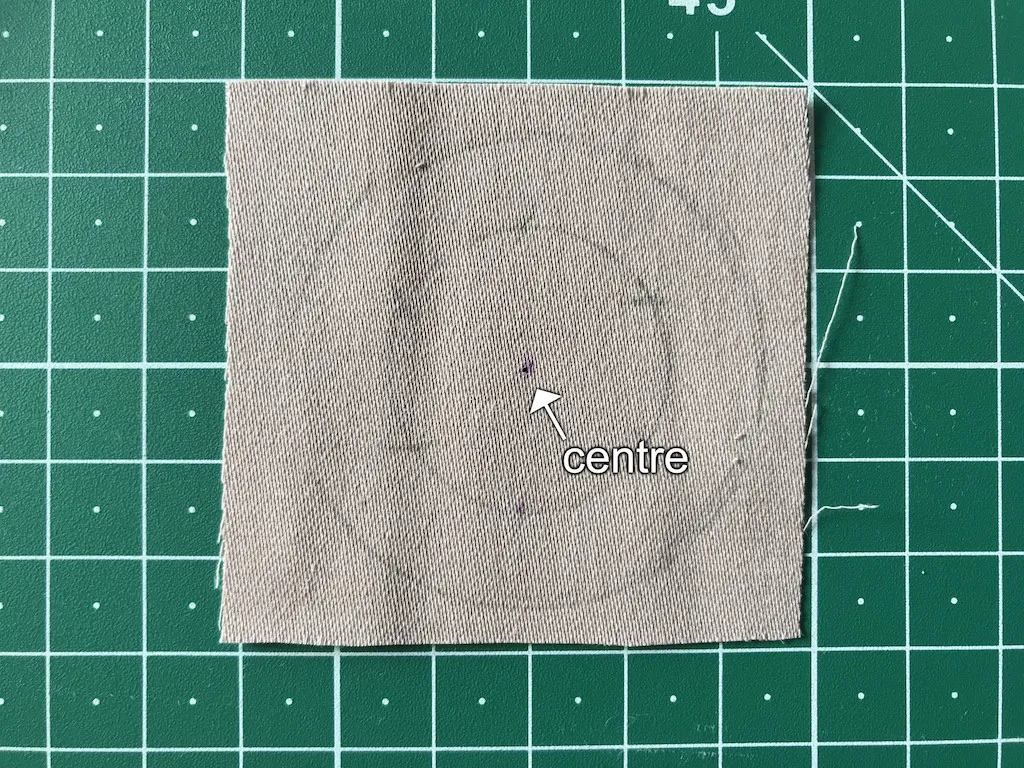
Pick the rectangle that will be the uppermost layer of the stack. Mark the centre of this rectangle.
Draw two concentric circles with a pair of compasses on the fabric rectangle; one circle with a diameter of 3 cm (1 1/8 inch) and the other one of 4,5 cm (1 3/4 inch). Make sure that the markings can be washed off.

Set the distance of the drawing compass legs to 1,5 cm ( 5/8 inch) and mark the inner circle as shown in the illustrations below. These 6 marks will form the edges of the flower petals.

3. Sew the inner circle
Put all rectangles on a stack with the marked one on its top. Baste together all layers going around the outer (bigger) circle you have drawn with the pair of compasses.
Sew the inner (smaller) circle (see the image below).

2. Shape the petals of the flower applique
Begin with cutting at the edge of the outer (bigger) circle and get rid of the rectangular-shaped fabric and basting.

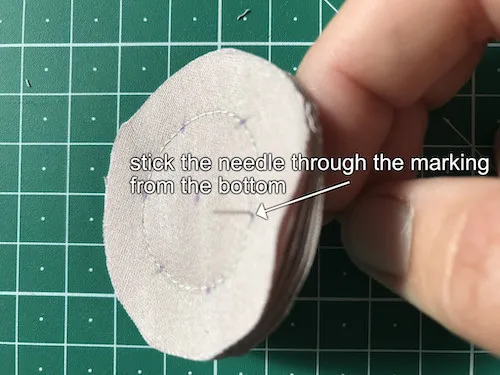
i. Pick a thread that goes well with the fabric or the rest of your project and double thread a hand sewing needle like this. Start at the bottom of the flower and pull out the needle at the first mark.
ii. Make a loop over the outer edge of the petal and pull out the needle again at the very same mark. Pull the thread slightly.

iii. Push the edge of the petals towards the centre and strongly pull the thread pressing the edge of the fabric toward the marking. Be careful not to break the thread.

iiii. Do another loop and tie a knot on the back side of the flower and cut away the redundant thread.
Repeat steps i. – iiii. for each marking on the inner circle (see the images below). The petals of the flower are ready.


4. Create the centre of the circle
The centre of the flower will be made of stripes cut on the bias of the fabric. Follow the instructions below.
Cutting the first layer of fabric
Slash the first (uppermost) layer of the fabric on the bias. Cut as close to the stitching as possible but be careful not to cut through the stitching.

Make perpendicular slashes to the cut you have made already. Make several slashes creating about 3 – 4 mm (0 1/8 inch) wide stripes of fabric. Cut close to the stitching; again be careful not to cut into the stitching.

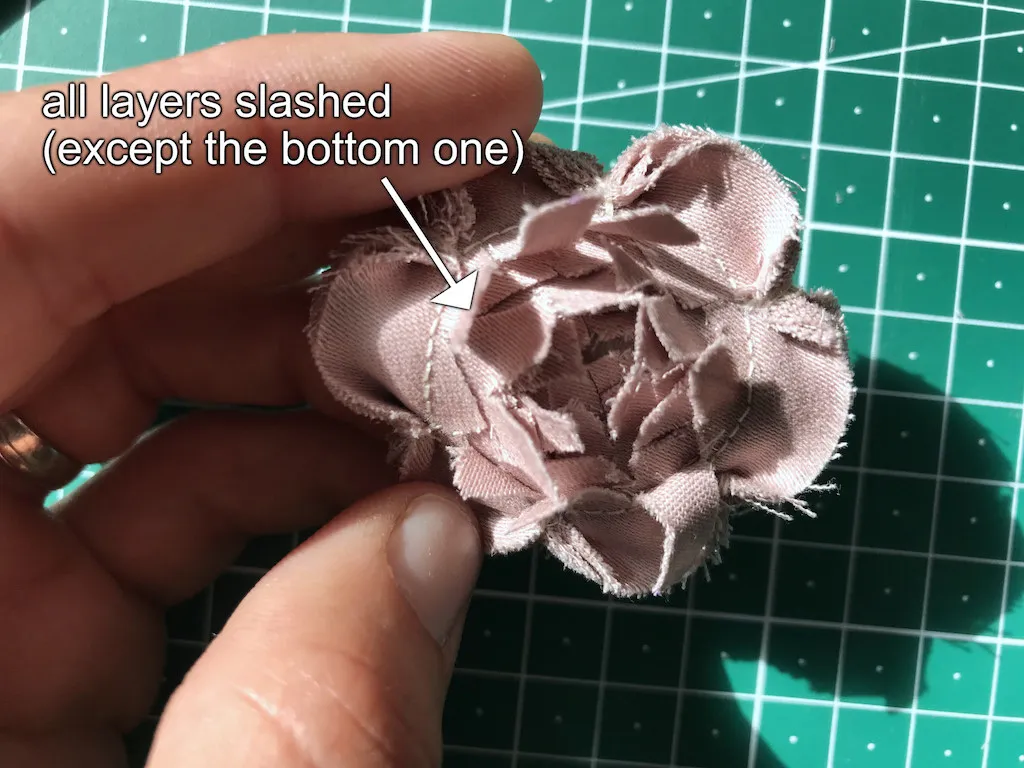
Repeat the same process for all following layers. Make sure that the first cut in a new layer is always perpendicular to the first cut of the previous layer.
With each layer cut a bit farther from the stitching. Do NOT cut through the last (bottom) layer (see the scheme below).

Rub and cut the flower applique
By rubbing the stripes you make the fabric fray a little bit and the stripes will also slightly stand out. Cut off small pieces of the longest stripes – mostly from the upper layer (see the images below).


4. Create variations
To add more interest to the flower, you can use different colours for the individual layers. Or, just change the uppermost layer.

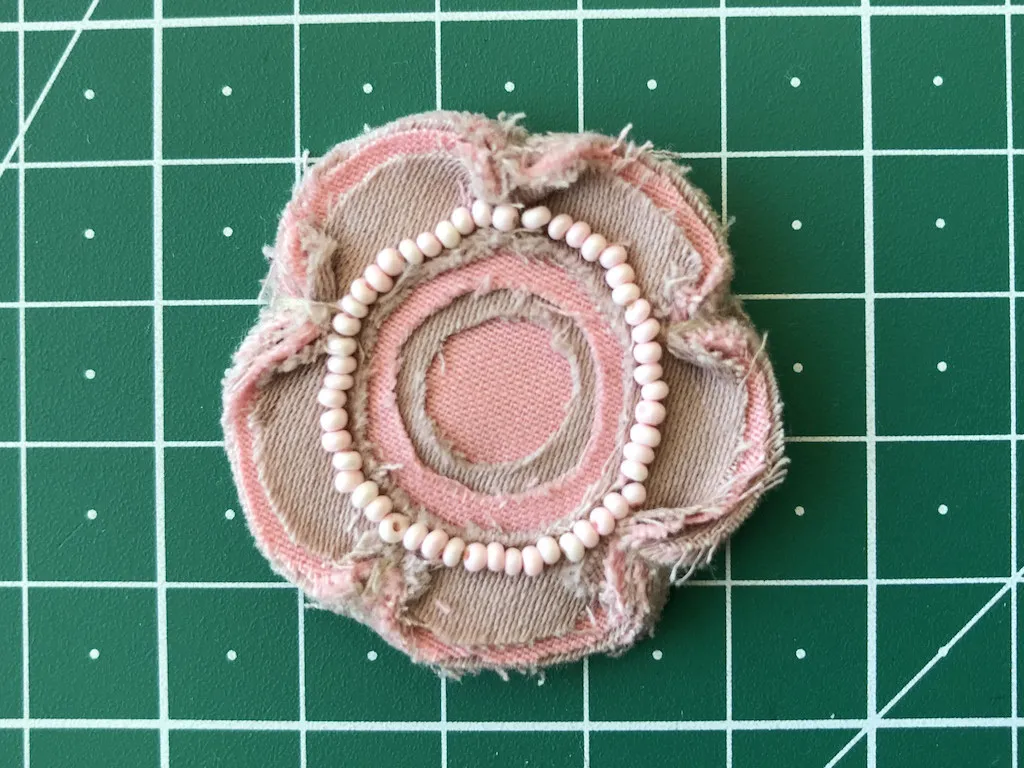
You may also cut circles in the centre of the flower instead of stripes or choose to decorate it with small beads. Another option is to cut off a thin stripe at the edge of the uppermost layer of the fabric and thus create the front petals a little bit smaller and reveal the petal beneath (see the image below where I made multiple adjustments).
5. Sew the flower applique onto a garment or accessory
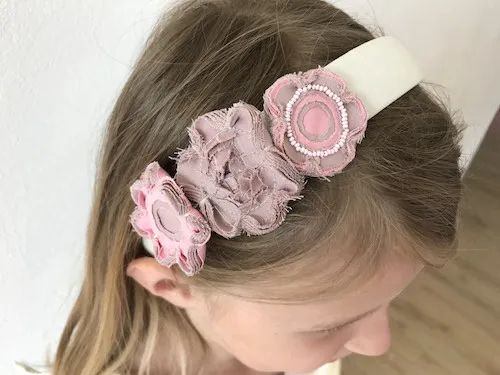
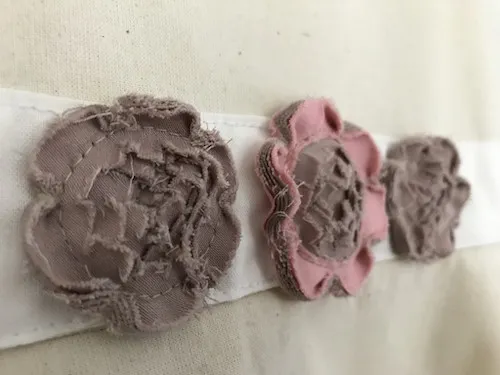
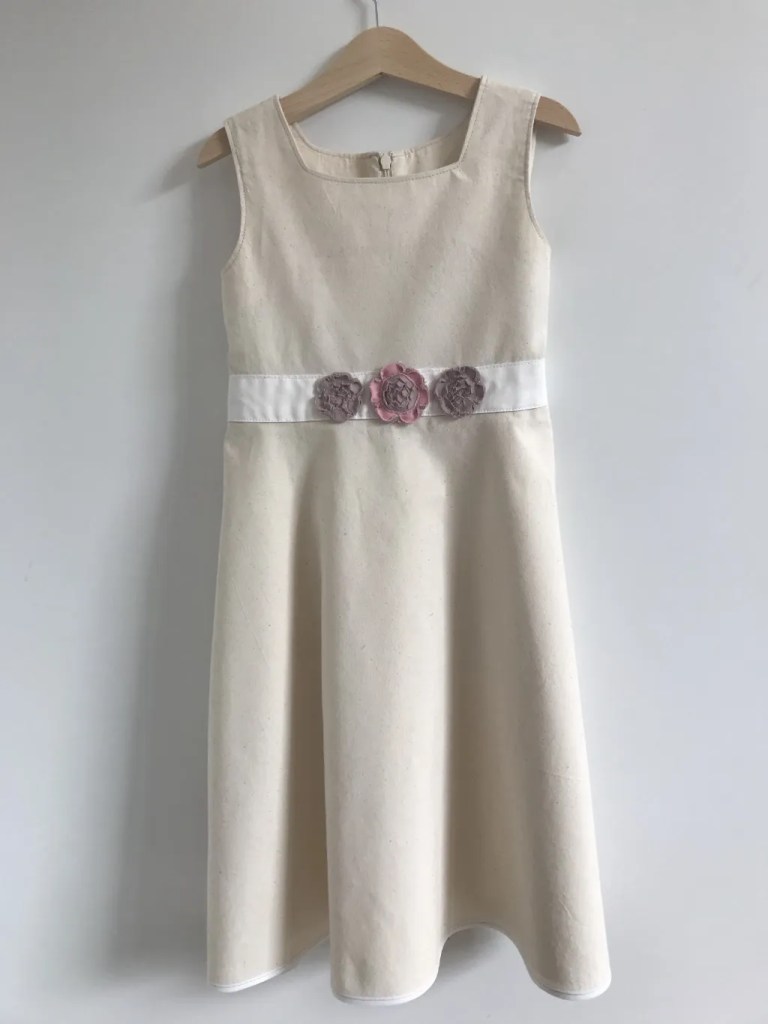
You can place the flowers anywhere you fancy. It may be the middle of a t-shirt, the hem of a skirt or a dress. I decided to sew three flowers to the waistband of a dress and also made a hair band (see the images below).
There is an invisible zipper on the back of this dress. You can watch the following youtube tutorial on how to sew a concealed zipper. I used the pattern from Pattern Making For Kids’ Clothes, which I modified a bit.
Conclusion: How To Make Fabric Flowers – Faux Chenille Style
I hope you enjoyed this tutorial and wish you good luck with your project. As you can see the stitch and slash is a very versatile fabric manipulation technique. Give it try ;). If you liked this tutorial, please be so kind and share it. Thank you.


