


Faux chenille is a fabric manipulation technique I really love as its application is so universal. With Christmas around the corner, perhaps you wish to make a special gift for someone and this contribution may be the right inspiration for you.
In this tutorial, I will show you how to create a red and white decorative Christmasy faux-chenille pillow case. Please bear in mind that I am focusing on the faux chenille technique rather than a pillow sewing manual.
The size of the pillowcase I am working with here, is 60 cm by 70 cm (23 5/8 inch by 27 9/16 inch).
To make a faux chenille Christmas pillowcase, you will need:
- Red anti-pilling fleece (100% polyester)
- White anti-pilling fleece (100% polyester)
- Red polyester thread
- White polyester thread
- Scissors
1. Measure the size of your pillow
First of all, measure the size of the pillow for which you would like to sew this case. The size of the Christmas pillowcase I am working with here, is 60 cm by 70 cm (23 5/8 inch by 27 9/16 inch). If your pillow has different dimensions, you will either need to adjust the arrangement or size of the templates (a star, Christmas tree, heart) on the pillow.
2. Select closure type for the pillow
Decide whether you would like to use a zipper, concealed zipper, buttons or the envelope type of closure for the pillowcase. My choice is a concealed zipper.
2. Cut the fleece fabric
For the decorated front of the pillowcase, cut one red and one white piece of fleece, both corresponding with the size of your pillow. DO NOT FORGET to add seam allowances before cutting the fabrics. (Measure twice, cut once 🙂 I work with 1 cm (3/8 inch) seam allowance. Depending on the closure, cut one back piece of the pillow or two pieces for the envelope type of pillowcase.
Since I decided to sew a concealed zipper, I cut another red rectangle 60 cm by 70 cm (23 5/8 inch by 27 9/16 inch) large and ended up with two red rectangles and one white rectangle.

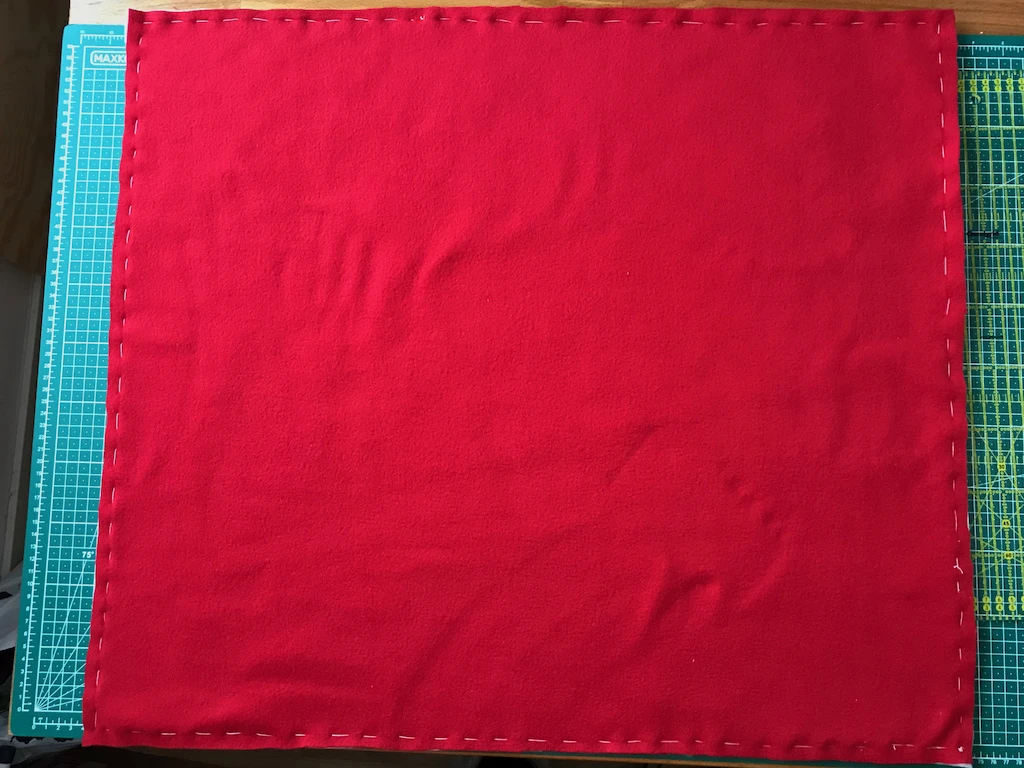
3. Baste one white and one red rectangle together
The two fabrics for the faux-chenille decoration should stick together well while sewing, so I recommend basting them. Place the red fleece on the top and the white one on the bottom (see the image below).
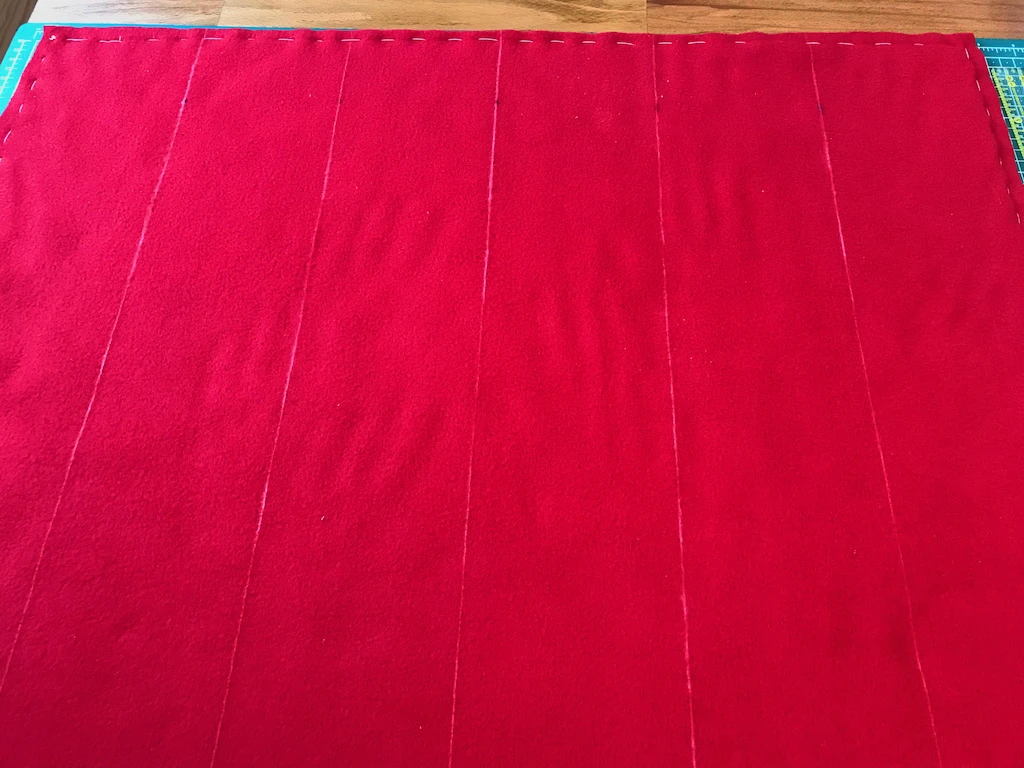
4. Divide the width of the pillow to 6 parts
Divide the width of your pillow by six. Do not include the seam allowances into the equation, just the measured size of your pillow. That means (in this tutorial) 70/6 = 11, 6 cm (23 5/8 / 6 = about 4 1/2 inch).
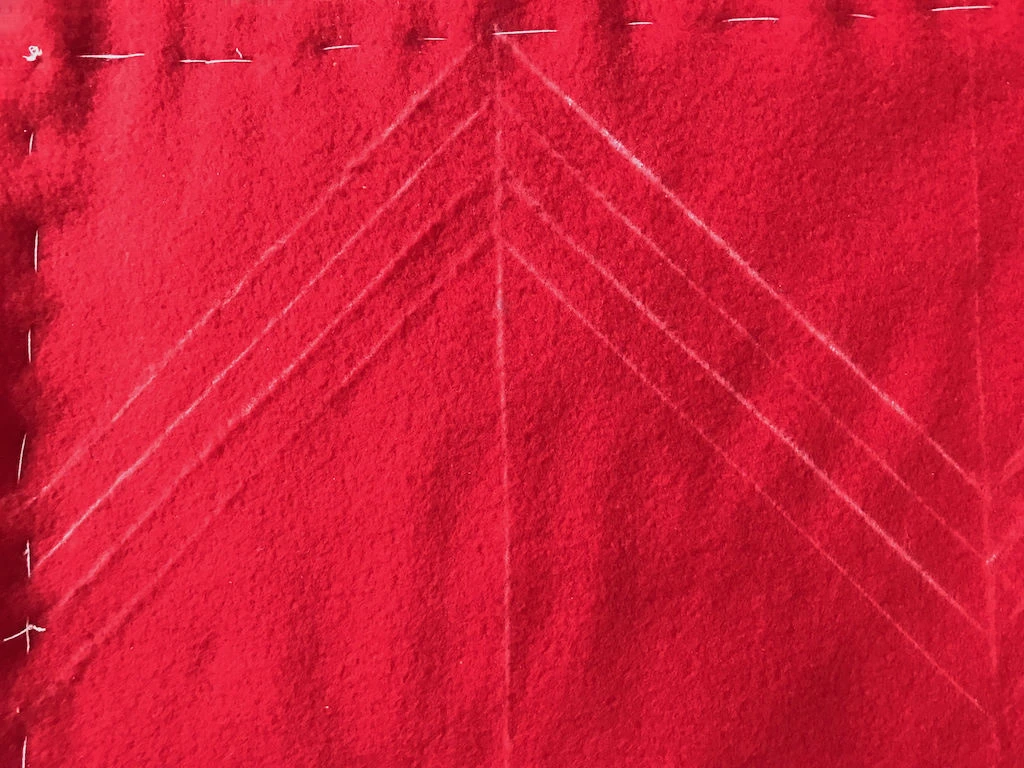
5. Pre-draw diagonal lines and sew
This will be probably not necessary to explain to those who are proficient in quilting.
Pre-draw diagonal zig-zag lines according to the scheme below. In each step I drew three or four rows of zig-zag lines on the red fleece fabric with my quilting ruler and then I sew over them with a red polyester thread (see the images below).

Place your quilting ruler like this (see the image below) and draw the first pair of diagonal lines.

Move your quilting ruler downwards by 1,4 cm (35/64 inch) and draw a new pair of diagonal lines. Draw three or four rows of diagonal lines along the whole pillow width (see the image below).
Afterwards sew through these lines with red polyester thread (see the image below).

When you sew the lines, draw a new set of zig-zag lines and continue sewing (see the images below).

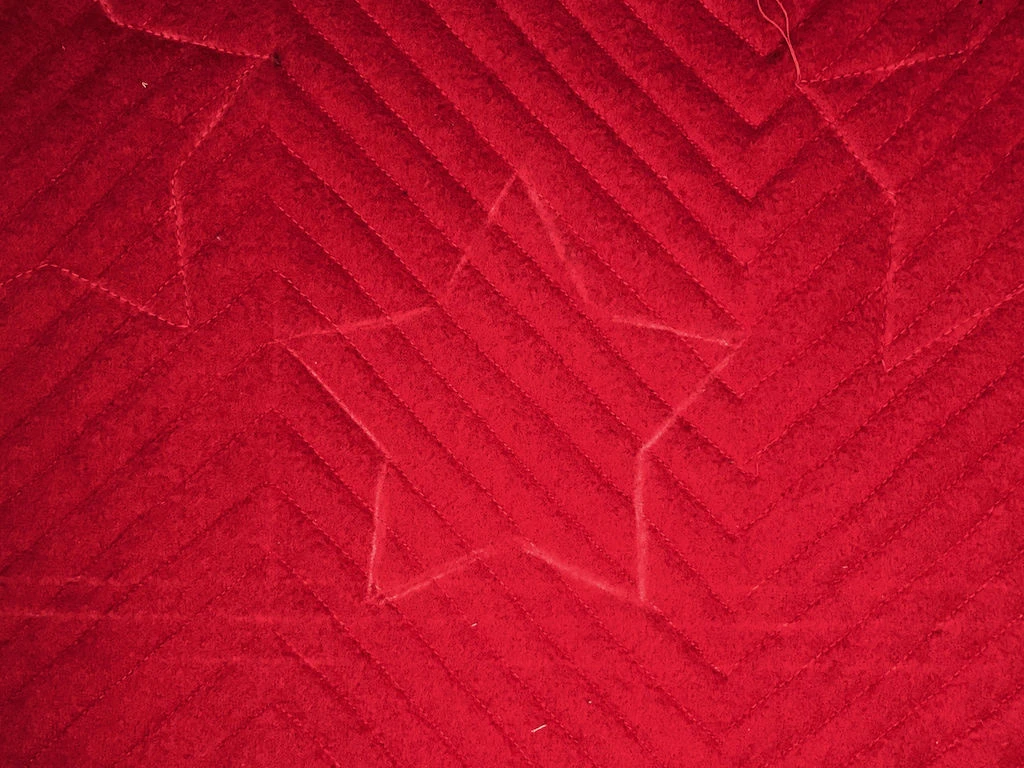
In the image below you can see one complete half of the Christmas pillowcase front.
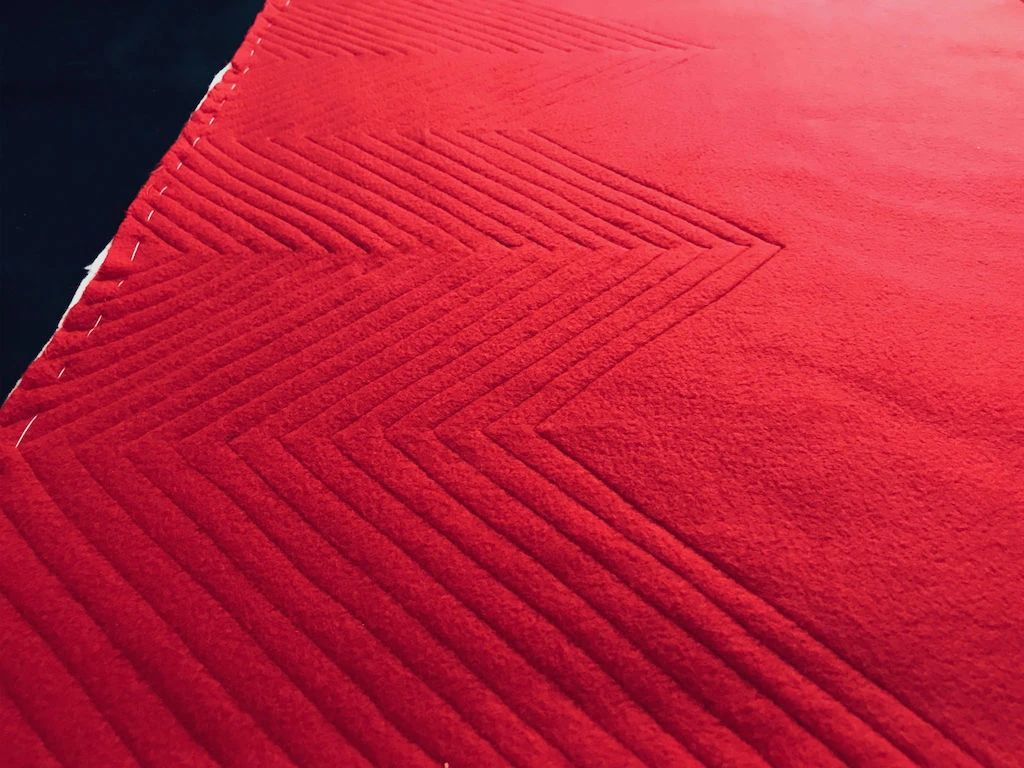
After you have sewn all the diagonal lines (see the image below), you can move to the next step.

6. Transfer the templates
Download and print out the templates (a star, heart and Christmas tree) on your home printer, or create your own.

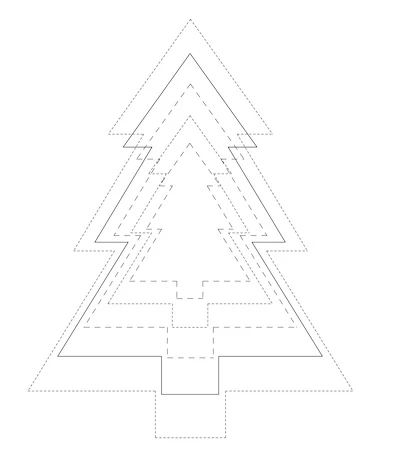

Cut them out and by drawing around them transfer them to the red fleece fabric (see the image below). If you printed out the templates downloaded from this site, please cut them out along the solid lines.
In the image below you can see a scheme I used to transfer the templates. The red lines indicate the diagonal lines we have already sewn on the sewing machine. The blue lines indicate the arrangement and size of the individual templates.


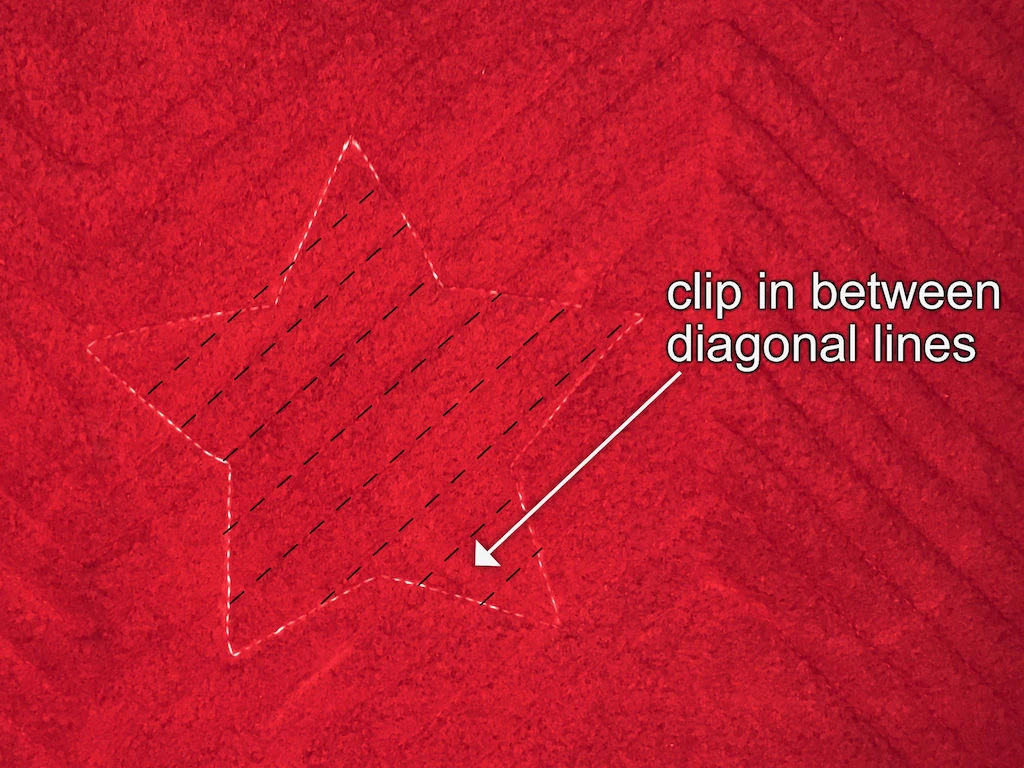
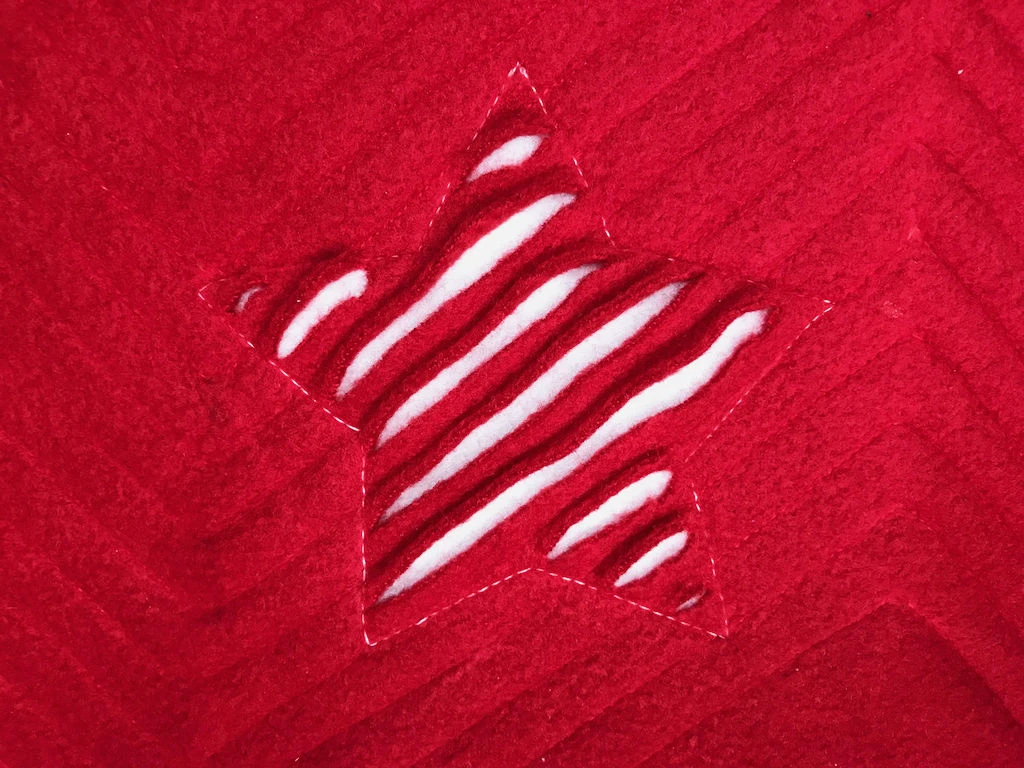
7. Sew over the templates
With white polyester thread, sew over the transferred lines of all the templates (see the scheme below).

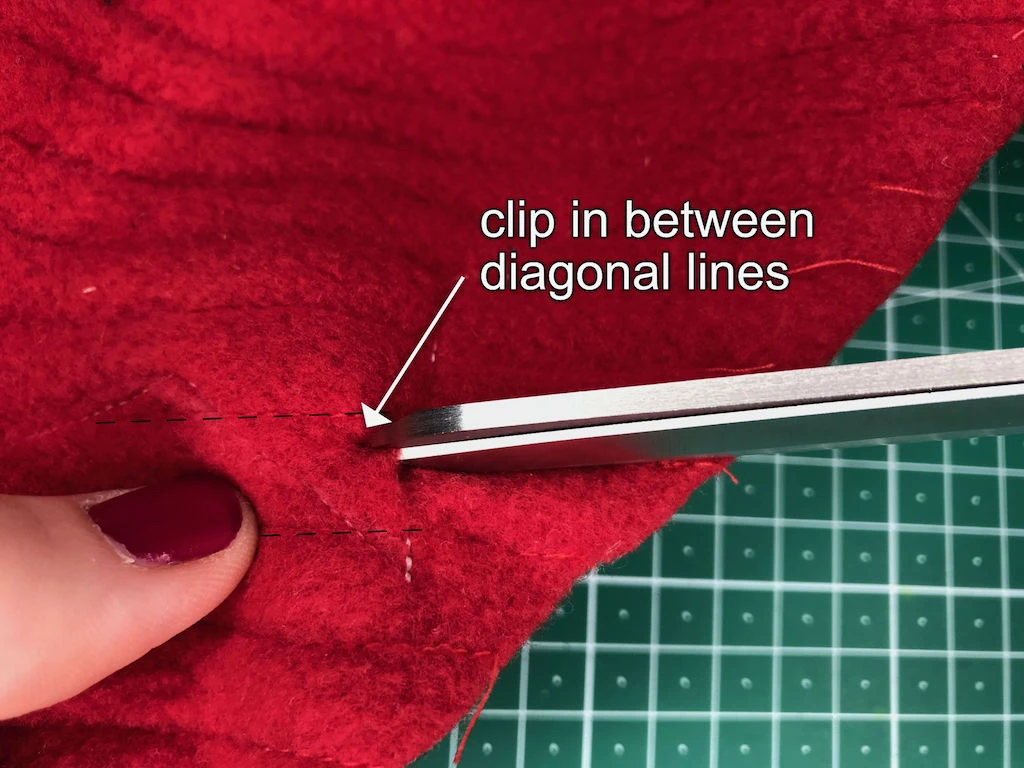
8. Clip and slash in between sewn lines
With the tip of your scissors, clip into the fabric within a template (see the image below).
Put the scissors into the clipped hole and slash the fabric (see the image below).
Slash all diagonal lines within all templates (see the images below).
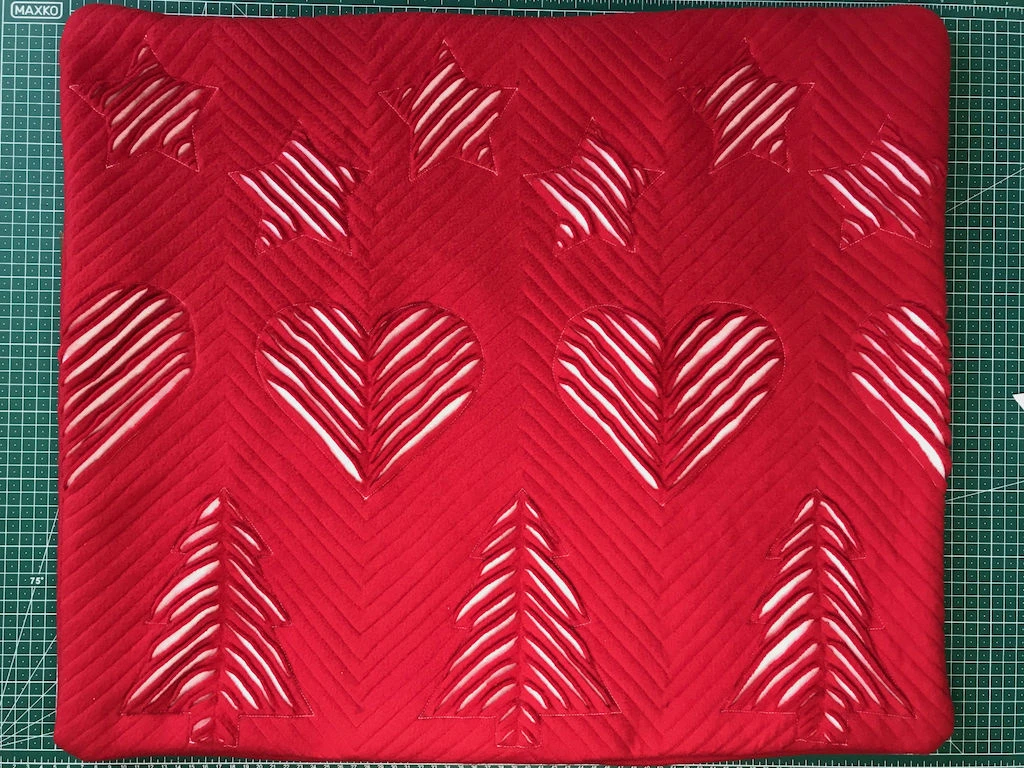
9. Finish the Christmas pillowcase
Finish the pillow with the closure type you have chosen at the beginning. I hope you appreciate the result.
