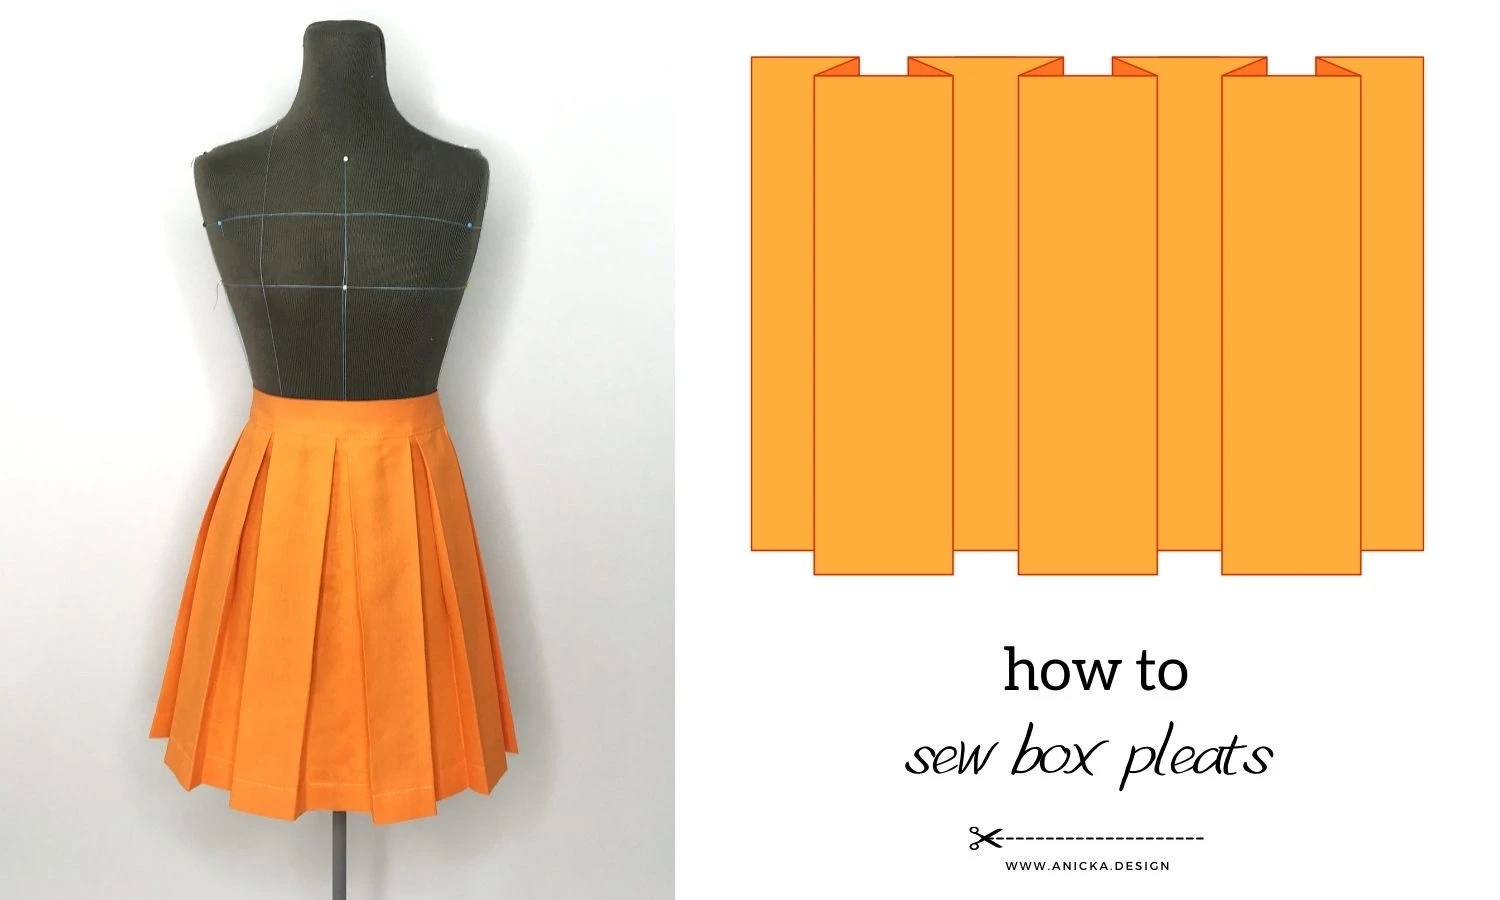


What are box pleats?
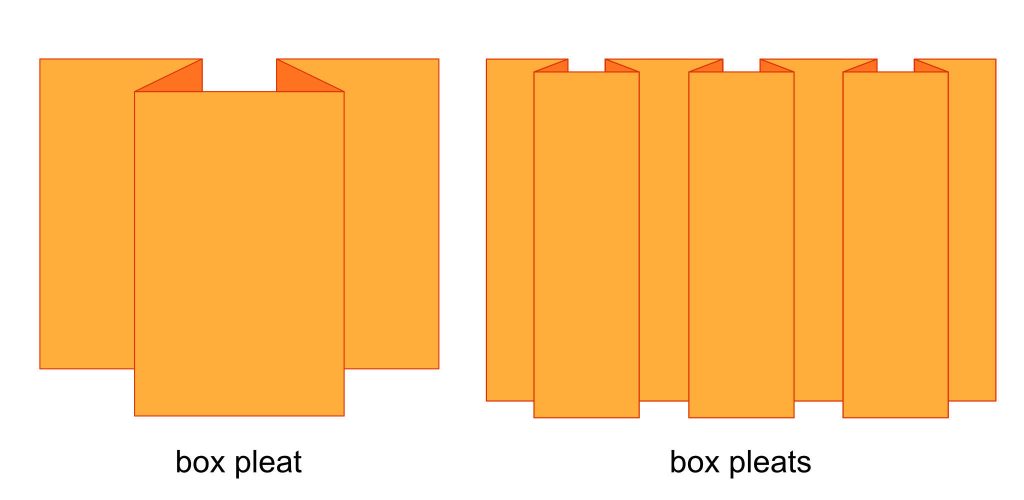
A box pleat is a piece of fabric folded in such a way that a box-like shape is created. Box pleats are a series of multiple fabric pleats (see the images below). They add fullness to a garment or part of a garment. You can use them to make a whole pleated skirt or simply as decoration for different clothing – for example, tunic, skirt, dress hems, or sleeve cuffs. Sewing box pleats is not complicated at all, however, may be time-consuming for large projects.
This page contains a box pleats calculator . It computes the fabric consumption based on the required dimensions.
In this tutorial you will learn the following:
- Tools needed to make box pleats
- Suitable fabric and fabric preparation
- Formula to calculate fabric consumption
- Box pleats fabric consumption calculator
- How to sew box pleats
Tools needed to make pleats
- Ruler (I use a quilting ruler)
- Textile marker
- Pins
- Thin needle and thread (optional)
- Iron
Suitable fabric and fabric preparation
Not all fabrics are suitable to be turned into box pleats. Ideally use medium to lightweight 100% cotton. If you wish to sew a super lightweight skirt from fabrics like chiffon, use pleating moulds. Check out my tutorials about accordion pleats, knife pleats, and advanced pleats to learn more.
Lightweight 100% cotton fabric is a good choice for making box pleats.
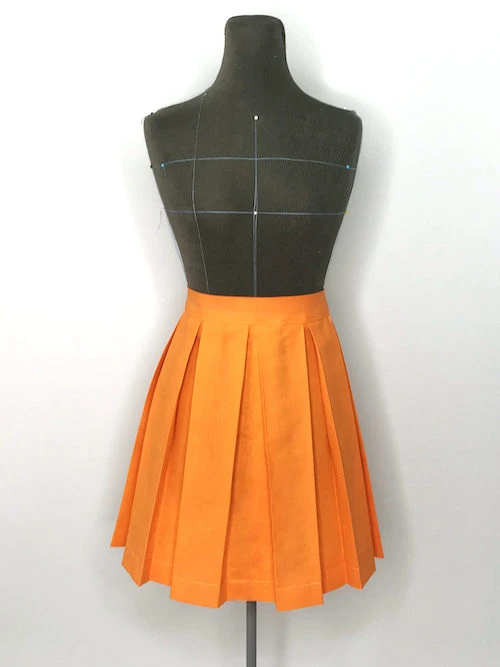
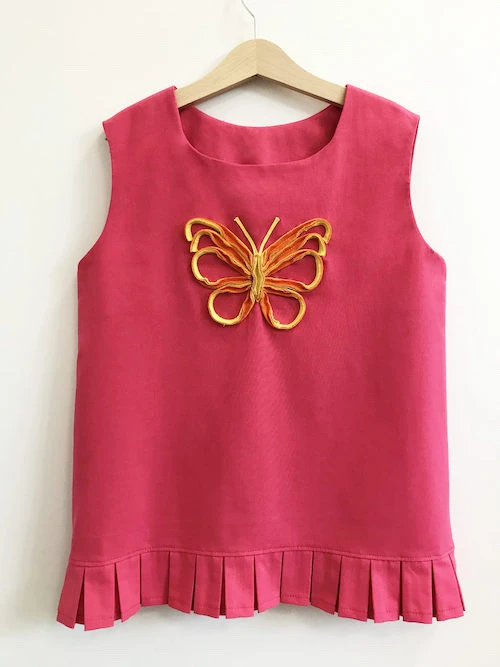
In the images below, you can see a 100% cotton pleated skirt and a cotton tunic with box pleats used as decoration.
Prepare the fabric for sewing by washing, drying, and pressing it.
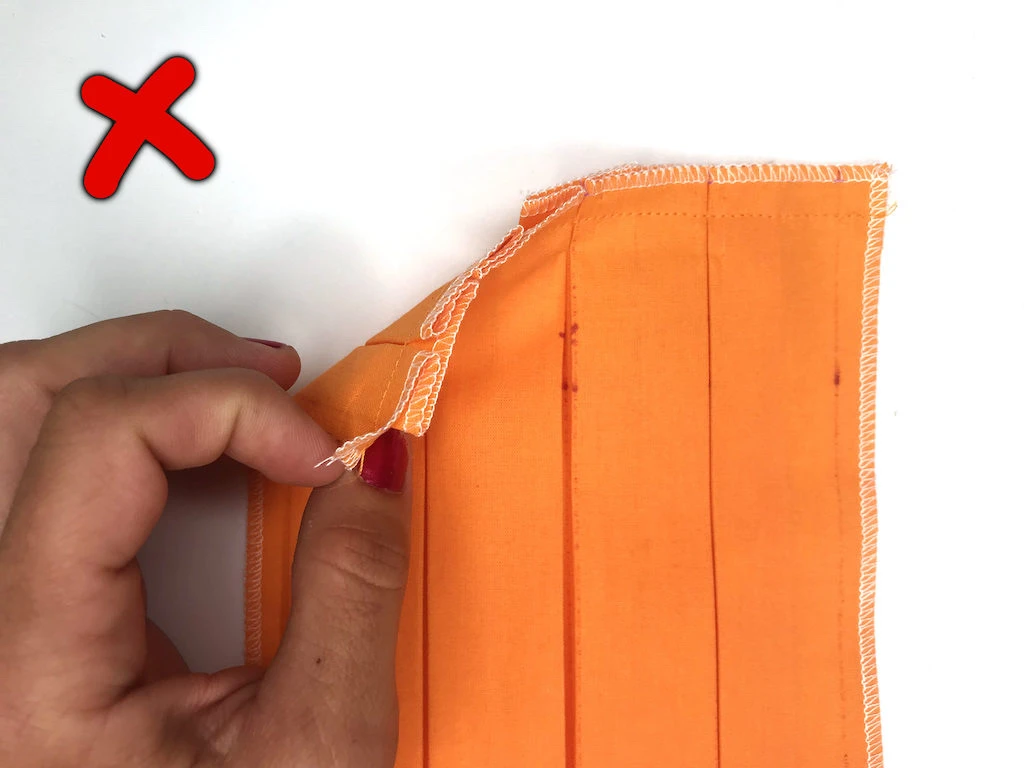
Do not finish the raw edges of the box pleats in the place where they are going to be sewn to another pattern piece. Doing so would add too much bulk to the folds (see the images below). If your fabric frays badly, finish the raw edge AFTER you have completed the pleats.
If the pattern piece you are about to pleat has a hem, make sure you finish it BEFORE pressing the pleats completely. The phase of doing so might be slightly different depending on the project you are working on. However, adding a hem after pressing the box pleats might result in a visually unappealing design.
Hem the fabric before pressing the box pleats completely.
Formula to calculate fabric consumption
Consider the size and depth of the individual box pleats before you cut your design fabric. By pleat size, I mean the width of one box pleat front. By pleat depth, I mean how deep you fold the fabric under the box (see the schemes below).
Calculate fabric consumption for box pleats according to the following formula:
fabric width = number of box pleats ⨯ (pleat width + 4 ⨯ pleat depth)
fabric length = pleat length
⎯⎯⎯⎯⎯⎯⎯⎯⎯⎯⎯⎯⎯⎯⎯⎯⎯⎯⎯⎯⎯⎯⎯⎯⎯⎯⎯⎯
Do not forget to add seam allowances and hem allowances.
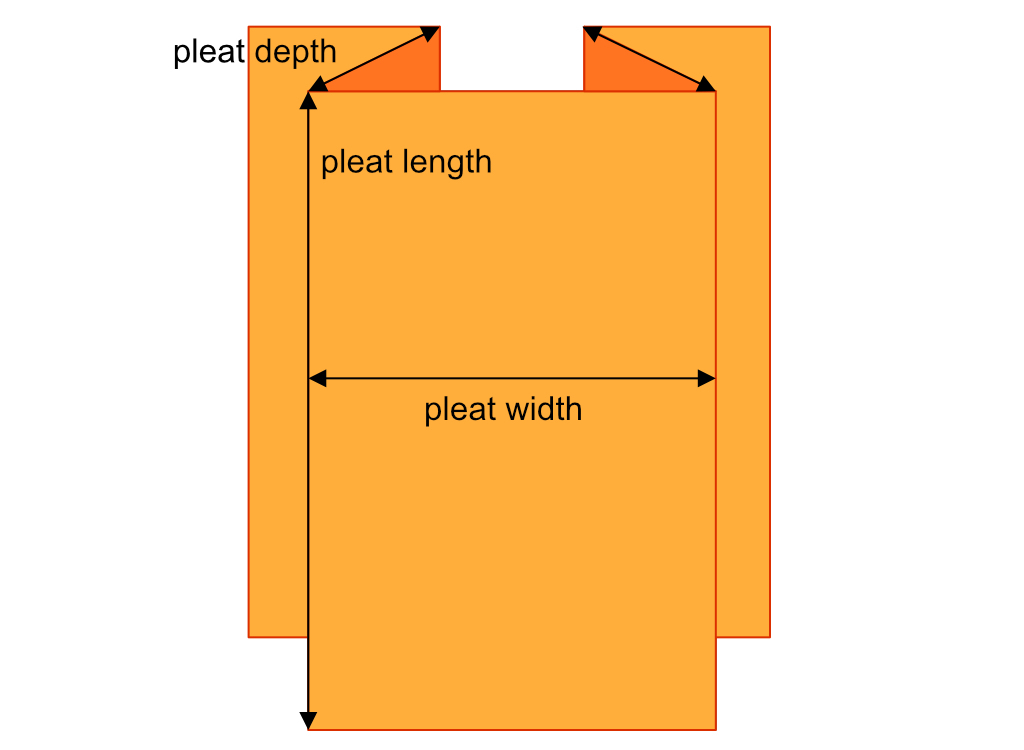
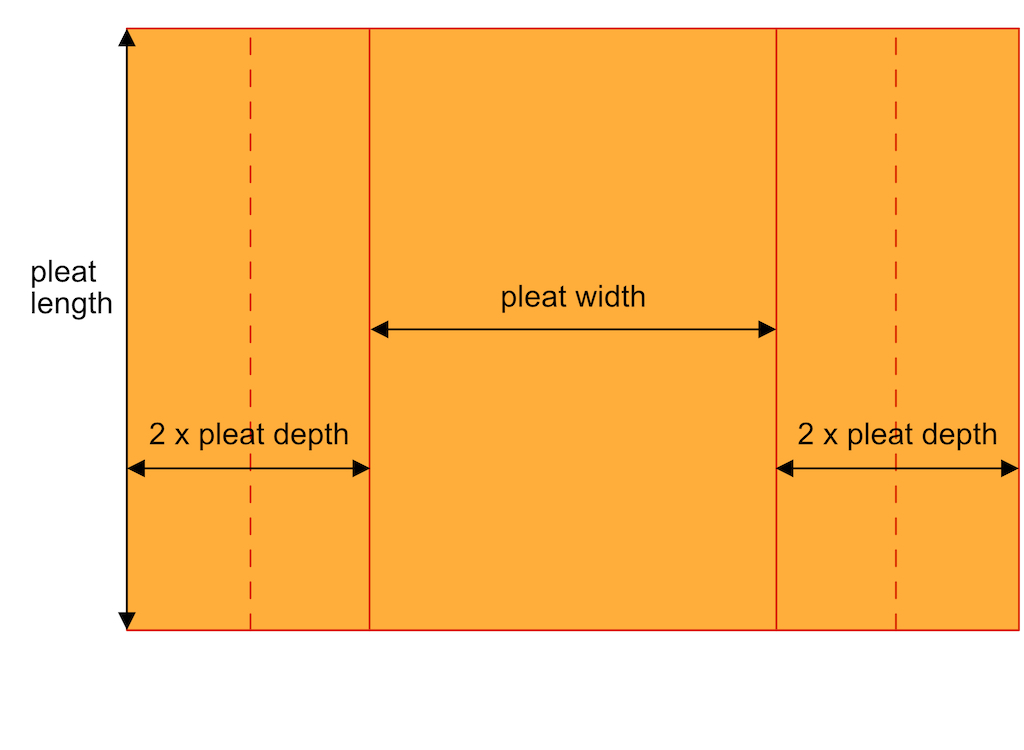
The pleat depth has to be smaller than one-half of the box pleat width.
Box pleats fabric consumption calculator

Calculated fabric consumption for box pleats

Do not forget to add seam allowances and hem allowances before cutting fabric.
How to pleat fabric: sewing box pleats
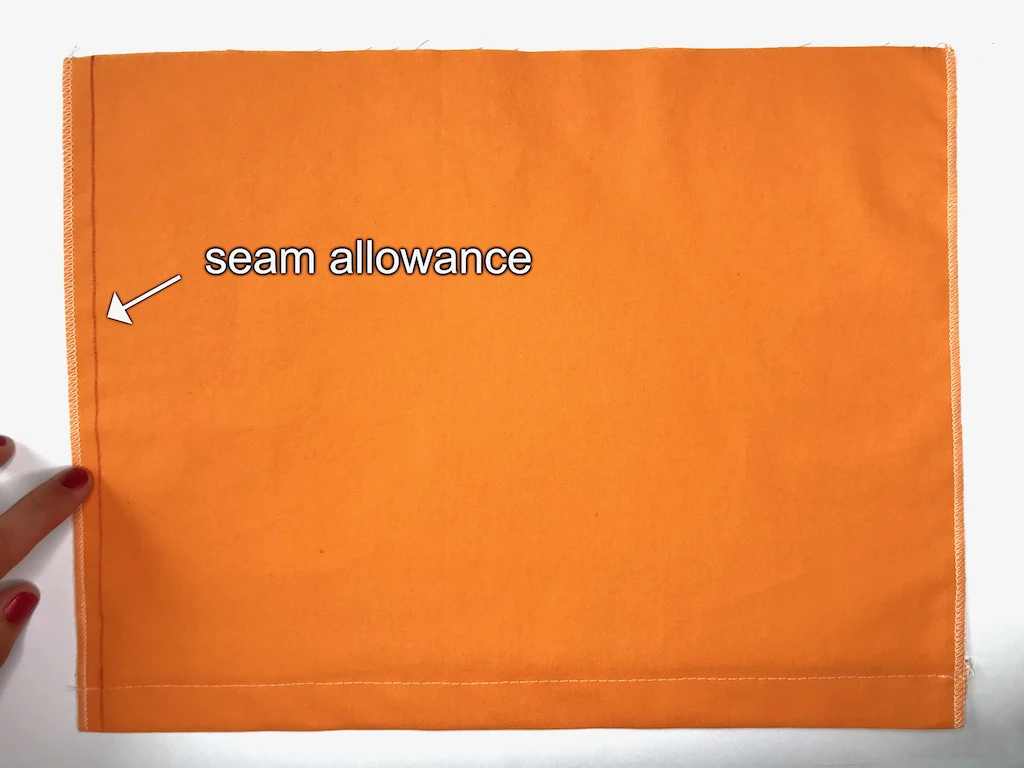
1. Mark the left-hand side seam allowance
I usually start at the left-hand side by marking the seam allowance. This way I know where the first crease of the box pleat will go (see the image below).
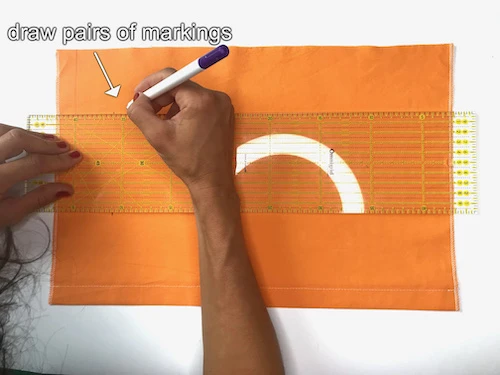
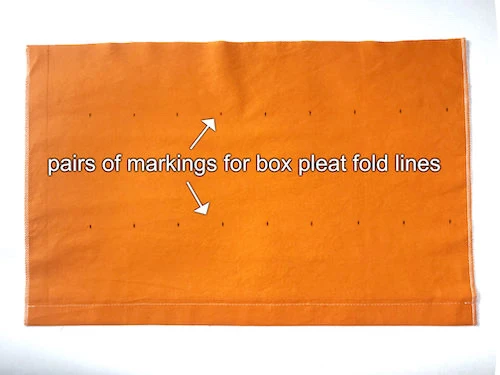
2. Draw pairs of markings
Using a quilting ruler and textile marker, draw pairs of markings on the RIGHT SIDE of the prepared fabric. The distance between individual lines is determined by the box pleat width and pleat depth (see the images below).
Make sure your textile marker can be removed easily from the fabric you use to draw box pleat fold lines.

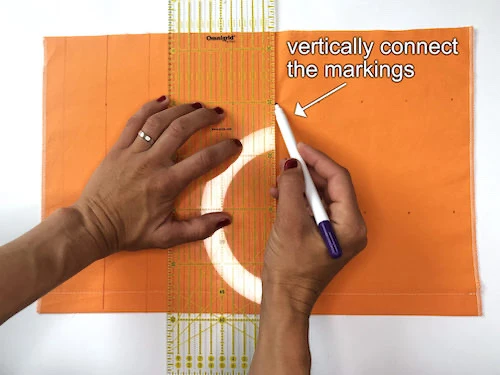
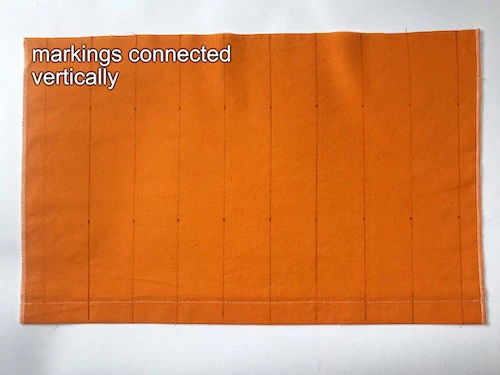
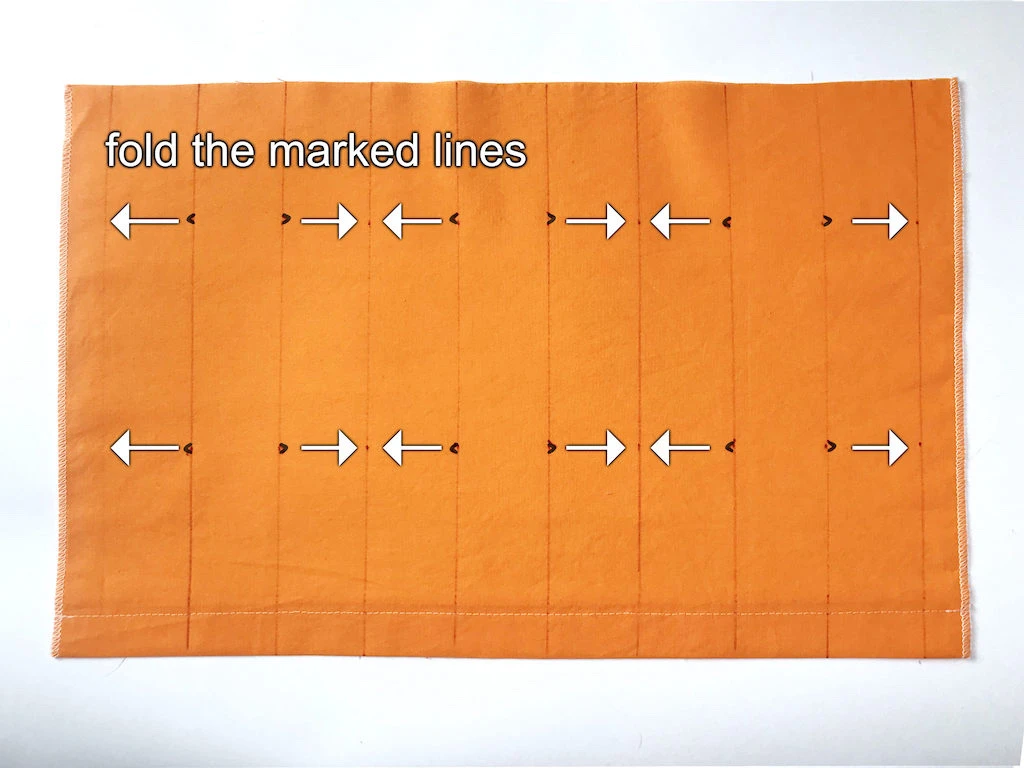
3. Connect the markings and create vertical lines
By connecting the markings you draw vertical lines that will indicate the fold lines of the box pleat and also a line, towards which the box edge should be moved. I like to add little arrows (or triangles) on the lines that will be folded and moved to create a pleat (see the images below).
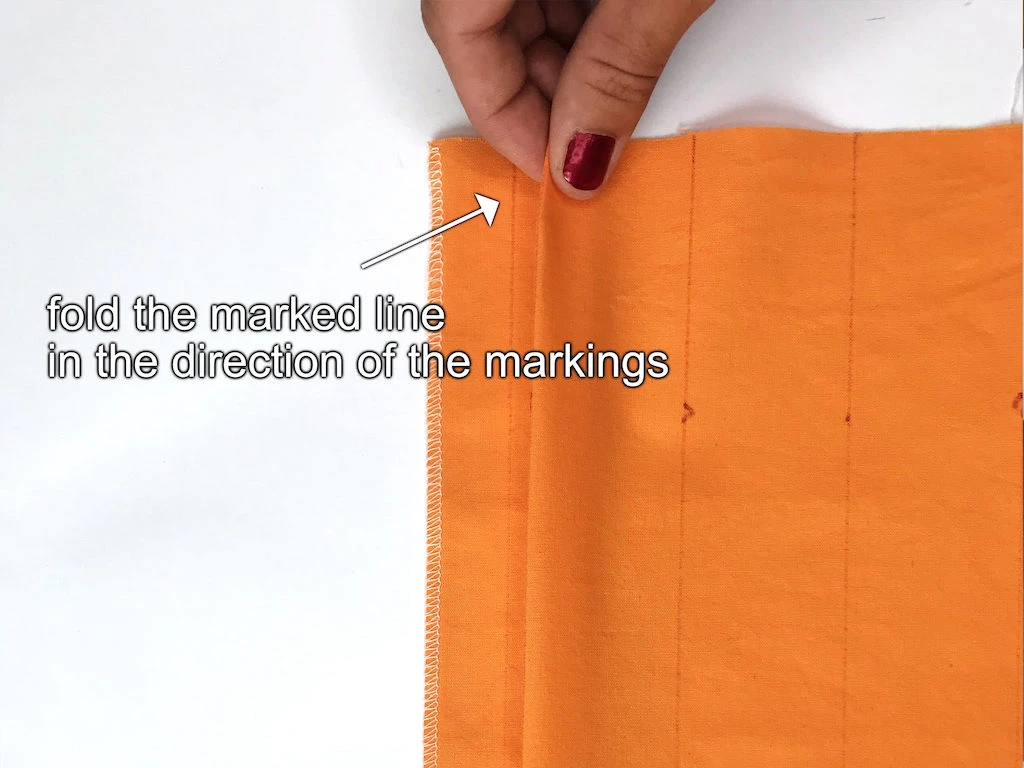
4. Fold and pin the lines
At the top of the fabric take the marked line and move it towards the line without marking. At this line the edges of the box pleat will meet (see the image below).
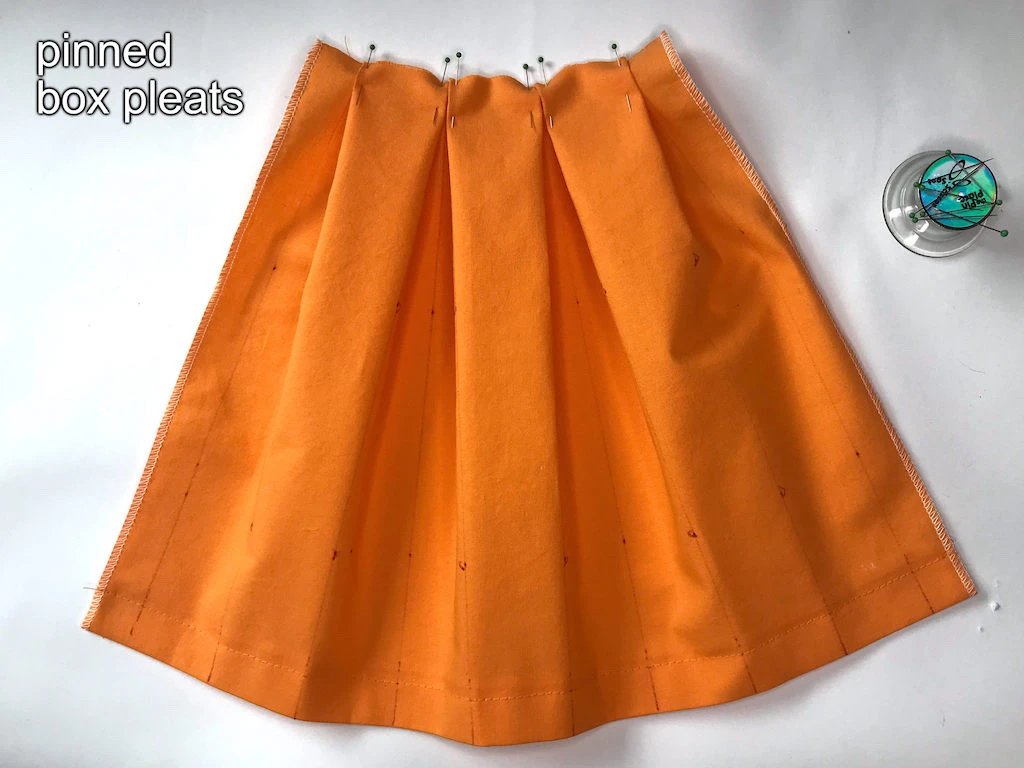
Use pins to keep the folded fabric in place (see the image below).

At this phase, your pinned box pleats should look like this (see the image below).
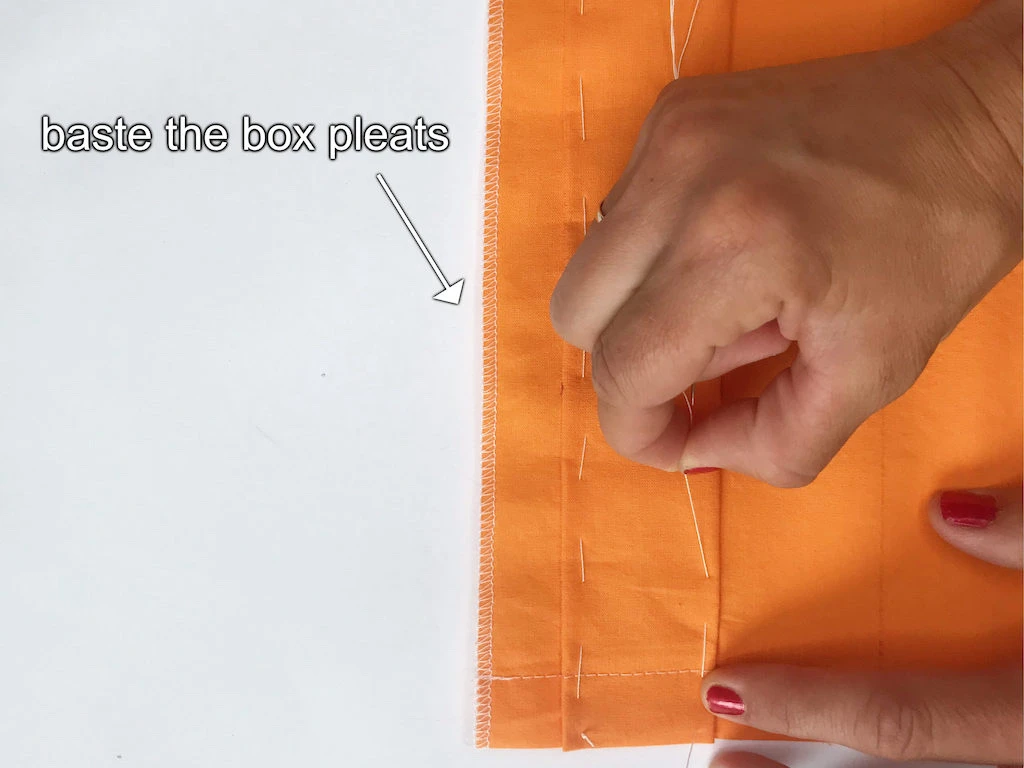
Nonetheless, for large projects like a long pleated skirt, you can baste the folds into place (see the images below). To do so, use a thin needle and thread to make sure that the needle holes disappear after the first wash. You can test this on a scrap of fabric.
Basting the box pleats prevents the fabric from ‘opening’ and makes it comfortable to work with.

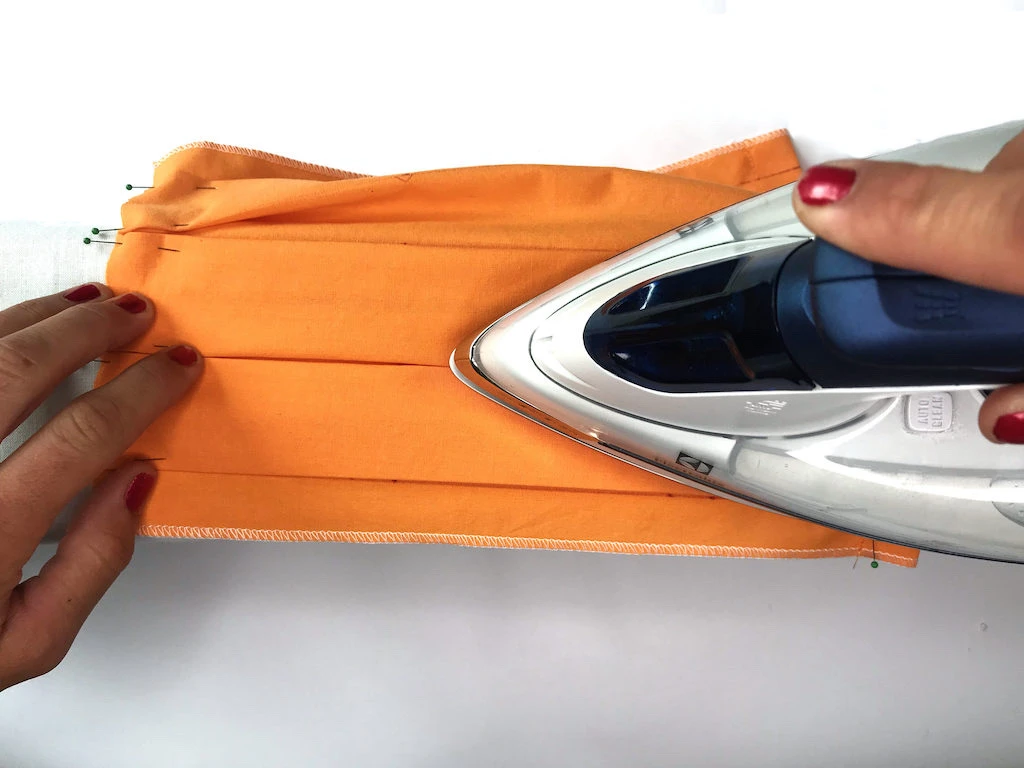
Pressing the pleats
Before you start pressing the folds, make sure you align the lines you have drawn accurately and the folds are straight (see the image below). If you basted the fabric, the lines are already aligned.
You may press one or even multiple folds at once. This depends on the pleat depth and width you have decided to use for your project.
In the image below you can see that my box pleats are not basted. This may be fine with small projects. However, with larger projects – like skirts I recommend basting the pleats as described above :).
Sew the top of the box pleats
Now that you have pressed the box pleats, you can sew the top where they are pinned together.
You can use the stitching as basting and remove it after you have sewn the pleats to another pattern piece.
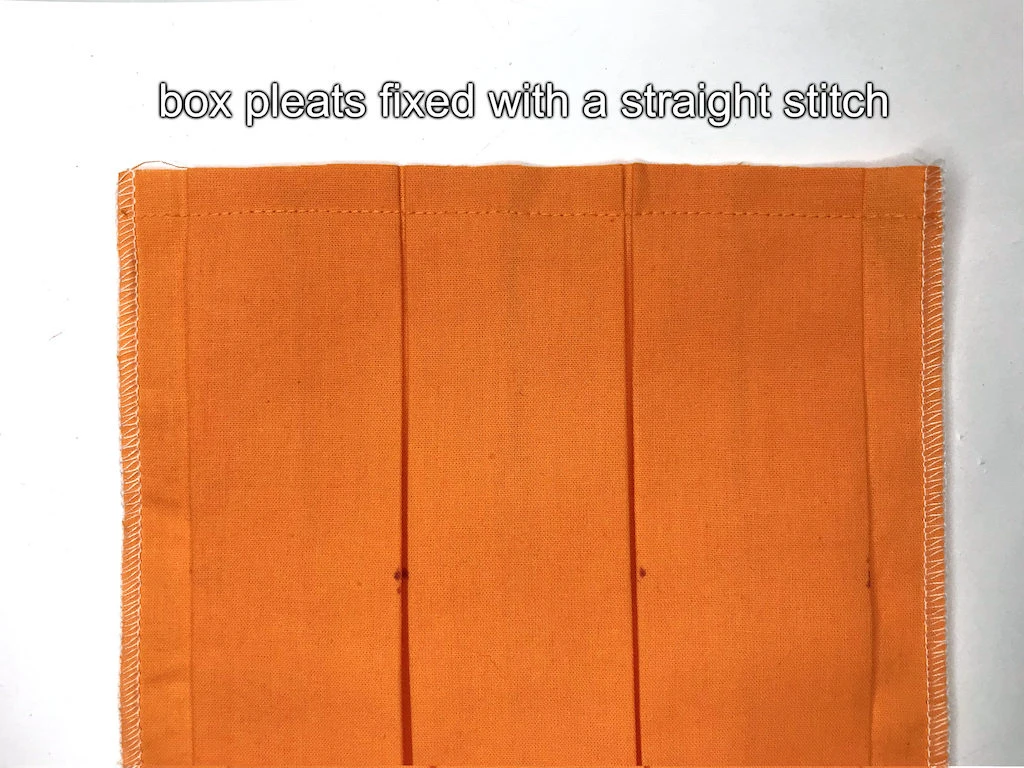
At this phase, you can finish the seam allowances at the box pleats top as well. Use an overlock machine or a standard sewing machine to do so and continue with your project.
Conclusion: Sewing box pleats
Sewing box pleats is easy, box pleats are appealing and versatile. Sewing box pleats is not demanding, however, it may prove time-consuming if you are working on a full-length pleated skirt for example. Yet, their attractiveness is worth your time and effort.
If you are interested in super fancy designs (not only pleats), you can check out this amazing book of pattern drafting by Antonio Donnano.