


For this year’s Halloween (2022) me and my family decided to dress as characters from Harry Potter movies. In this blog post, I’m going to describe how to make a Sybill Trelawney headband I will be wearing . (Sybill is a fortune-teller and professor at the Hogwarts School of Witchcraft and Wizardry). The dimensions in this tutorial are designed for an adult.
For the headband you will need:
- Red-orange fabric with a pattern on it
- Red fringe trim about 15 – 20 cm (6 – 8 inch) long
- Silver sequins (optional)
How to sew the Sybill Trelawney headband
1. Take the fabric you have picked for the headband and cut a long rectangle. You can calculate the dimensions of the rectangle using the formulas and image below:
headband width = 10 cm (rectangle width = 4 inch)
headband length = 150 cm (rectangle length = 60 inch)
⎯⎯⎯⎯⎯⎯⎯⎯⎯⎯⎯⎯⎯⎯⎯⎯⎯⎯⎯⎯⎯
Do not forget to add seam allowances and hem allowance to the pattern pieces.
If you use a woven fabric, finish seam allowances on the long sides of the rectangle. You may also finish these allowances if you use a knit fabric.
2. Cut two 12 cm (5 inch) sequences of fringes, do NOT add any seam allowances to them. Fix their edges with a small amount of glue to keep the fringes together (see the images below).


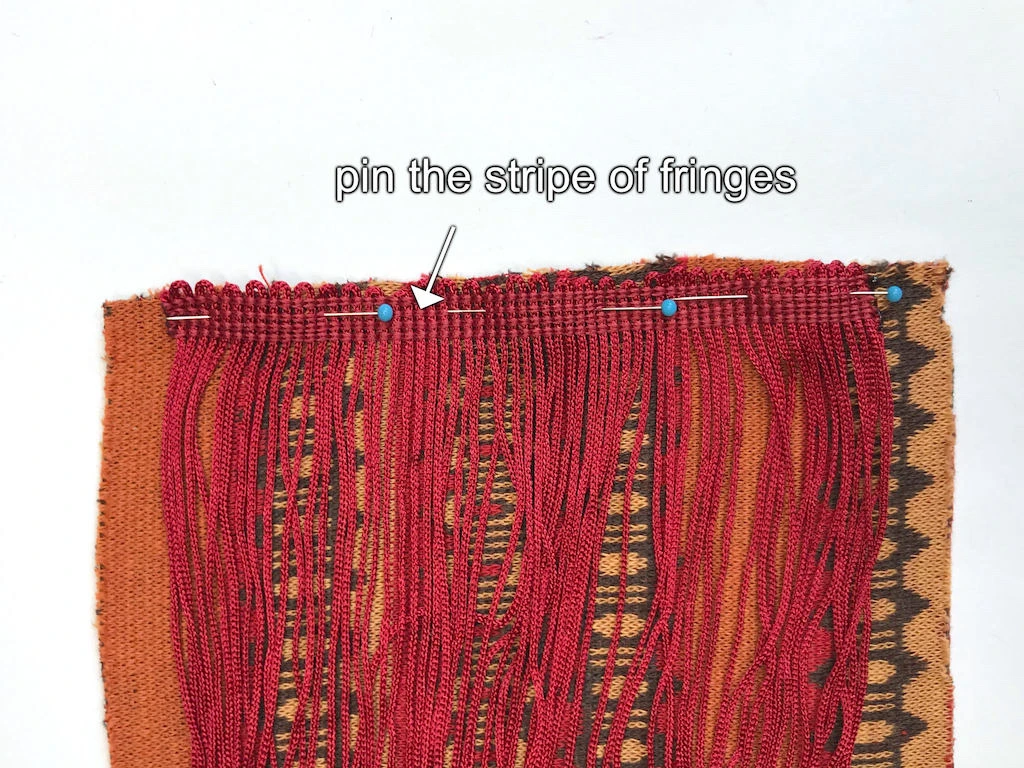
3. Prepare the fabric rectangle you have cut so that you can see its right side. Pin the fringes to its shorter side (see the image below).
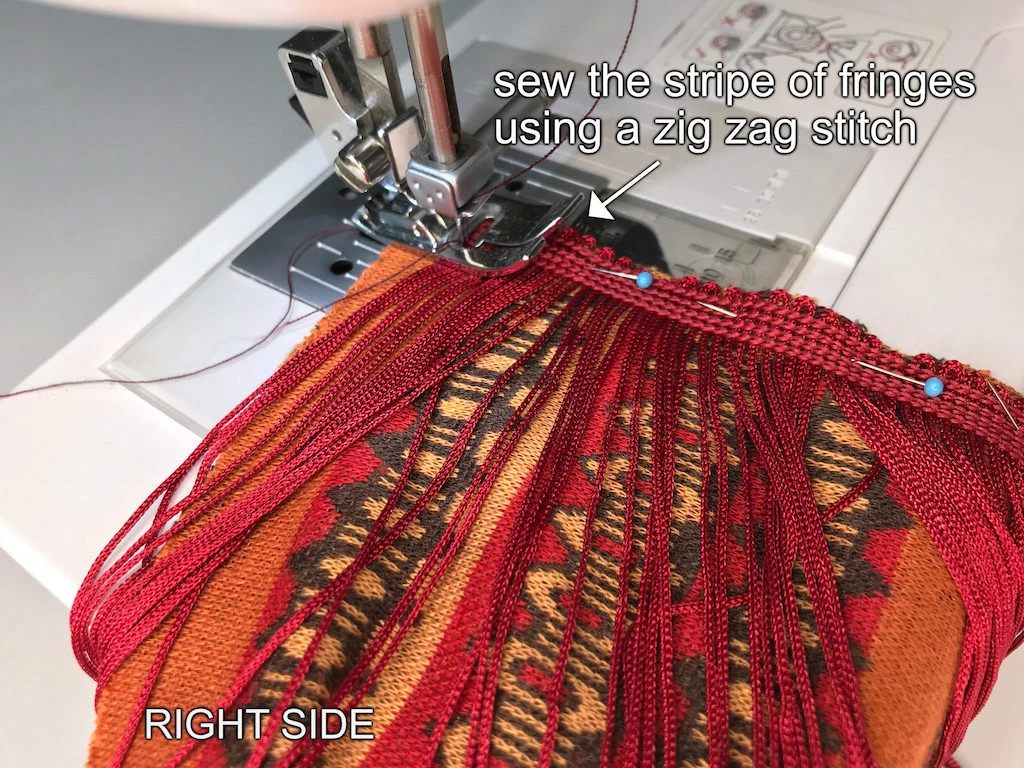
4. Use a zig-zag stitch to attach the fringe trims to the fabric (see the image below).


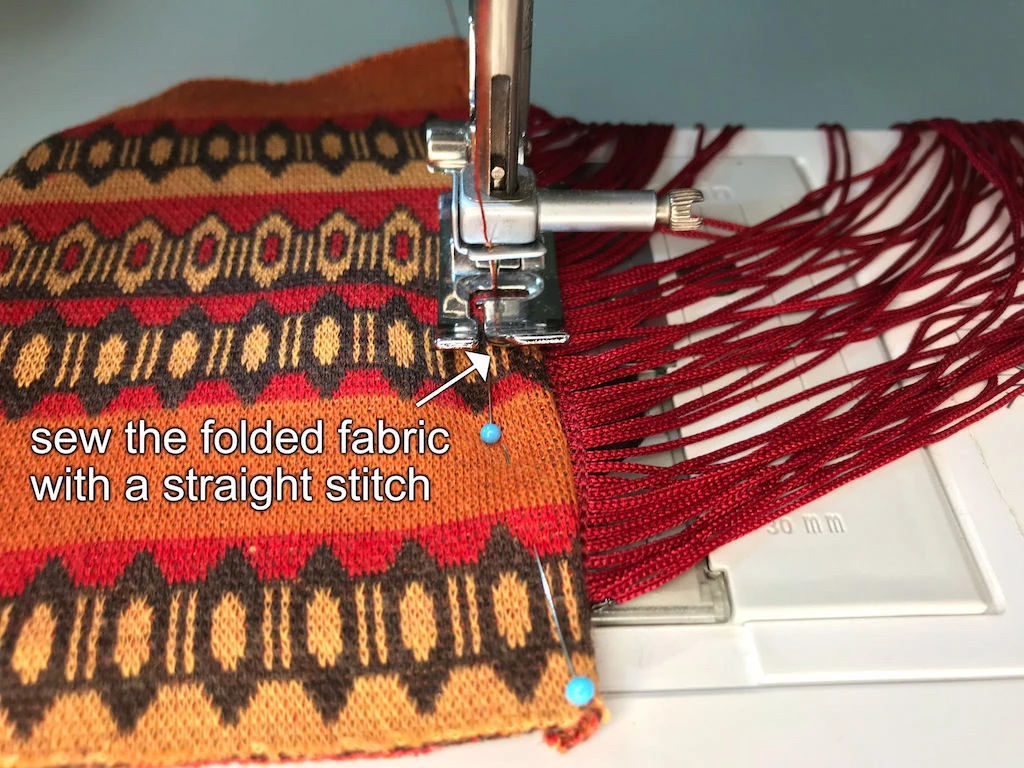
5. Turn the fringes over the zig-zag stitched edge and pin the fabric again, looking at the right side of the fabric rectangle (see the image below).

6. Topstitch the fabric and the fringe stripe with a straight stitch (see the image below). This way you will be covering the zig-zag stitch used to attach the fringes. As you sew, make sure that you keep the fringes on the right hand side, so they do not get sewn to the fabric :).
7. Repeat steps 4, 5, 6 for the other fringe trim: Pin it, sew with a zig-zag, turn over and topstitch with a straight stitch.
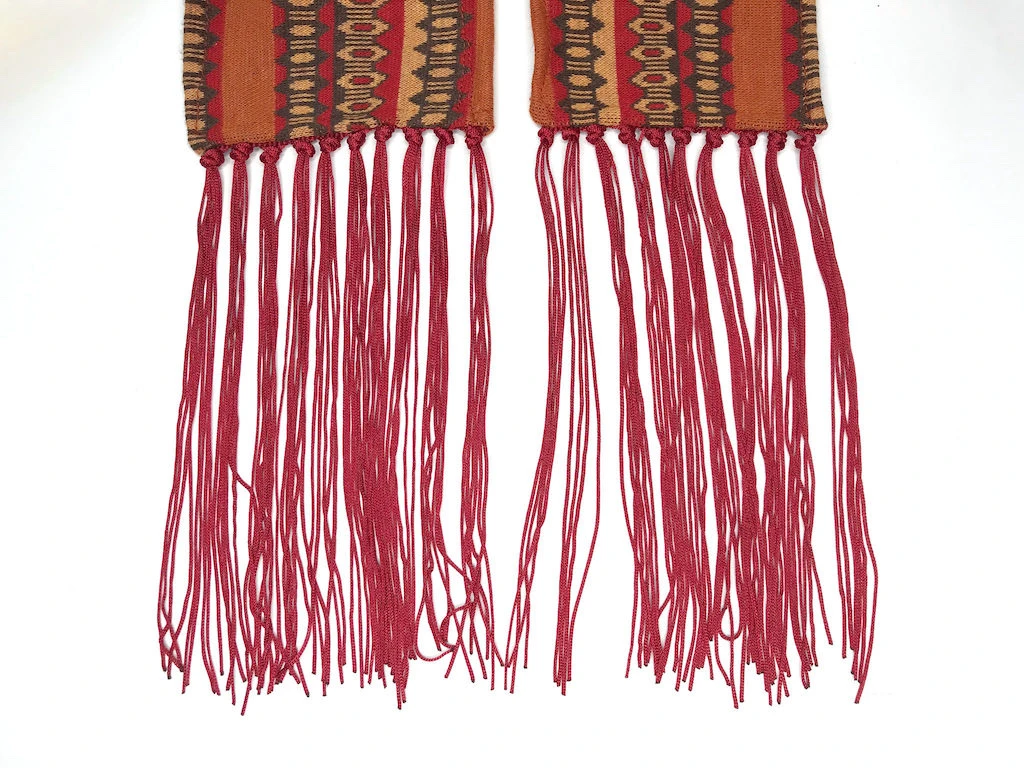
Once you have done this, the headband ends should look like this (see the image below).

8. Now fold, pin and iron the seam allowances along the long side of the fabric rectangle (see the images below). If you press the seam allowance, make sure not to press the pins.

9. Sew along the edge with a medium length straight stitch (see the image below).

10. The Sybill Trelawney headband is almost ready. In the last step you will group the individual fringe strings into chunks. I think one chunk should contain about 6 strings. In order to do so, take a chunk of these, loop them and move the knot towards the fabric (see the images below).


If you end up with more than six strings at the end, divide them into two smaller chunks. If it’s fewer than six strings, just make one smaller chunk.
When you finish the grouping on both ends of the headband, the result should look similar to this (see the images below).

Sew silver sequins to the headband for a more interesting and original look.
11. (Optional) Sew the silver sequins to the the headband if you wish to use them. Not particularly noticeable though, they make a contribution to the final effect of this hair decoration. Sew a row of about 10 in the middle and two rows of 10 sequins to the sides of the headband (see the image below). I did not sew them in a flawless row on purpose. I think this tiny imperfection suits the allover look of the whole costume.

Your headband is ready (see the image below)! Do not forget to check out other part os professor Trelawney’s costume: skirt and leg warmers/socks.
Also collect the accessories professor Trelawney is wearing: Bracelets, necklaces, rings and glasses to complete the final look.
