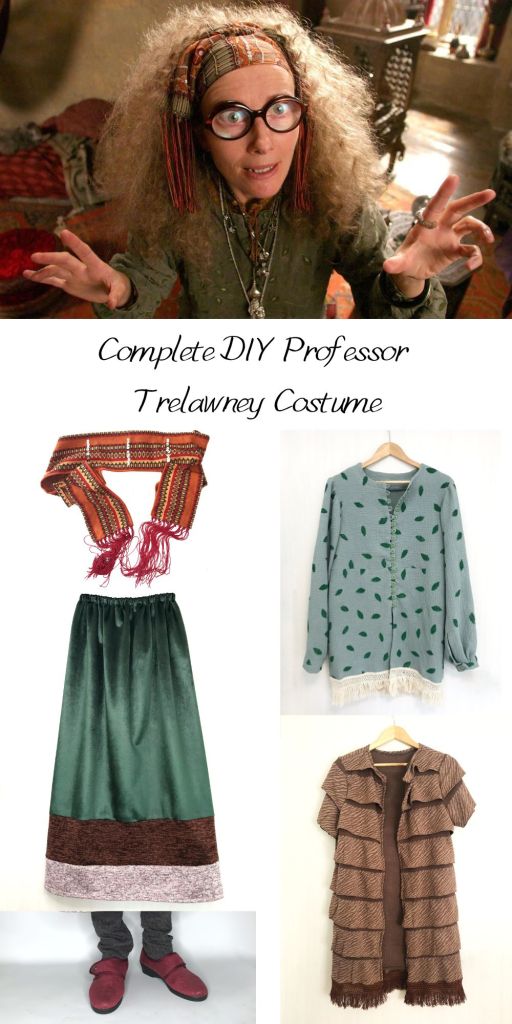
For this year’s (2022) Halloween my family and I decided to dress as characters from the Harry Potter movies. In this blog post, I’m going to describe how to make a Sybill Trelawney outfit (skirt) that I’m going to wear myself ;). (Sybill is a fortune-teller and professor at the Hogwarts School of Witchcraft and Wizardry).
In this tutorial you will learn how to make a DIY costume:
- Equipment you will need
- How to draft the Sybill Trelawney skirt pattern
- Step-by-step instructions for sewing the Sybill Trelawney skirt pattern
Equipment you will need
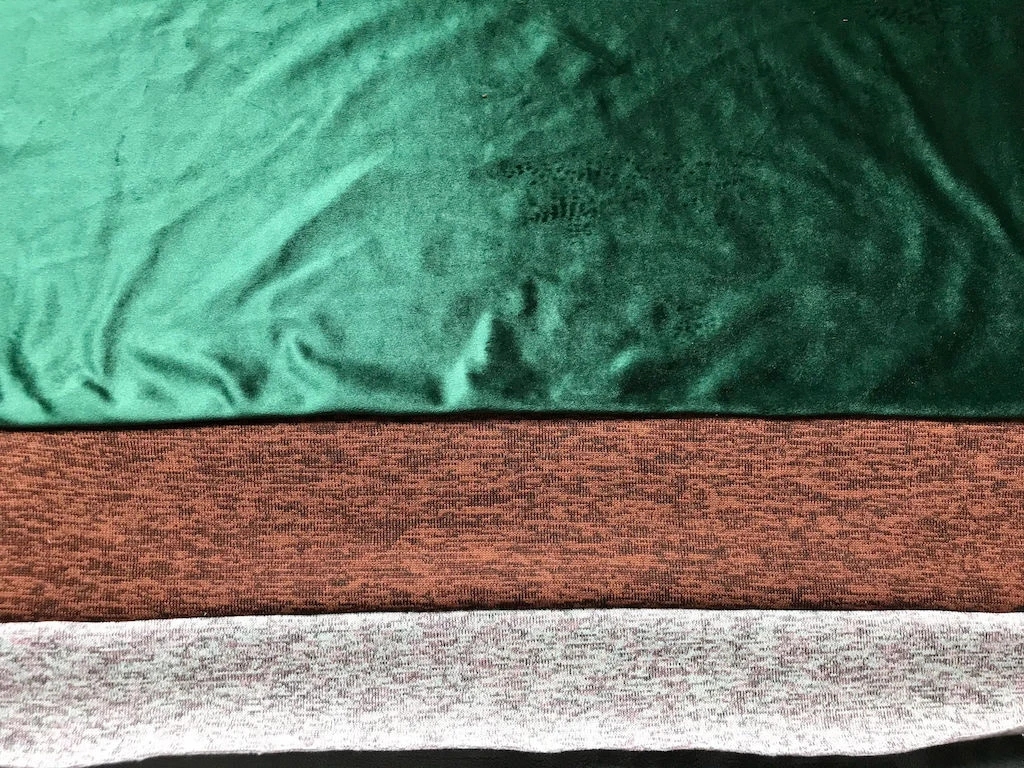
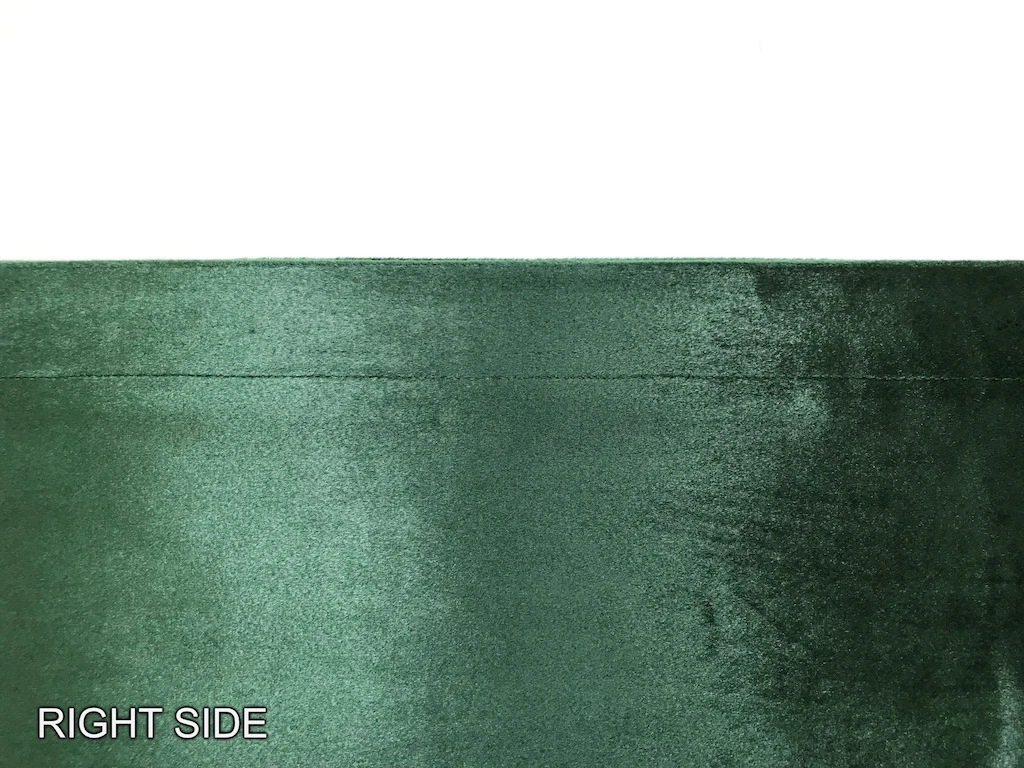
- Green fabric (I used knit velvet)
- Yellow-brownish fabric (I used sweatshirt fleece)
- Pink fabric (I used sweatshirt fleece)
- Elastic band about 2 – 2,5 cm (5/8 – 1 inch) wide
- 2 safety pins
If you want a green fabric with golden pattern as Sybil actually has on her skirt, look among Christmas fabrics. Green and gold are usually the colours of Christmas and you could find something suitable.
How to draft the Sybill Trelawney skirt pattern
I recommend drafting a simple gathered skirt with an elastic waistband so that you do not have to sew a zipper. Take a piece of paper (letter/A4 format will be sufficient), a pencil, and sketch the pattern with measurements using the following steps (see text and patterns below):
Decide the ease for the skirt and use it for all following pattern pieces.
It should be 15 – 20 cm (6 – 8 inch).
In the skirt patterns below, the seam allowances are indicated. Throughout the tutorial, I will work with a 1 cm (5/8 inch) seam allowance.

1. For the green part of the skirt: Measure the distance from your waist to below your knees. Add 4 cm (1 5/8 inch) to the waist and seam allowances. The extra 4 cm (1 5/8 inch) part will be folded to create a tunnel for the elastic waistband.
green fabric length = waist to below your knees + 4 cm (1 5/8 inch)
green fabric width = hip circumference + ease
Do not forget to add seam allowances
2. For the yellow-brown stripe at the bottom of the skirt: The yellow-brown stripe is about 12 cm (4 3/4 inch) long and the same width as the green fabric.
green fabric length = 12 cm (4 3/4 inch)
green fabric width = hip circumference + ease
Do not forget to add seam allowances
3. For the pink stripe at the bottom of the skirt: The pink stripe is 8 cm (3 inch) long and the same width as the green and yellow-brown fabric. You have to add hem allowance to the bottom of this pattern piece.
green fabric length = 8 cm (3 inch)
green fabric width = hip circumference + ease
Do not forget to add seam allowances and hem allowance.
4. For the elastic waistband: Measure your waist and prepare an elastic band according to the following formula:
elastic waistband length = 0,75 * waist circumference
It may happen that your hip circumference, with added ease and seam allowances, is wider than the width of your fabric. In that case, divide the pattern into two halves (FRONT and BACK) with seams at the sides (see the image below). Do NOT divide the elastic waistband.

How to sew the Sybill Trelawney skirt
Take your measurements and cut out the pattern pieces for the skirt according to the instructions above. You should have three (or six) pattern pieces.
Finish seam allowances of all pattern pieces
If you use woven fabrics, you have to finish all the raw edges of all pattern pieces. Even if you use knit fabrics and plan to use the costume often (Halloween parties, carnivals, cosplay, renting, borrowing the costume), I recommend finishing the edges to prolong the durability of the garment. The result will also look much more pro ;).
I do not plan to use the costume more than a few times (probably once only), therefore, I decided to leave the edges raw.
Sew the individual pattern pieces together
First, you will have to sew the horizontal pieces together: Green, yellow-brown, and pink. This applies to both pattern types (the three-piece and six-piece one).
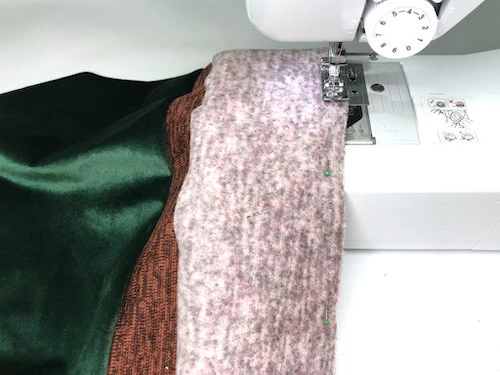
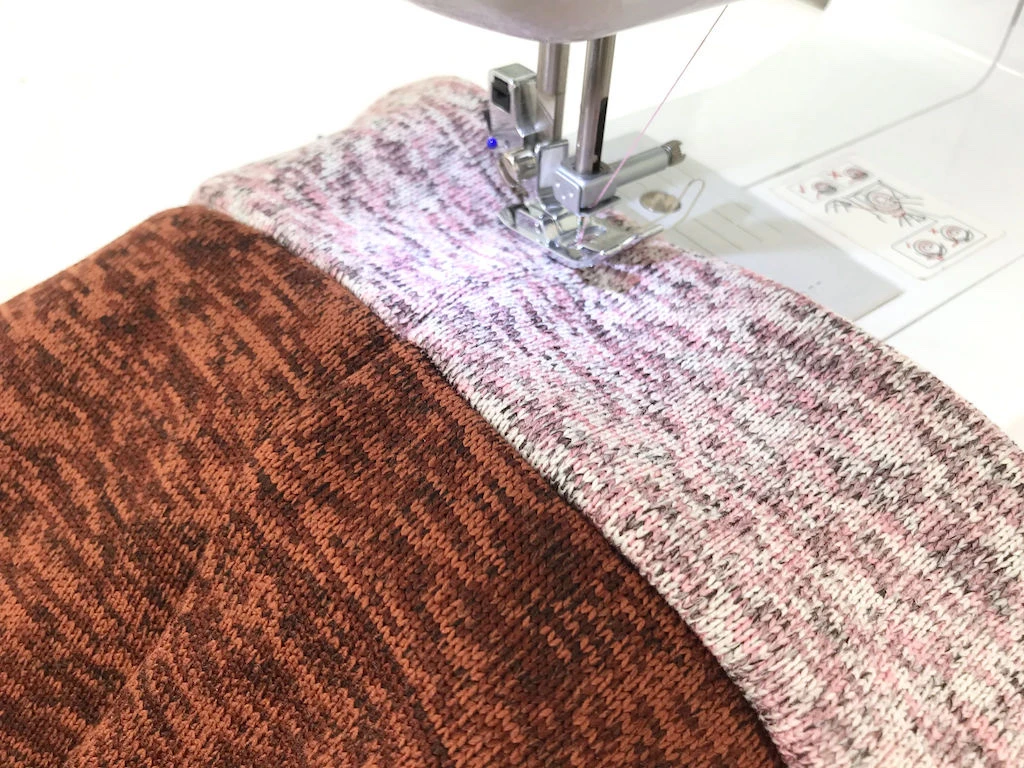
1. Pin the yellow-brown stripe and green fabric right sides together and sew (see the images below).


2. Pin the pink pattern piece to the brown-yellow pattern piece right sides together and sew (see the images below).

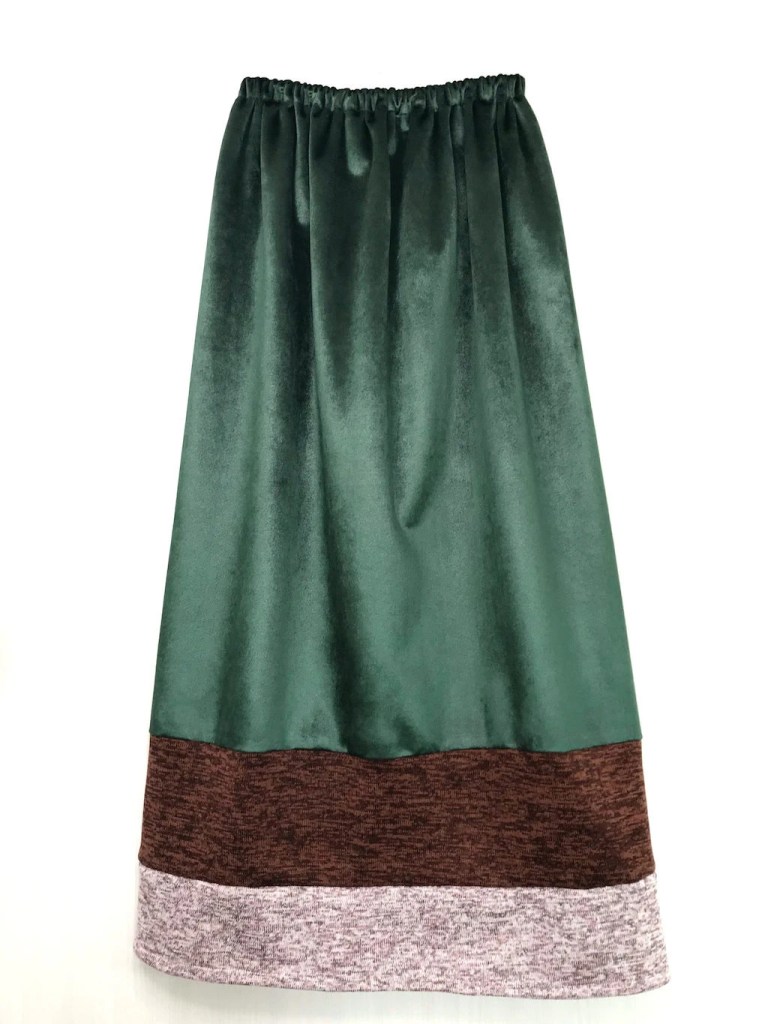
3. At this phase, you should have one striped panel or two striped panels of the skirt (I have one, see the image below).
If you used woven fabric, press the sewn seams open.
Sew the back seam/side seams of the skirt
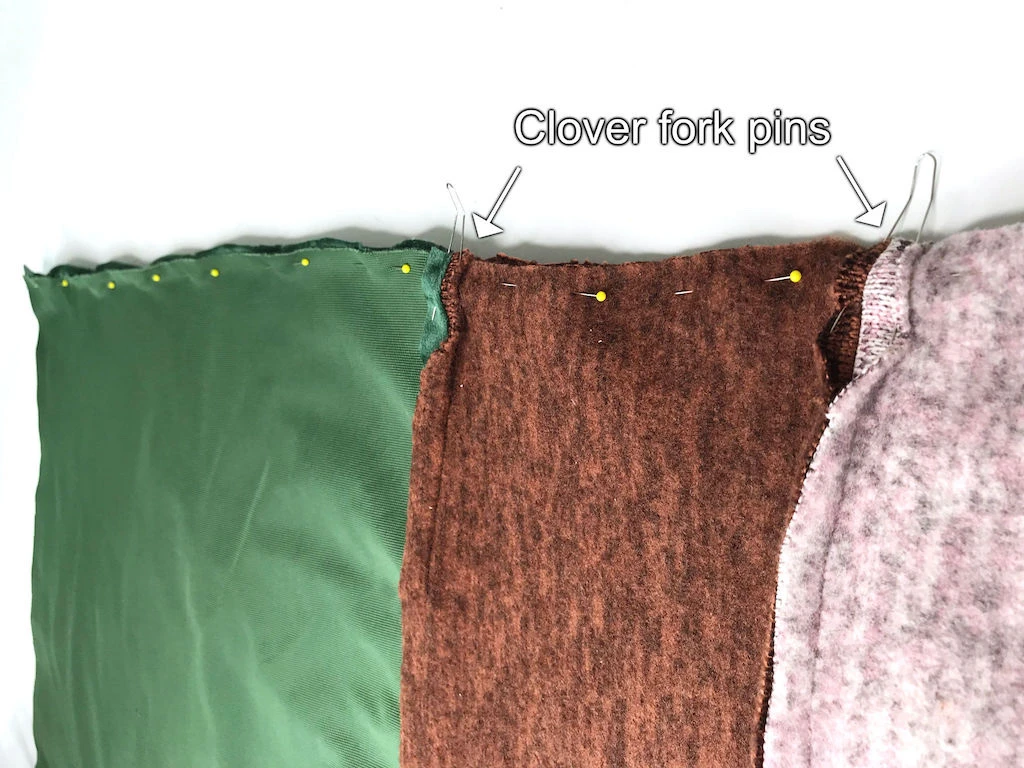
1. Pin the panel right sides together at the back seam (or the two panels together at one side seam). At the spots where multiple seam allowances meet, I use clover fork pins (see the image below).
2. Create markings on the green fabric at the waist. The first one, where you will stitch, and the second, where you won’t (see the image below). The left-out part without stitching will be needed to insert the elastic into the skirt waist.
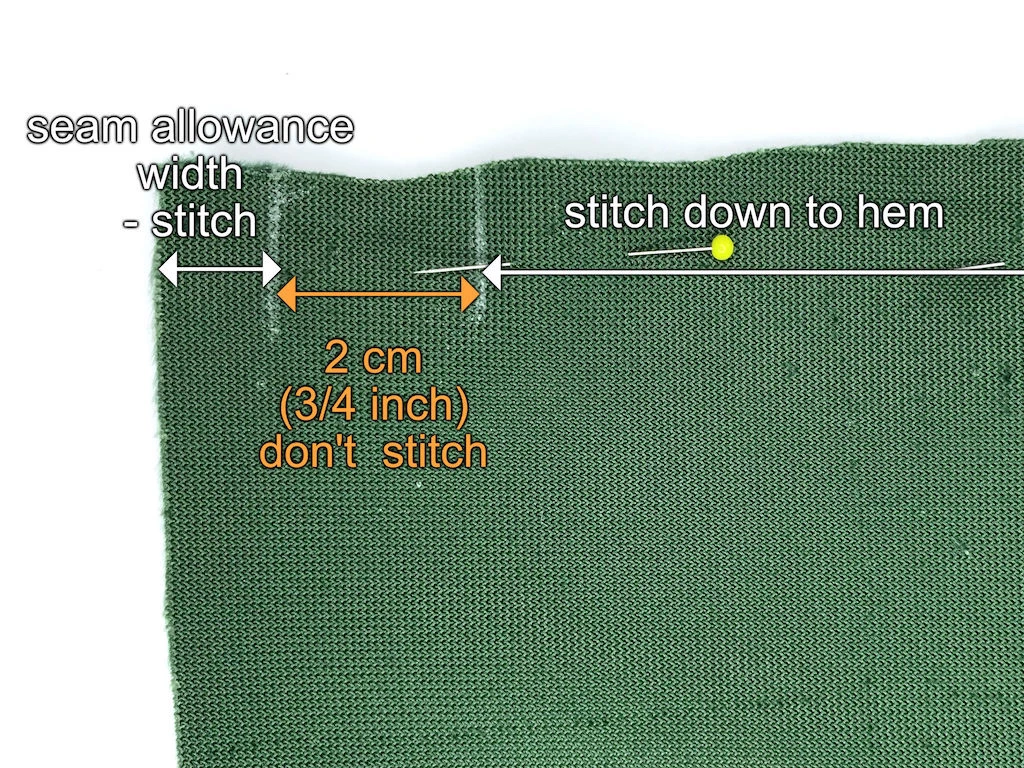
3. Start at the waist and sew the 2 cm (3/4 inch) part and stop. Do not forget to secure the threads, tie knots and cut away the excess threads. Skip the 2 cm (3/4 inch) part and continue sewing straight to the hem of the skirt (see the image below).

If you use Clover fork pins, you can sew through them.

By skipping the small part, you created a gap along the stitching for the elastic band(see the image below).

4. If you sew the two-panel version, pin and sew the other side seam straight from waist to hem. This time without skipping any parts.
At this point, you should have a skirt that has either one back seam or two side seams. The skirt is almost ready.

Sew the waist of the skirt
Let’s start with the waist. First, you have to sew a casing for the elastic waistband. I’m going to use the most simple method of sewing such a casing. If you would like to use a different method of sewing a casing, you can choose from these.
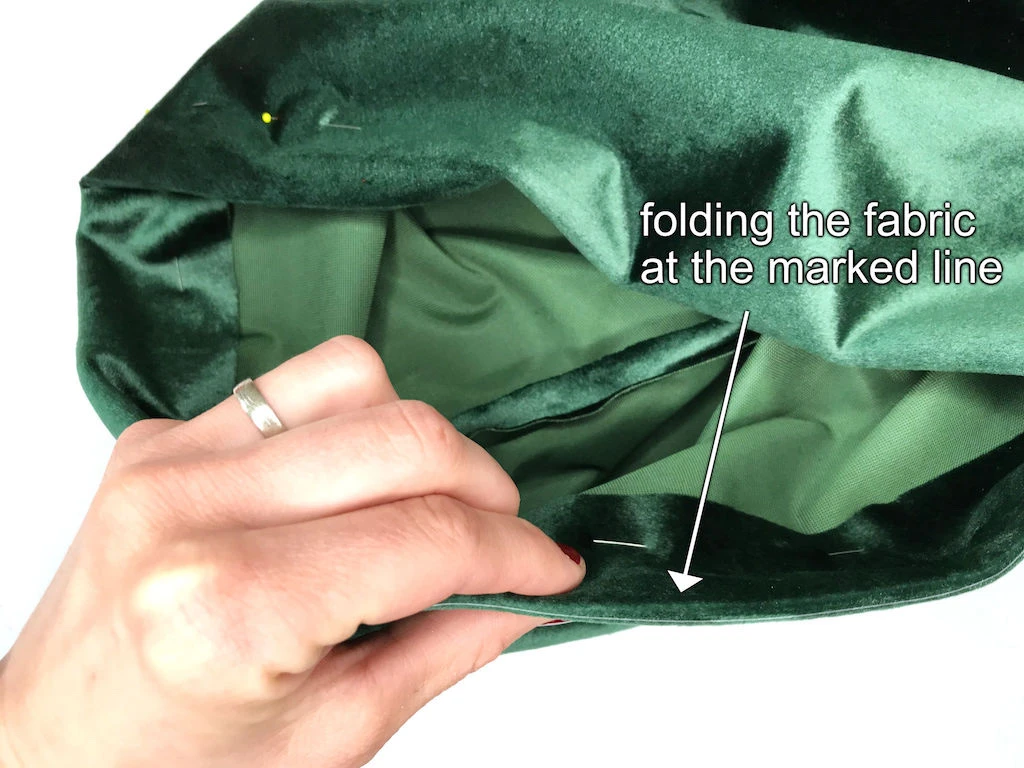
1. Mark 3 cm (1 1/8 inch) + seam allowance from the top. I use a 1 cm (3/4 inch) seam allowance. Therefore, I draw a 4 cm (1 1/2 inch) line from the edge of the fabric. This line shows where the fabric will be folded (see the images below).
Make sure you draw this line around the whole skirt waist.

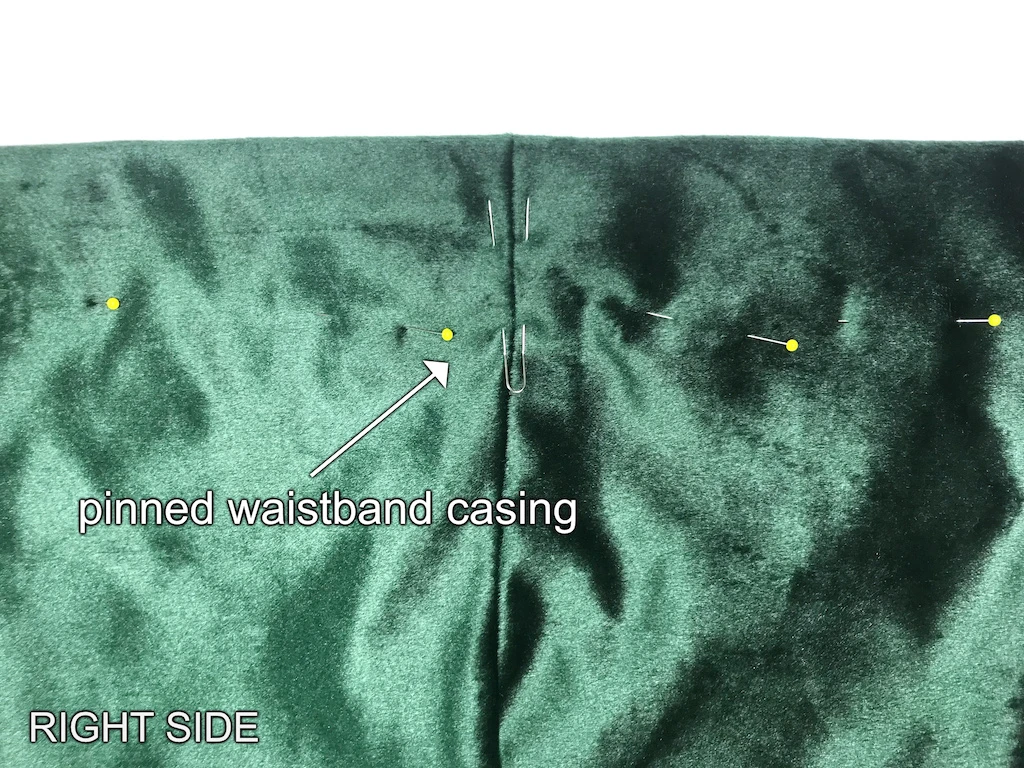
2. Fold the fabric at the marked line you have just drawn and pin it from the right side (see the images below).

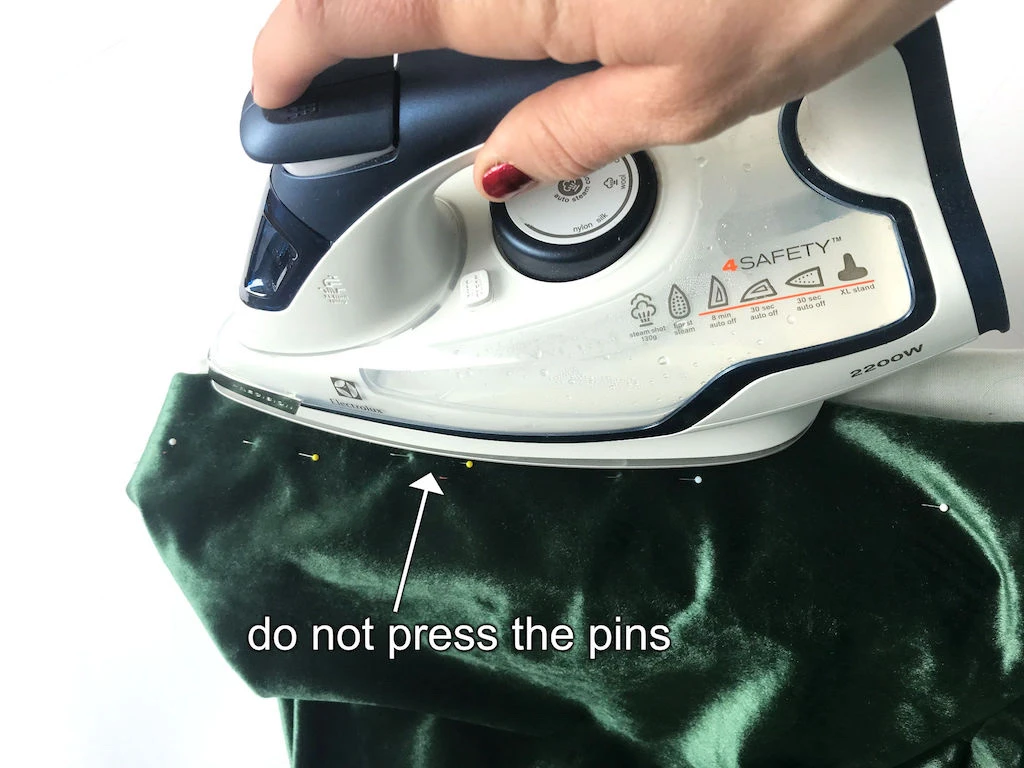
3. Press the waist. Be careful and do not press the pins.
4. Sew the folded waist (see the image below).

Sew the hem of the skirt
Now let’s deal with the hem. I decided to sew a simple single-fold hem. This means folding it, pinning, pressing, and sewing from the right side (see the images below).
1. Again, you can mark the fold line for the hem on the right side of the pink fabric (see the image below).

2. Fold and pin the hem close to the fabric edge (see the image below).

3. Press the hem. Do not press the pins.
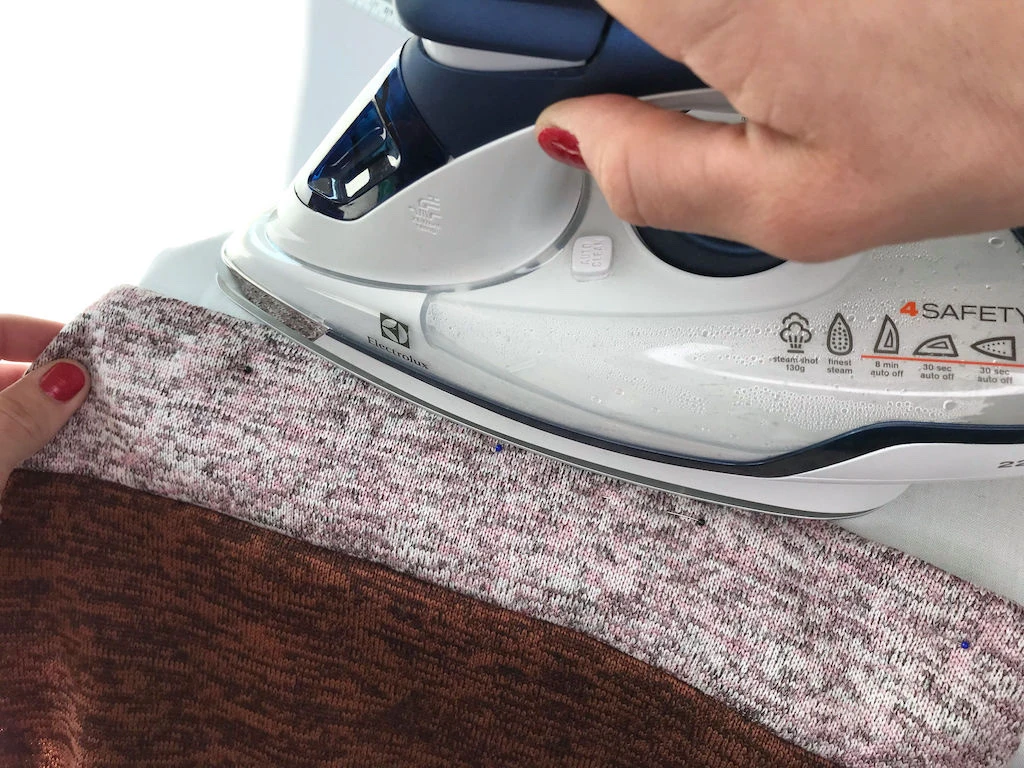
4. After you have pressed the hem, sew it (see the image below).
Insert the elastic band into the waist
The final part is inserting the elastic band into the waist.
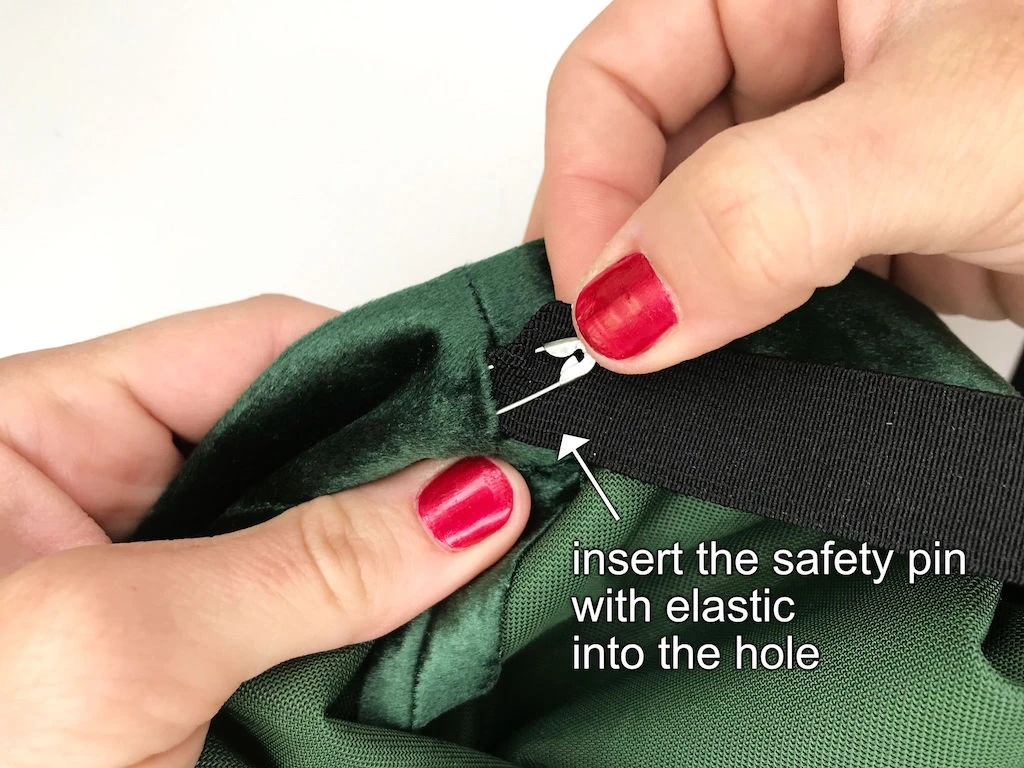
1. Now take the prepared and attach a safety pin to one of its ends:
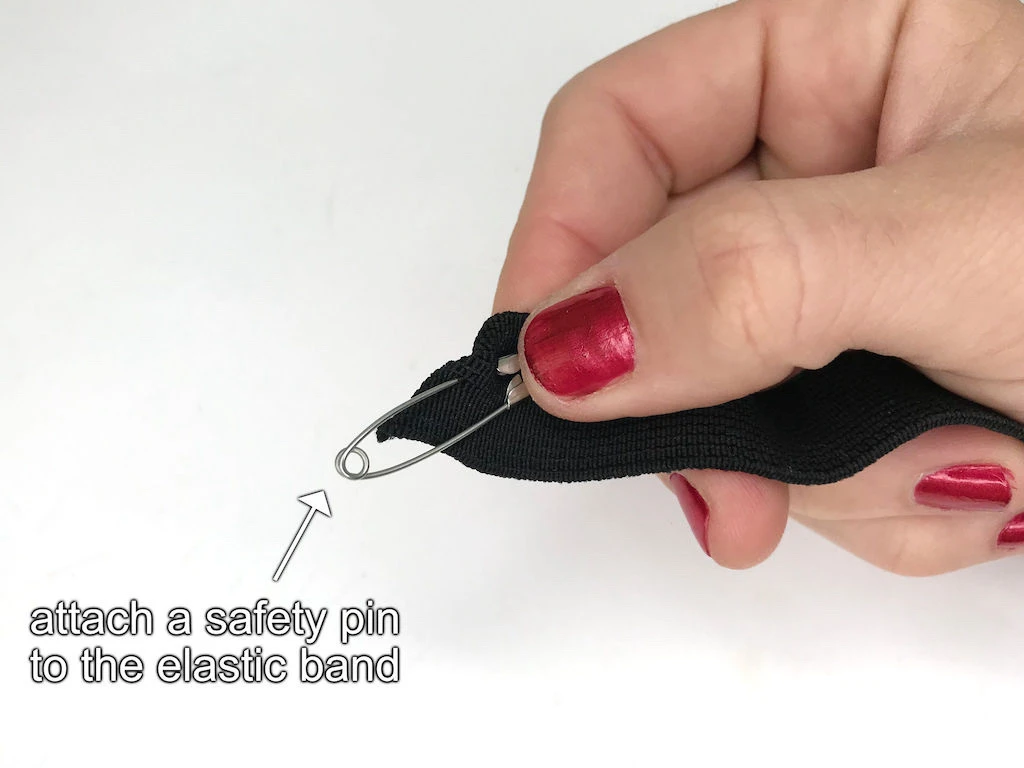
2. Insert this pin into the gap prepared at the waist (see the image below).
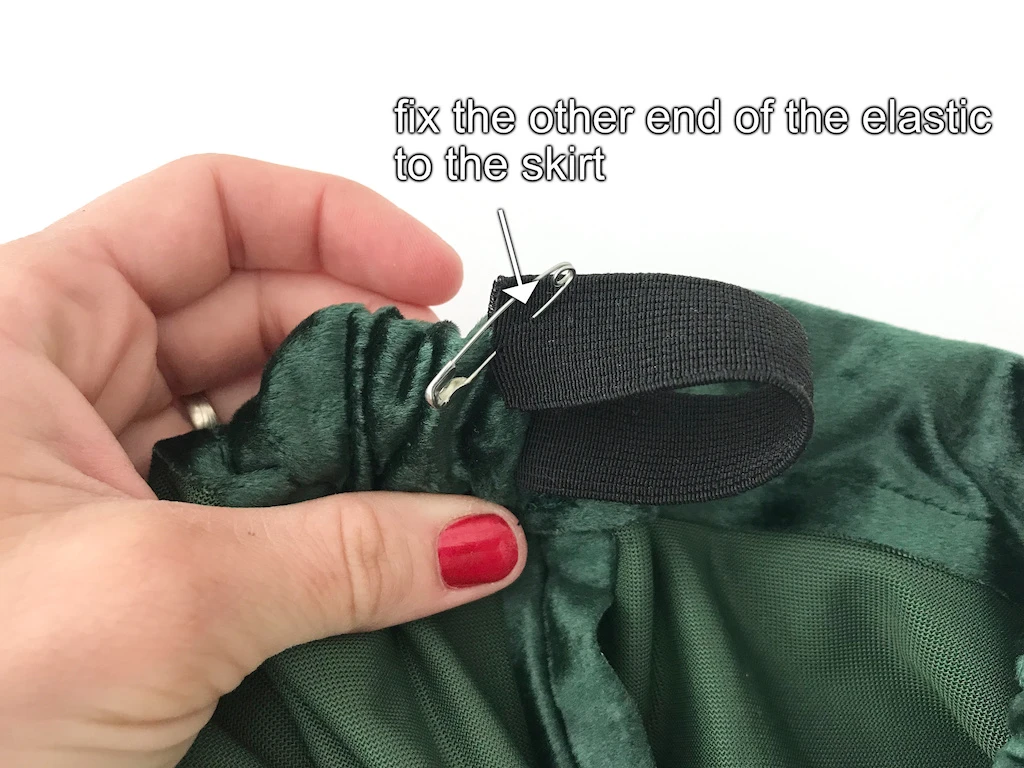
3. You can pin the other end of the elastic near the gap so that it does not get swept into the tunnel.
4. Move the safety pin inside the tunnel towards the opening
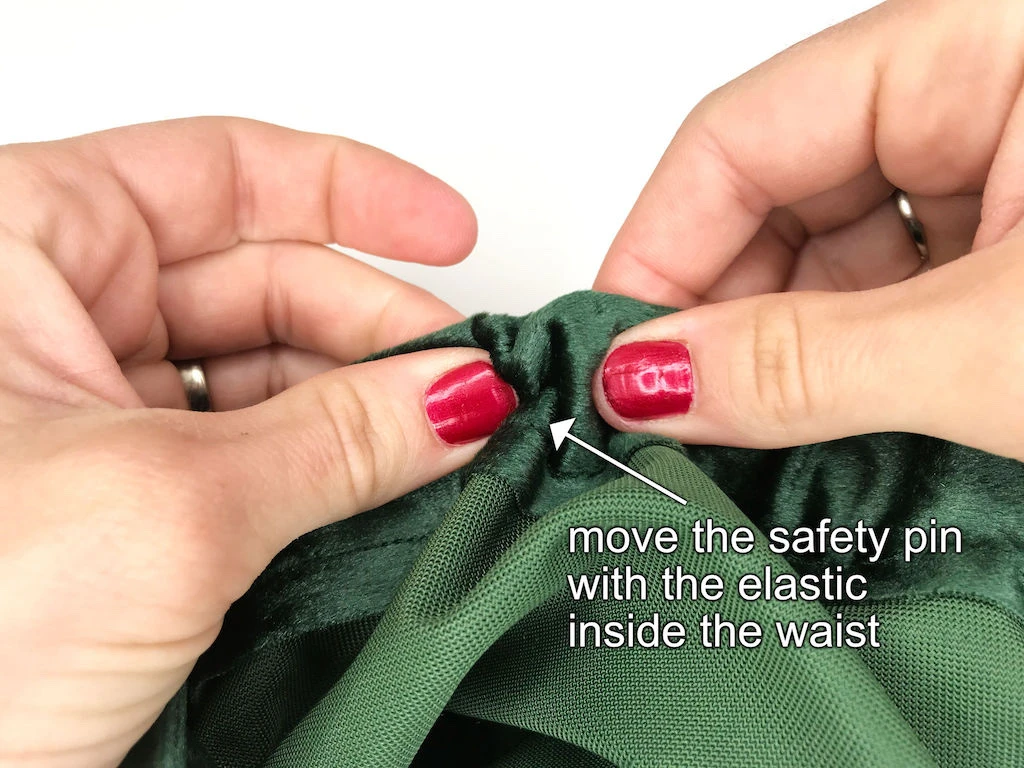
5. As you reach the opening, pull the safety pin with the elastic out. The end used to pull the elastic might be damaged a little bit. Cut it away.

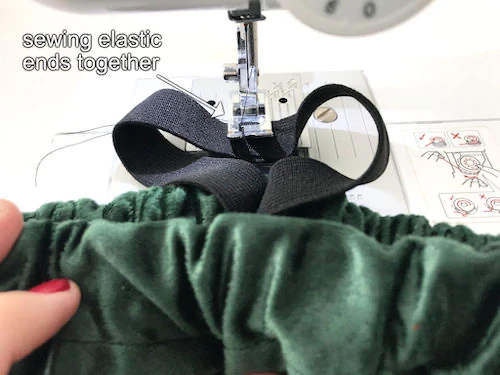
6. Align the two ends of the elastic making sure you did not twist and sew them together using a dense zig-zag stitch.

8. Stretch the waist so that the elastic gets pulled into the inside of the tunnel and ‘disappears’.

In the image below you can see that the elastic is hidden inside the waist.

Spread the gathers evenly around the waist if necessary.

Now, your Sybill Trelawney costume skirt is ready. Do not forget to check out other parts of professor Trelawney costume parts. For example the headband, or leg warmers/socks.
In the images below you can see the complete professor Trelawney costume and all individual parts of it.